
Master Power Automate: create a flow in 8 simple steps
Have you ever heard of workflow automation but felt unsure about how it works? Many people assume that automation is something only developers or tech experts can handle. But what if I told you that setting up an automated flow is easier than you think? That’s right—it’s simpler than you imagine, and in this blog, I’ll show you exactly how to do it using Power Automate.
Many times, we perform tasks using multiple applications at once, and these tasks can become repetitive and overwhelming. Over time, they can pile up to the point where you feel stuck and stressed. Moreover, they often take up a lot of time—time that you could use for other activities to increase your productivity. Next, I’ll show you an example of an automation flow and teach you how to create and implement it. In this case, the flow will be for “requesting and approving time off.”
Let me tell you how I went from spending hours reviewing emails with different employee requests and dealing with awkward encounters with managers when requesting time-off approvals to managing those approvals in minutes. All of this, while avoiding delays in responses and the strict calculations needed to align schedules and prevent overlapping.
To do this, we will use Microsoft Power Automate. I know it sounds a bit complicated, but don’t worry, it’s not. We’ll explain in 8 simple steps how it works, so you can understand it and implement it easily.
New to Power Automate? You’re about to discover a powerful tool that can revolutionize the way you work. Check out the link below for a full breakdown of its features, and learn how you can harness it to automate processes, save time, and eliminate repetitive tasks in your organization: Discover Power Automate.
Table of contents
- Pre-requisites for the Flow Guide: Time-Off Request Automation with Power Automate
- Create the Automated Cloud Flow
- Set the Trigger with Forms
- Add an Action to Get Form Responses
- Add a Row into an Excel Table
- Start and Wait for an Approval
- Apply a Conditional Logic Based on Approval Outcome
- Actions for Approved Requests
- Actions for Rejected Requests
Pre-requisites for the Flow Guide: Time-Off Request Automation with Power Automate
Automating time-off requests in a company can greatly simplify human resources management, saving time and reducing errors. Through an automation flow, employees can submit structured time-off requests, while approvers automatically receive notifications to review and approve or reject the requests. In this step-by-step guide, you will learn how to create an automation flow that will allow your company to manage this key process more efficiently. To complete this flow, you will need the following resources:
- Time-Off Request Form: This form should include the following questions: Full Name of the employee, ID Number, Immediate Supervisor’s Name, Immediate Supervisor’s Email, a question indicating the type of request (personal matter, medical appointment), start date of the time-off, end date, start time, and end time of the request.
- Time-Off Approval Excel Sheet: The Excel document is the result of the Forms responses that are sent to employees once they need to request time off.
Once you have these two resources ready, we can begin.
Step #1: Create the Automated Cloud Flow
The Time-Off Approval Flow was created to automate and simplify both the request and approval processes for time off and vacations. This flow connects Forms, Excel, Approvals, and Outlook. We want to make your life easier! If you’re not familiar with the tools mentioned, we recommend checking out the links provided with each tool.
First, access Power Automate, click on “Create,” and then select “Automated Cloud Flow.”
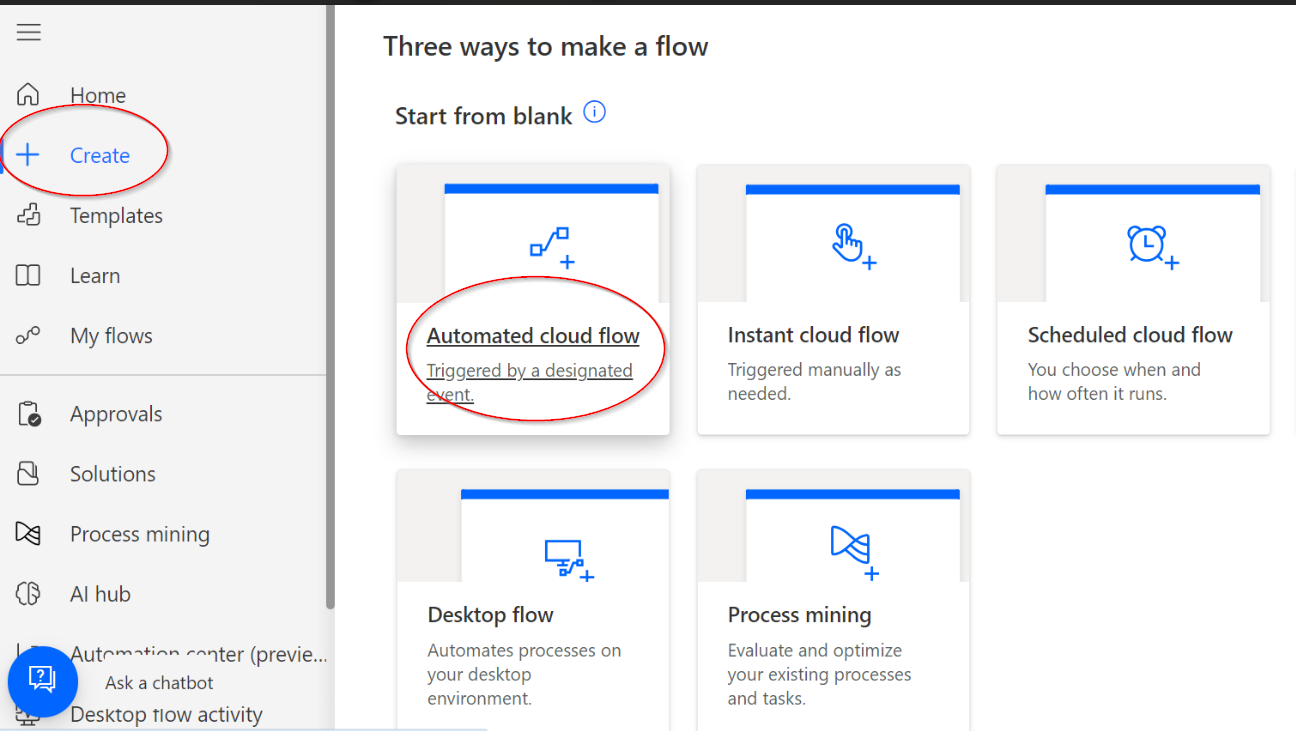
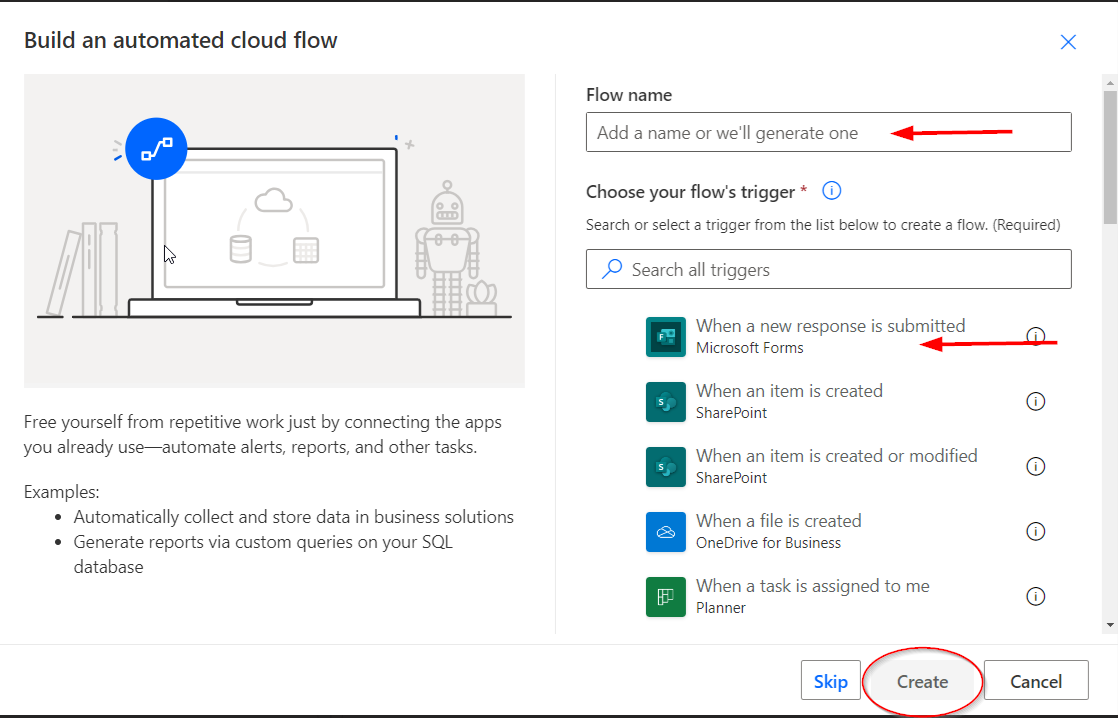
Next, name the flow and choose the trigger (A trigger is an event that starts a cloud flow. For example, you want to receive a notification in Microsoft Teams when someone sends you an email), which in this case will be “When a new response is submitted.”
Step #2: Set the Trigger with Forms
Here, we’ll detail the flow and its connections:
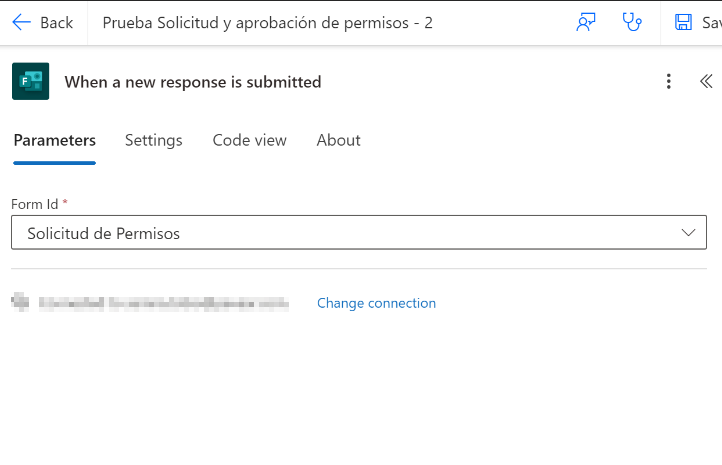
The flow starts with a trigger from Forms. From the options that load automatically, select the corresponding Form Id for the Time-Off Request Form, a resource we had previously created and stored in our account.
Step #3: Add an Action to Get Form Responses
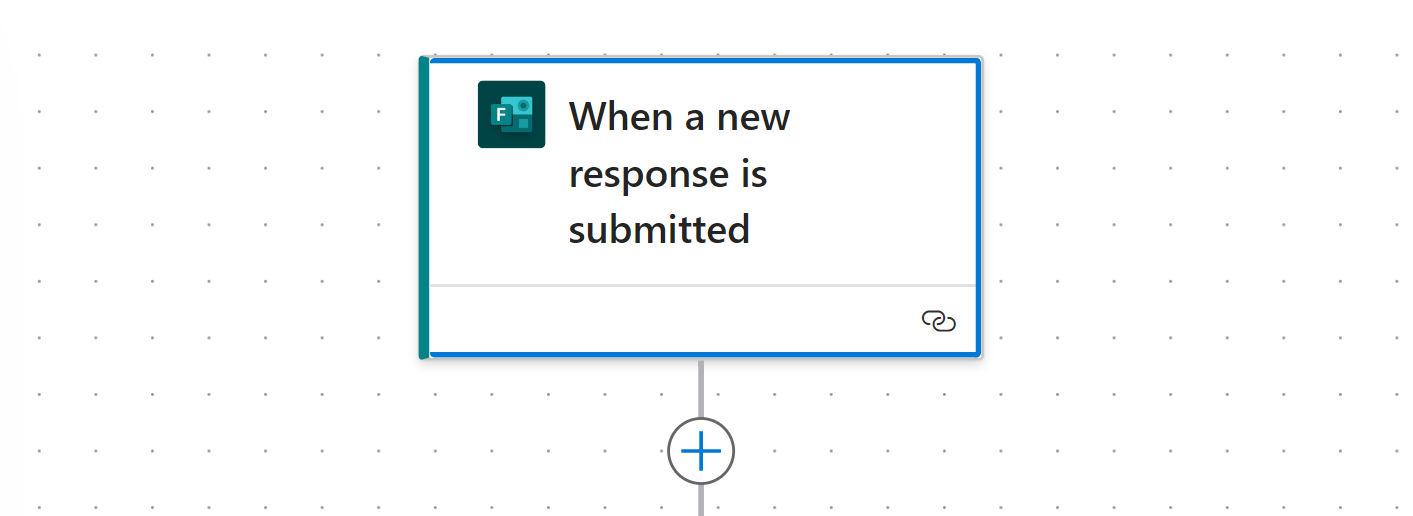
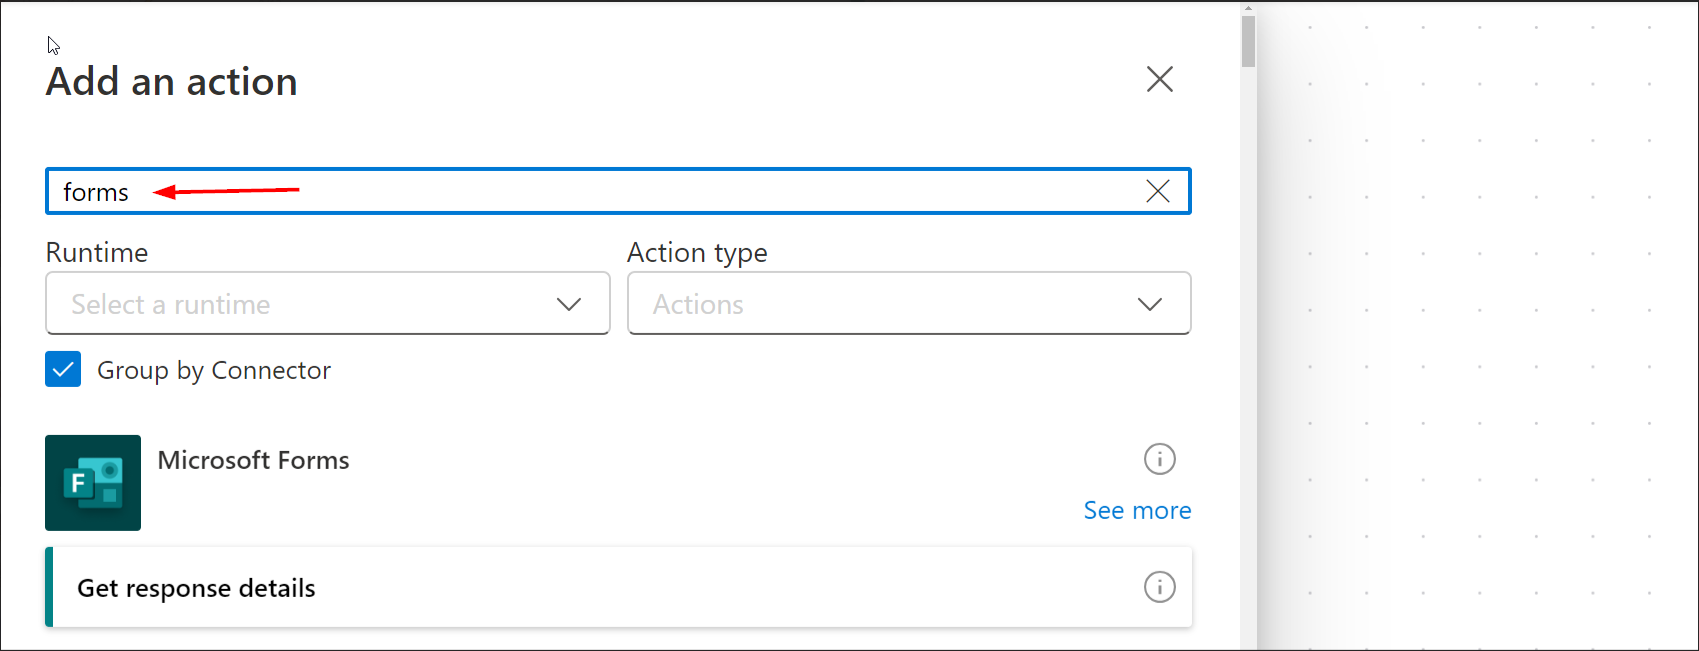
To continue building the flow, you need to add a new action by clicking on the “+” icon. This action should be repeated each time you need to add a new step.
In the search bar, type the name of the application to which the new action belongs. In this step, it will be Forms; select the appropriate option.
Step #4: Add a Row into an Excel Table
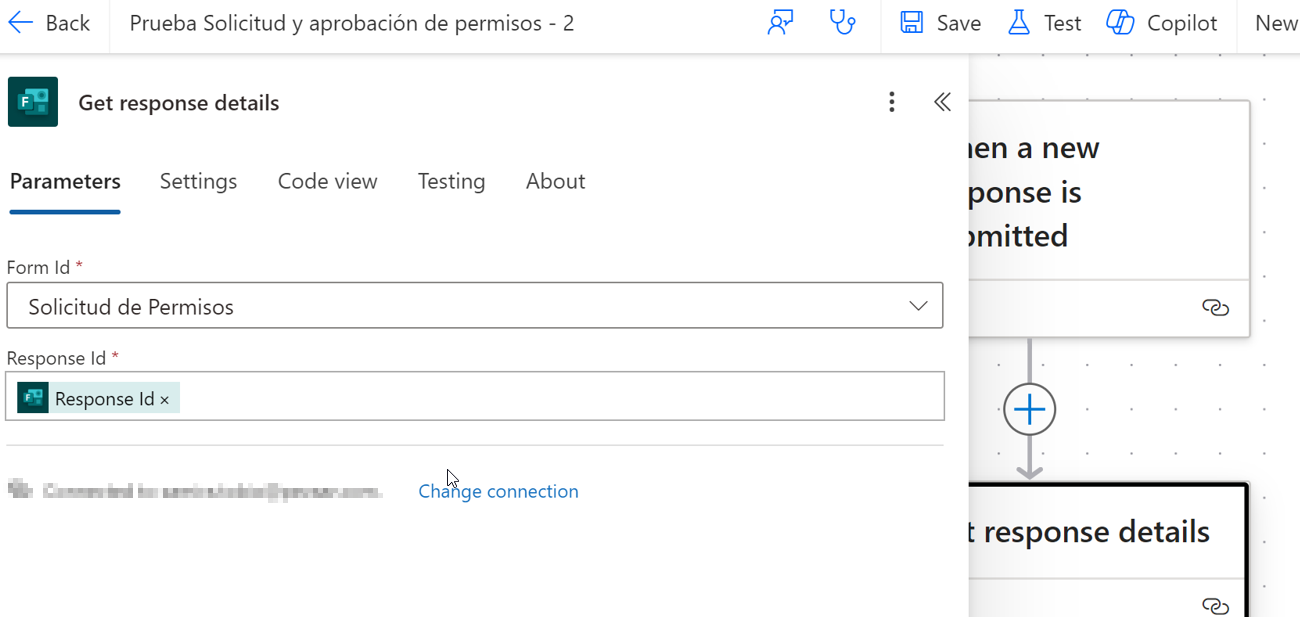
The next action added to the flow is Get Response Details. Here, you will need to select the corresponding Form Id for the Time-Off Request Form (in this step, all forms created by the user will appear). Then, select Response Id from the dynamic content. This will allow the system to retrieve the details of the answers to all the form questions.
Step #5: Start and Wait for an Approval
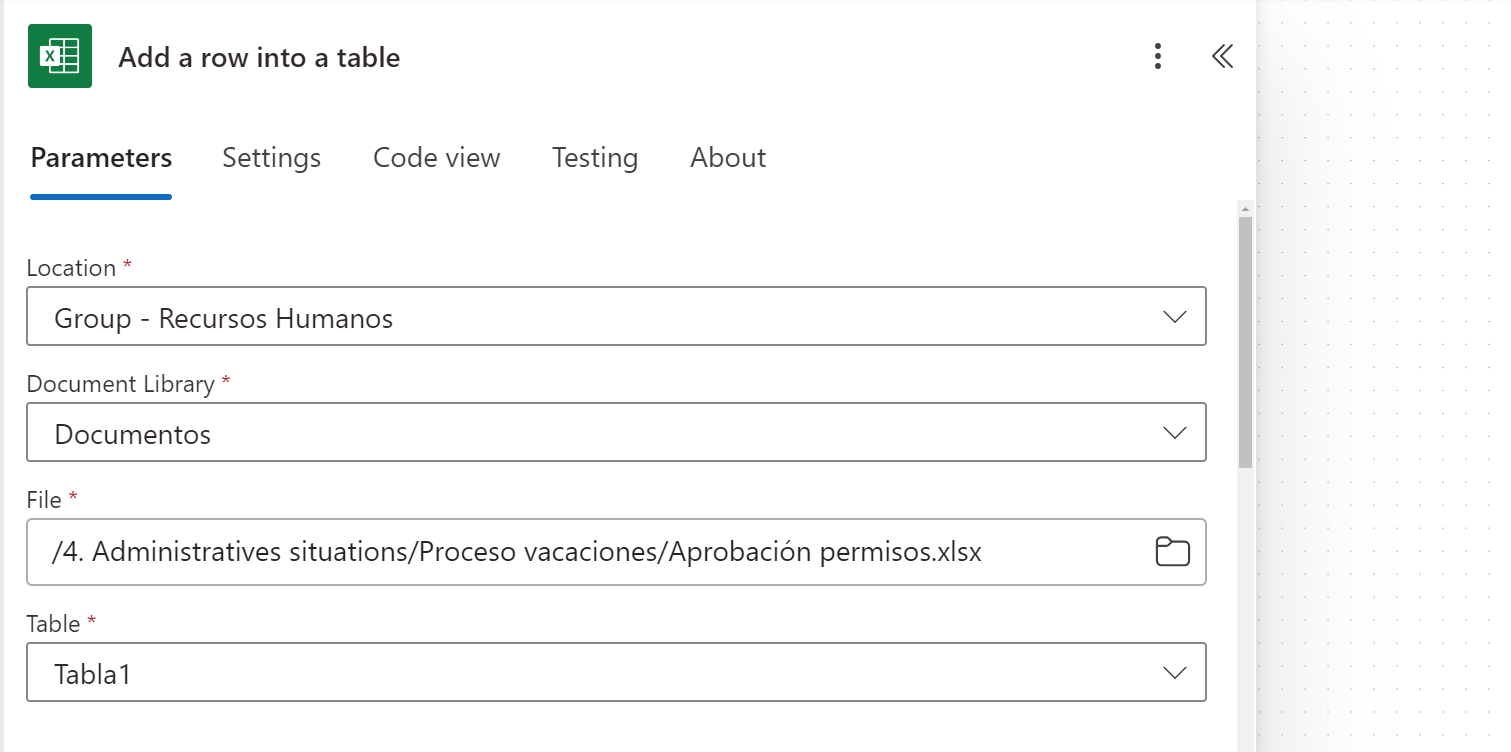
The third action in the flow connects with Microsoft Excel. We will add a row to a table. To do this, search for the action Add a Row into a Table.
In the first section that Power Automate shows after selecting the action Add Row into a Table, you need to select the location and name of the table where the recorded information from the previously created Excel file is located.
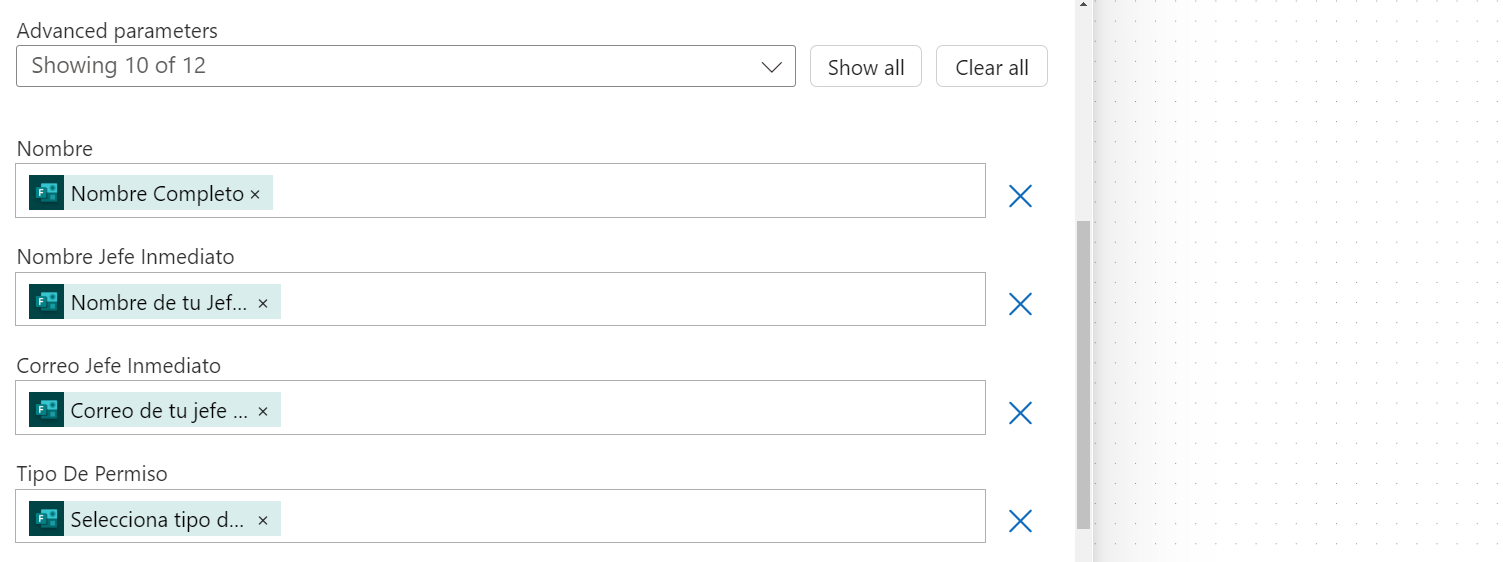
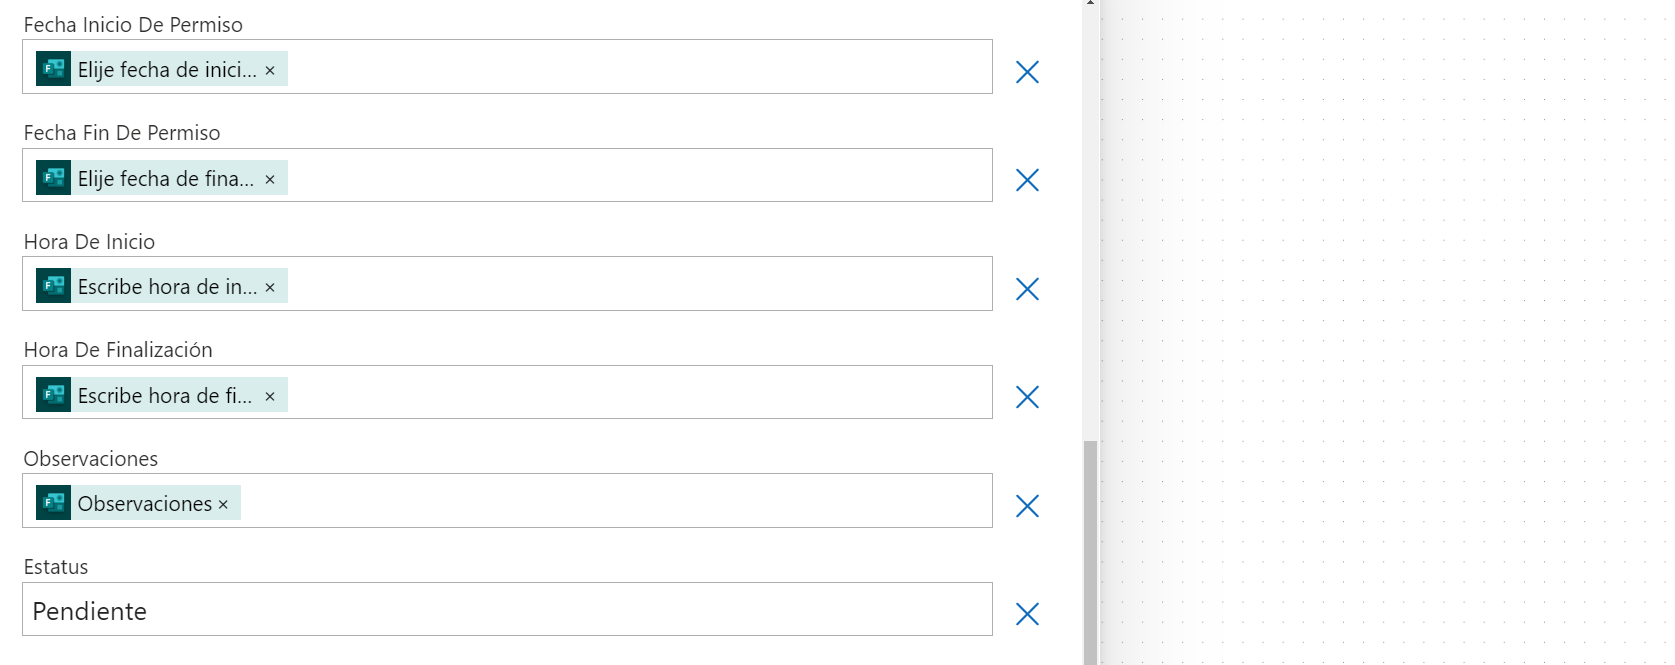
You must also fill in the parameters (Name, Immediate Supervisor’s Name, Immediate Supervisor’s Email, Type of Leave, Start Date, End Date, Time of Leave), using the dynamic content provided by Power Automate. These data are extracted from the form. The only option that will not have dynamic content is Status, which will initially be set to “Pending” and updated automatically with the approval result later.
Step #6: Apply a Conditional Logic Based on Approval Outcome
The next step connects the flow with Approvals. To do this, search for the action Start and Wait for an Approval.
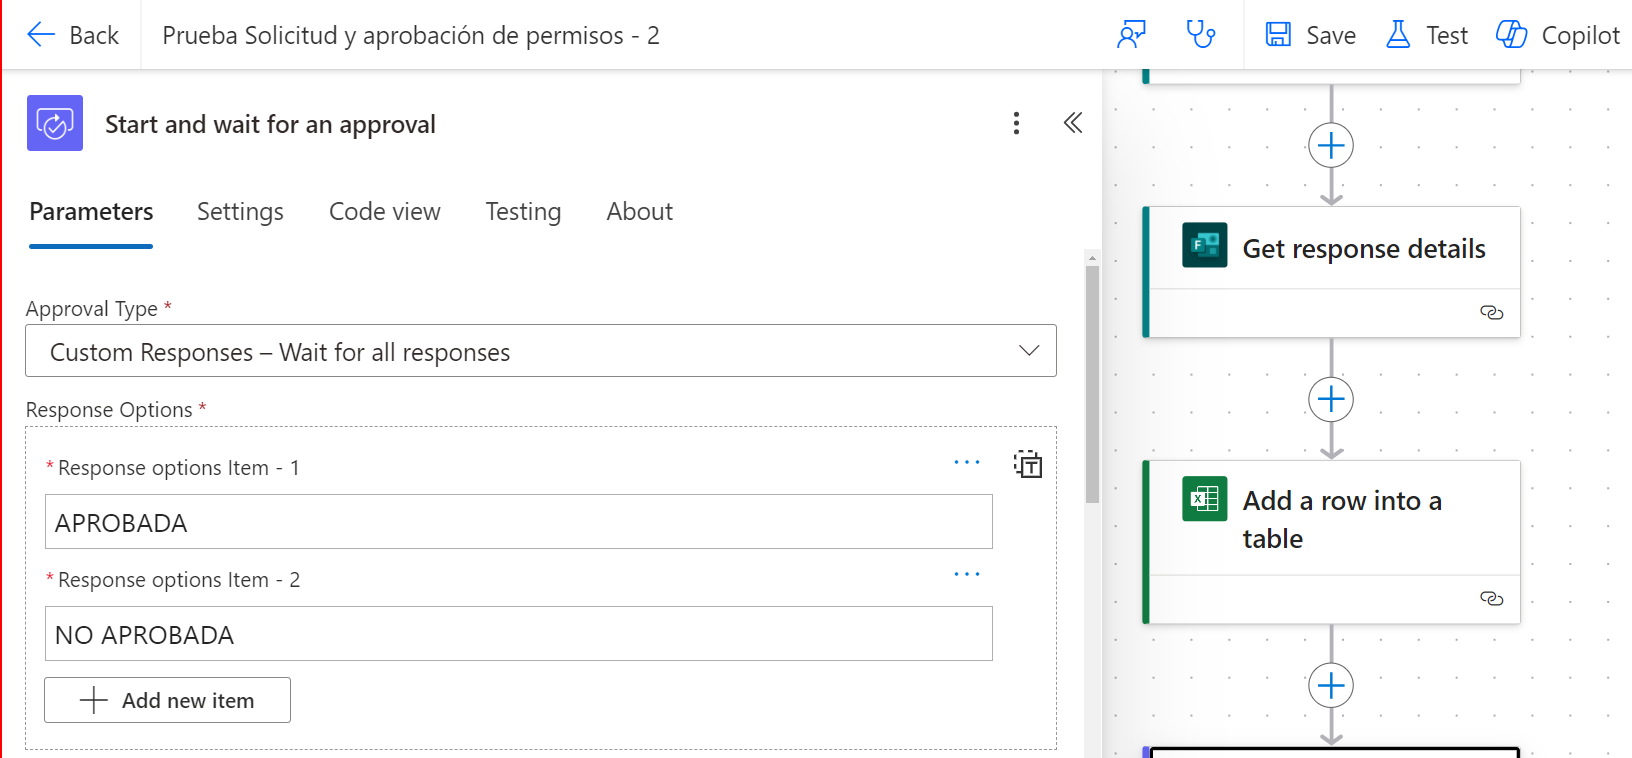
Initially, you should select Custom Responses – wait for all responses for this flow type. This option allows you to customize approval options and wait for all users involved to respond before a final result is obtained.
In the response options field, add two options: APPROVED and NOT APPROVED.
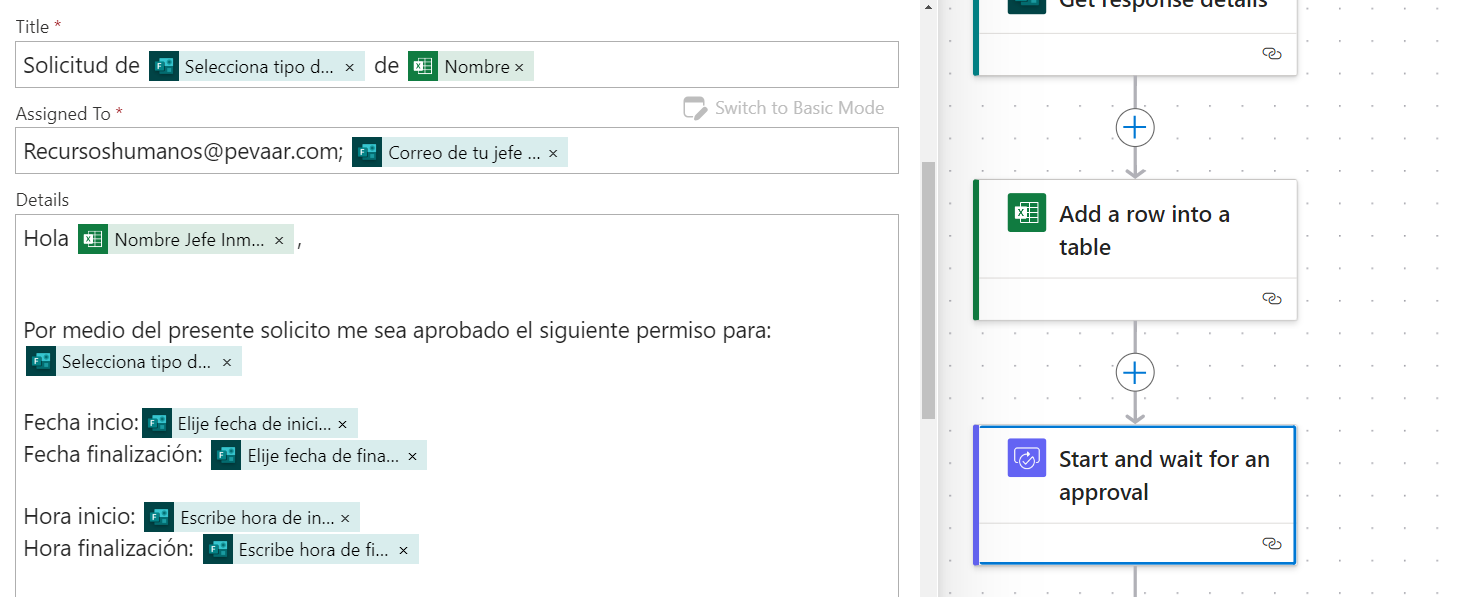
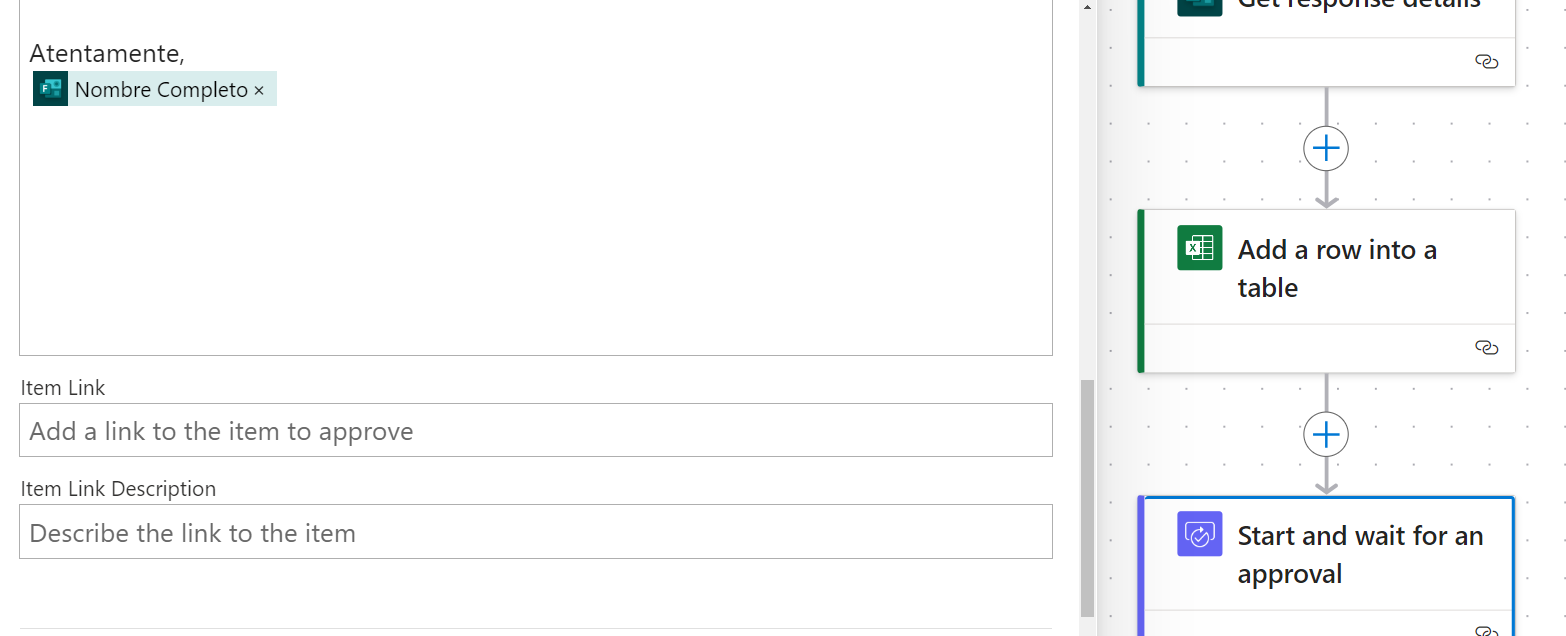
Power Automate will then ask you to fill in the title of the approval. You can adjust this according to the dynamic fields you want to include. The second field is Assigned To; here, you can include the dynamic field for the immediate supervisor’s email, and additionally, the Human Resources email for double approval. In the request details and advanced parameters, fill in the applicant’s information.
Step #7: Actions for Approved Requests
The final action in the flow is based on a Condition (search for the action Condition), which will be linked to the result of the request. You must select the Outcome from the approval dynamic content. This outcome must equal “APPROVED, APPROVED” (both responses must be positive for the request to be approved).

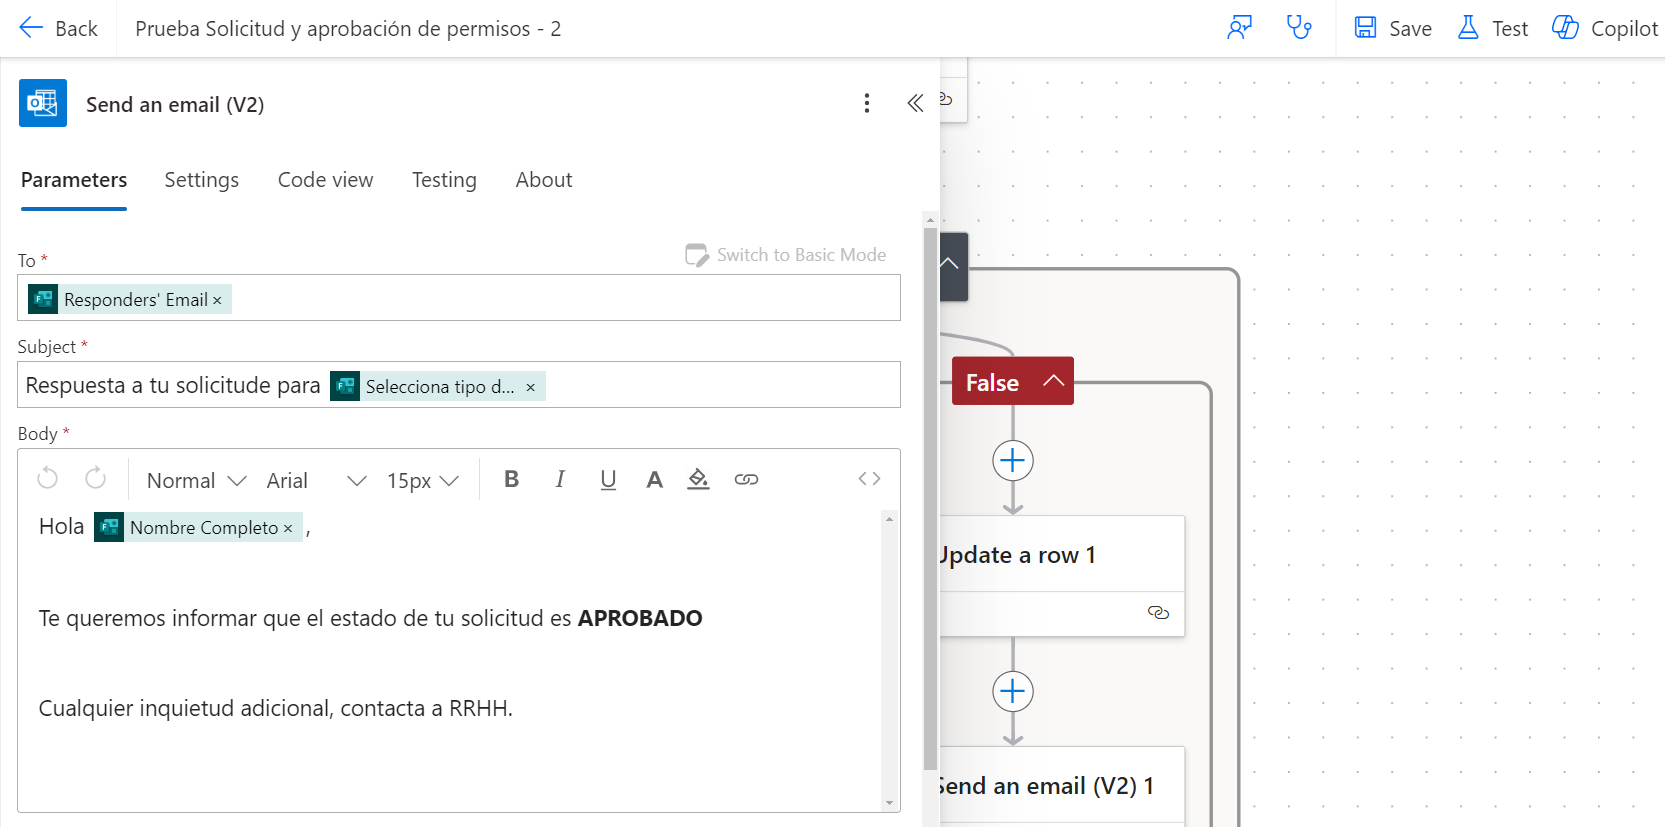
If both responses are “APPROVED,” the condition will be true, and the following actions will be performed:
- Update a row in the Excel table: Update the status with the approval result, which was previously pending.
- Send an email: Customize the email to be sent in case the request is approved.
Step #8: Actions for Rejected Requests
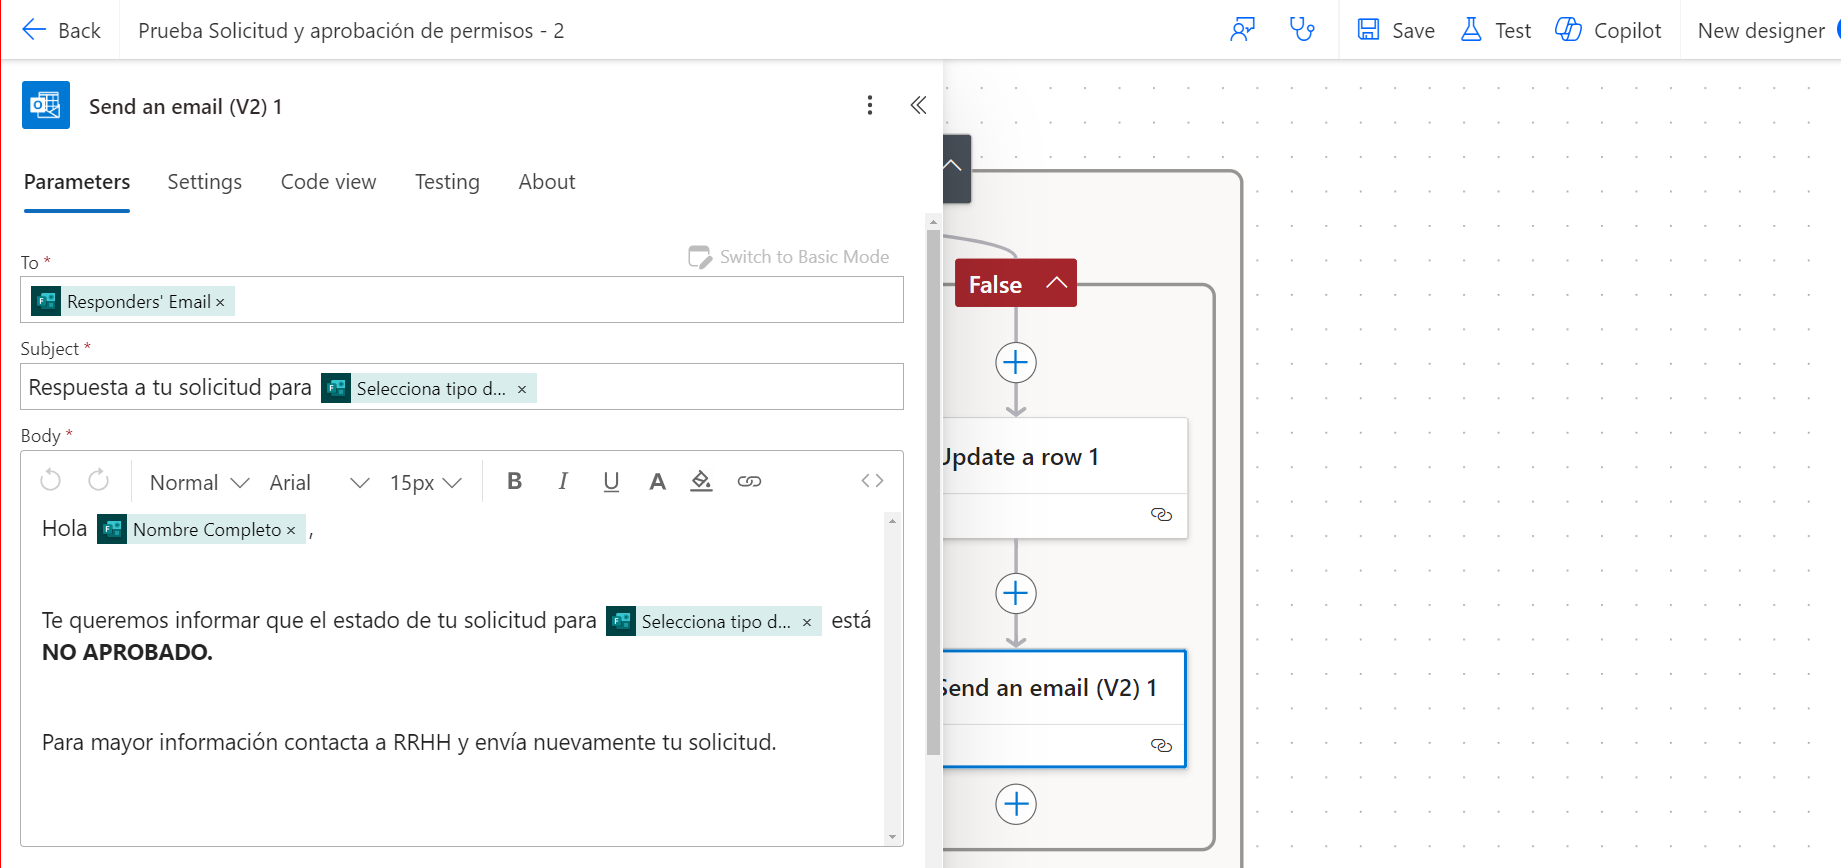
If the responses are “APPROVED, NOT APPROVED” or “NOT APPROVED, NOT APPROVED,” the condition will be false, and the following actions will be performed:
- Update a row in the Excel table: Update the status with the approval result, which was previously pending.
- Send an email: Customize the email to be sent if
- the request is not approved.


Leave a Reply