
Power Automate: Unlock Efficiency and Effortlessly Extract Attachments from a Form in 5 Easy Steps
Have you ever found yourself spending more time than necessary managing attachments from forms? We know how frustrating it can be. We experienced the same issue, day after day, until we decided to automate the entire process using Power Automate. Now, we’ll show you how you can do it too, in just 5 simple steps.
Why automate this process?
Imagine working in HR and receiving forms with dozens of attachments every day. Reviewing them manually takes up a lot of time, right? With Power Automate, that tedious process disappears. By automating repetitive tasks, not only do you save time, but you also reduce errors, allowing you to focus on more strategic and human-centered tasks.
Table of Contents
Step 1: Initialization of Variables
Step 2: Condition to Check if Attachments Were Sent in the Form
Step 3: Loop to Insert All Attachments from the Form into an Array
Step 4: Add Compose to Store and Manipulate the Files from the Array
Step 5: Start and Wait for Approval
Attachment Extraction Flow from a Form
Prerequisites to start the workflow for extracting attachments from a form:
Request form, which could be: leave request form, vacation request form, overtime request form, etc.
In this flow, the goal is to extract the attachments that are sent through a Windows Forms form. As you can see, the first part of the flow contains 5 actions. For the implementation of this flow, we will use the flow we created in our previous article, “Request and Approval of Leave.”
Step 1: Initialization of Variables
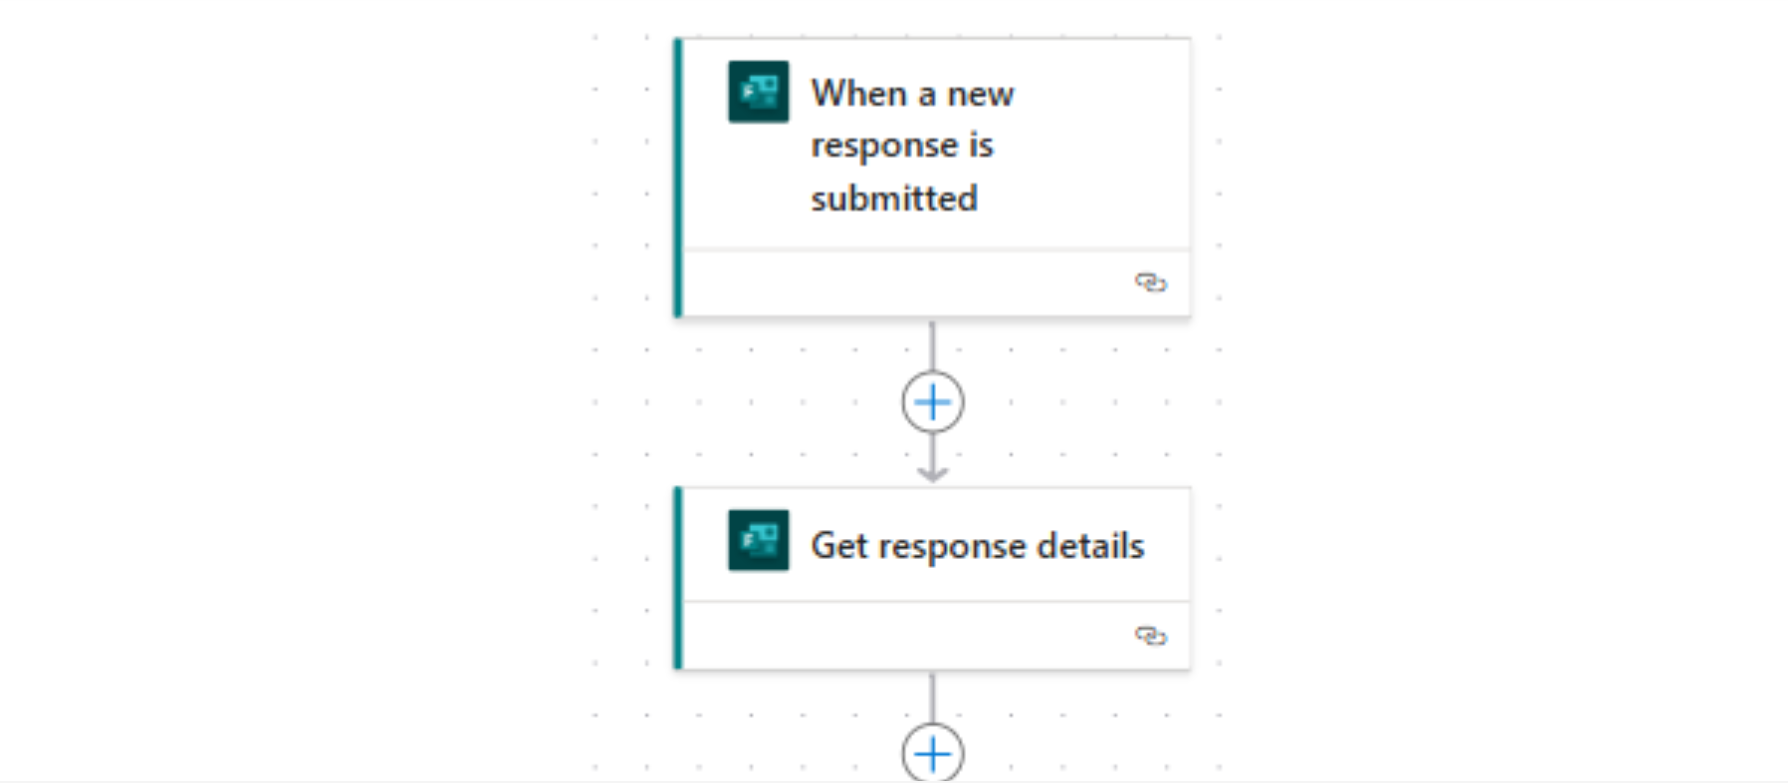
As mentioned earlier, we will use the “Request and Approval of Leave” flow. To incorporate it into the new flow, it’s necessary to use the trigger “When a new response is submitted”. Additionally, to retrieve the responses from the form, we must add the trigger “Get response details”.
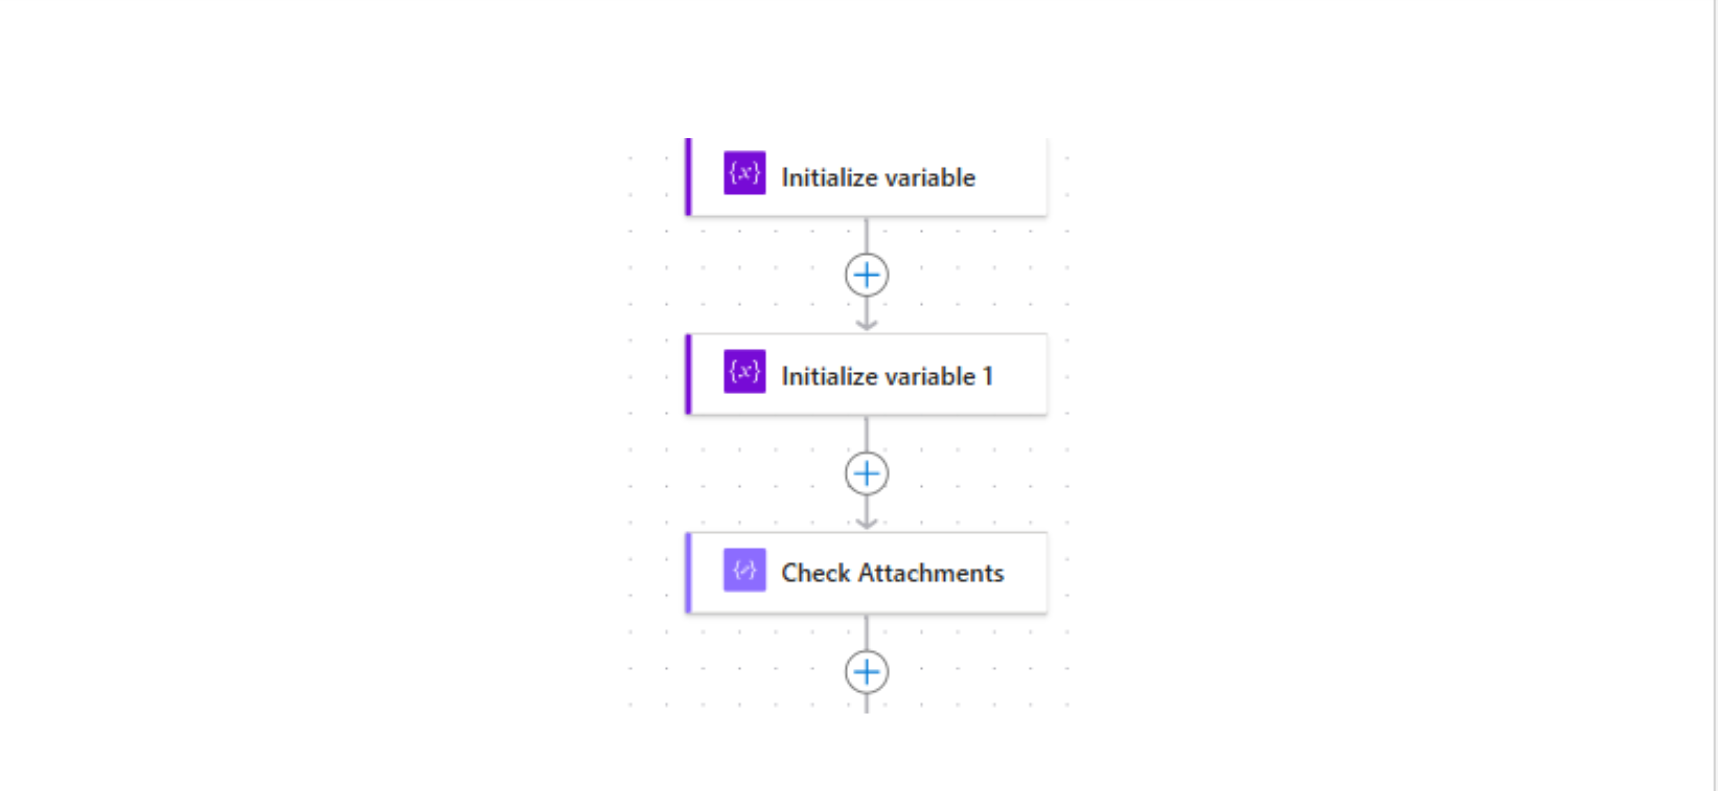
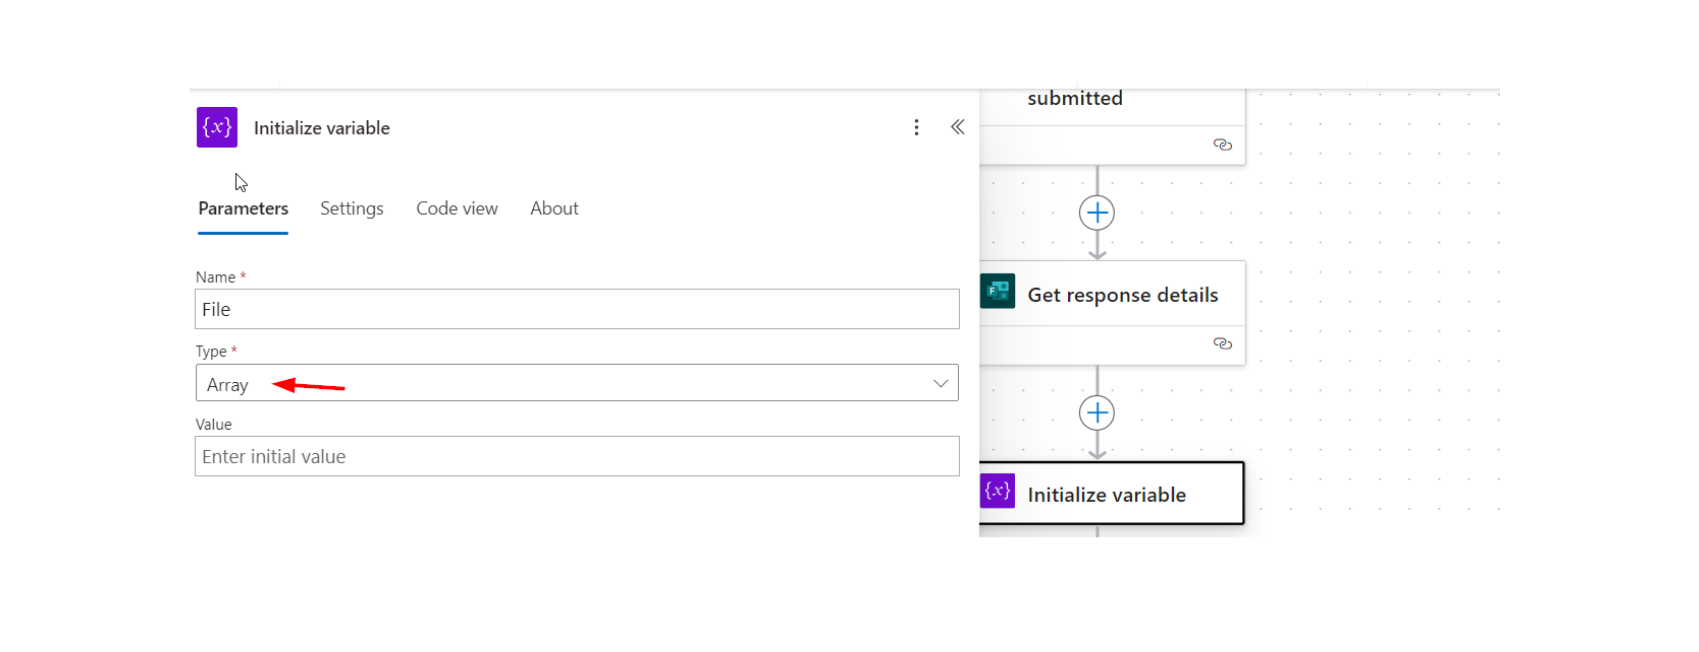
The most relevant actions in this first part of the flow are Initialize Variable and Check Attachments.
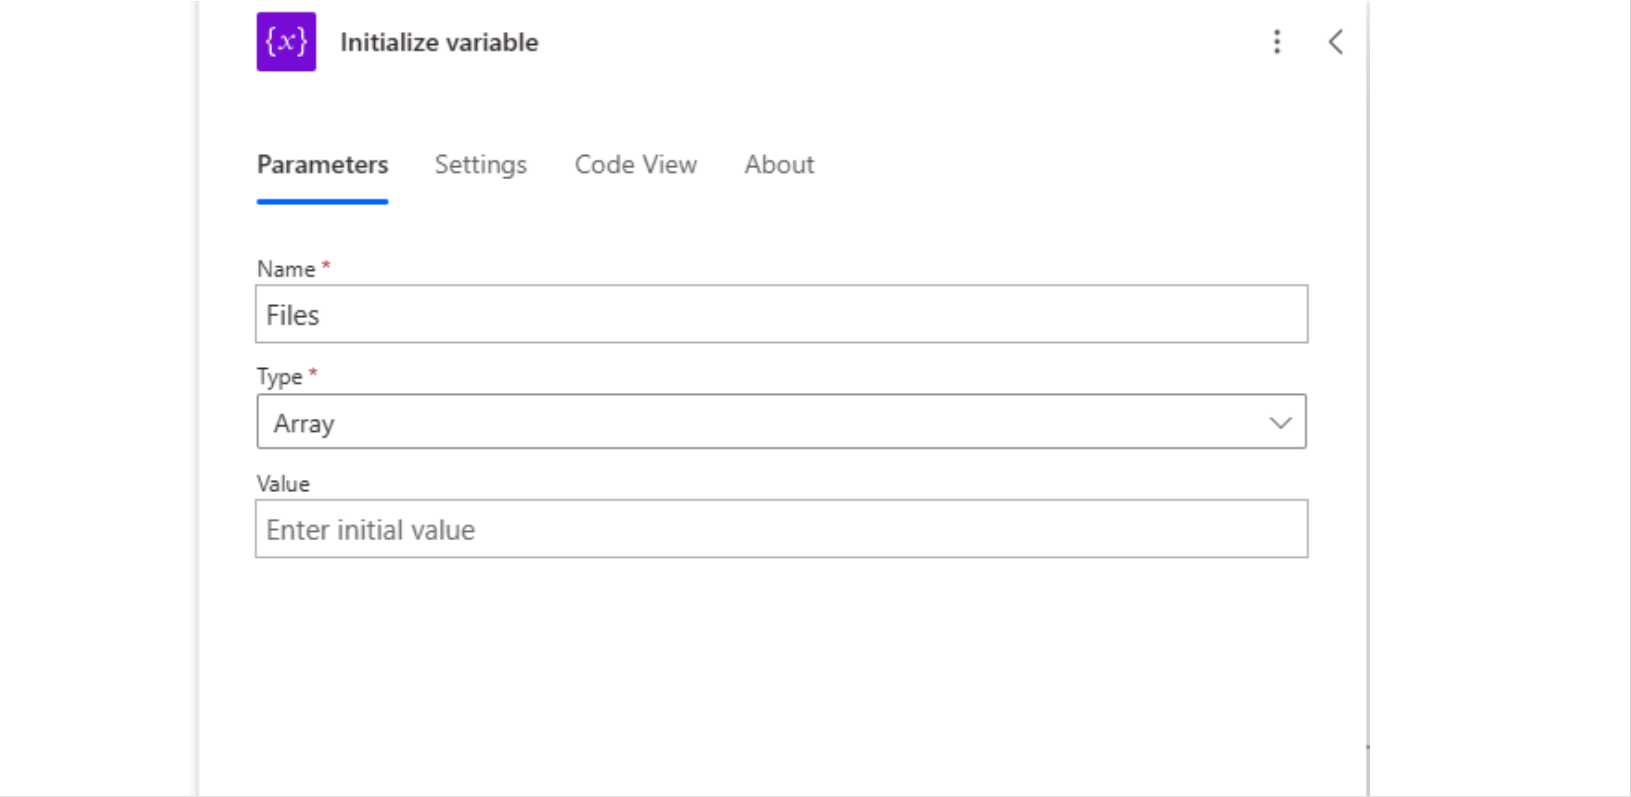
Initialize Variable is an action that allows you to declare a global variable. In this case, it is necessary to use this action because the form response contains an array of attachments. To manipulate that information, it is essential to initialize this variable. Additionally, initializing this variable will be key for building the loop we will implement in Step 3.
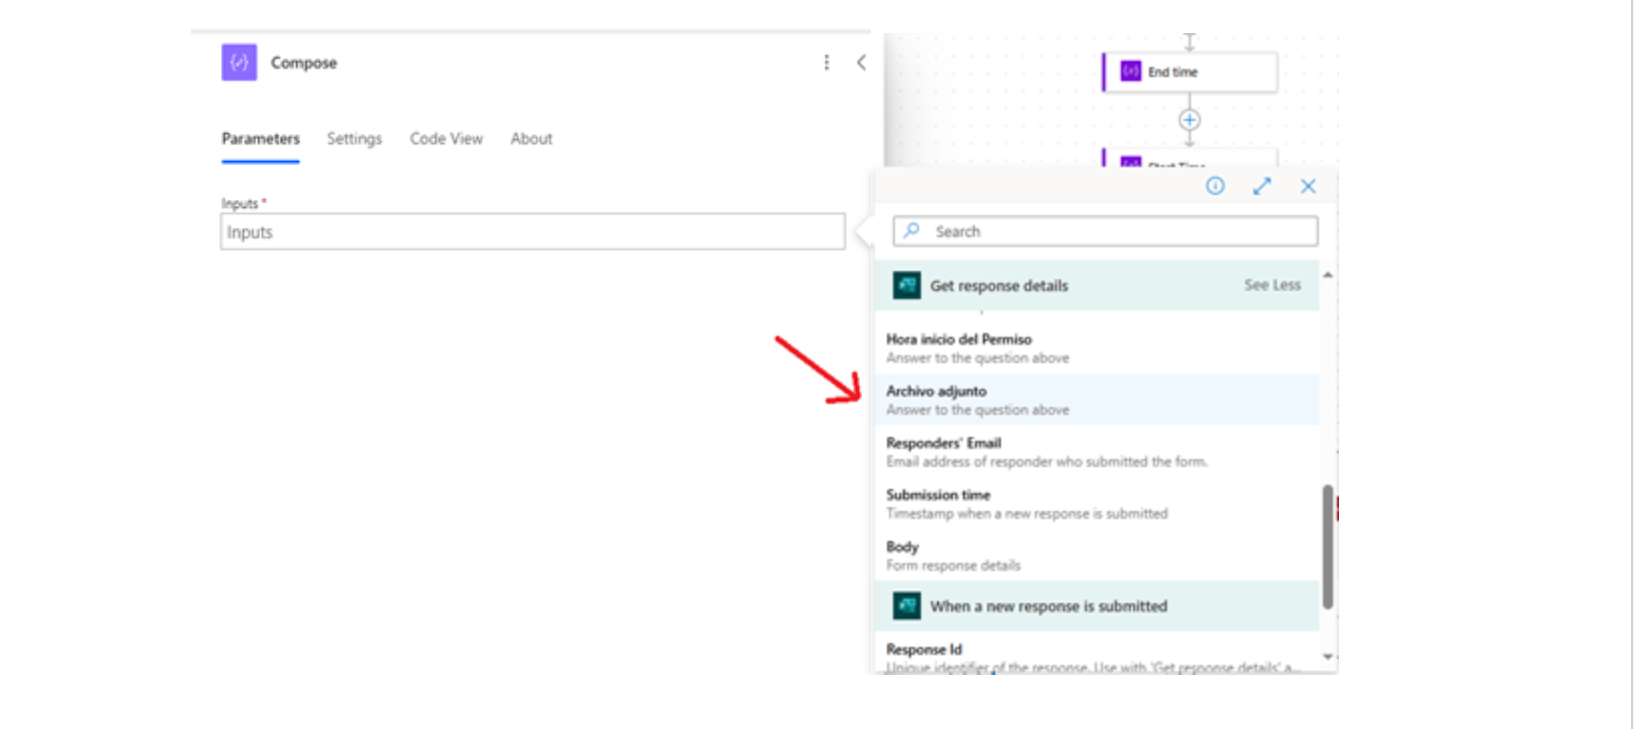
The Check Attachments action is a compose that stores the attachments. In this case, the compose was named Check Attachments because it checks if a condition needs to be created to verify whether the form has attachments or if no attachments were sent.
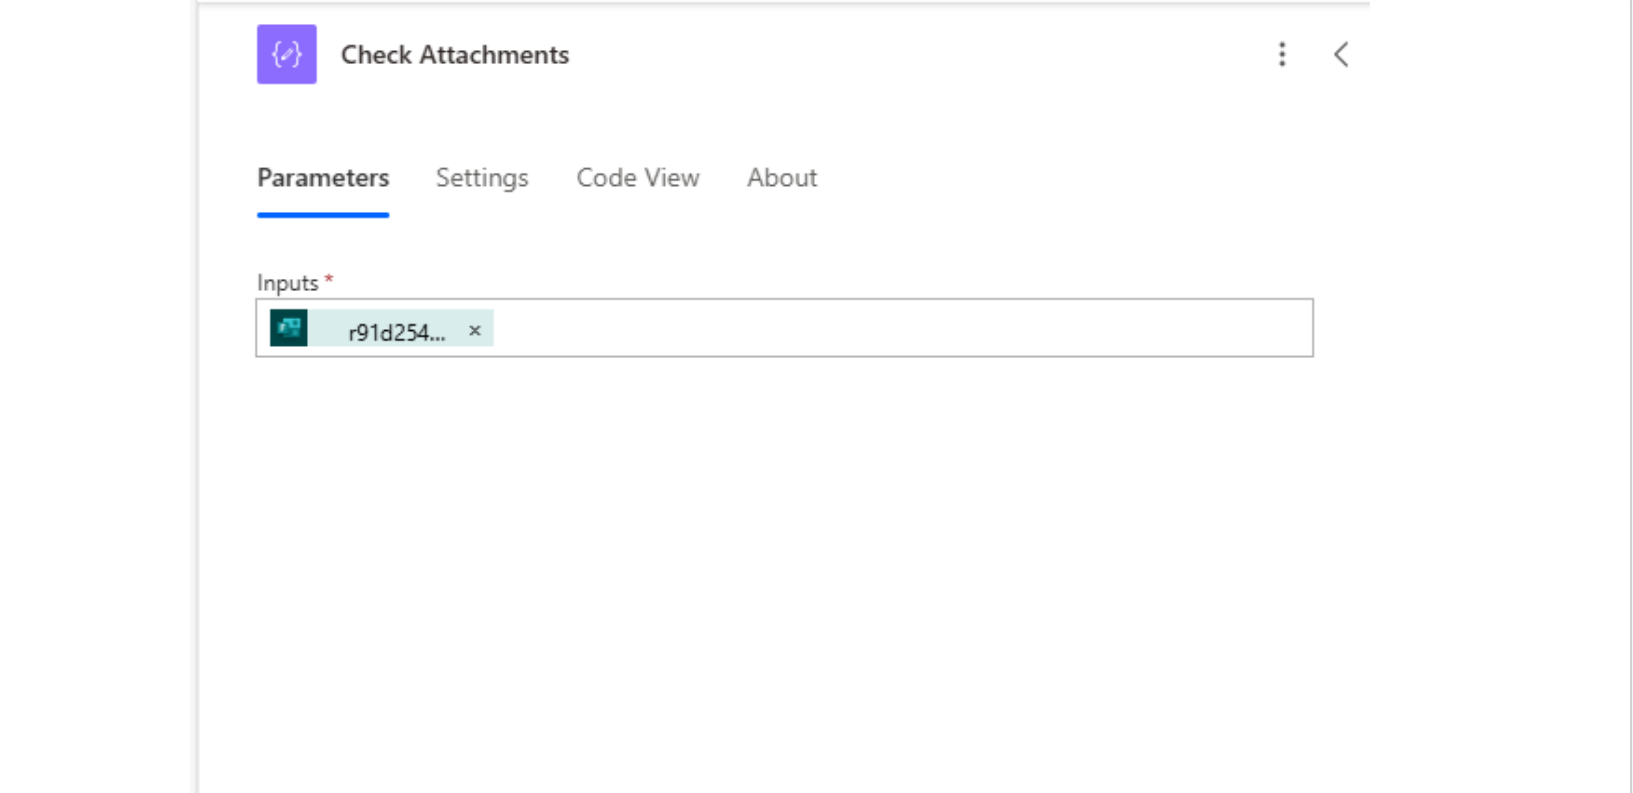
To add the form attachments to the compose, it is necessary to look for the name of the form question used to upload the attachments.

Step #2: Condition to Check if Attachments Were Sent in the Form
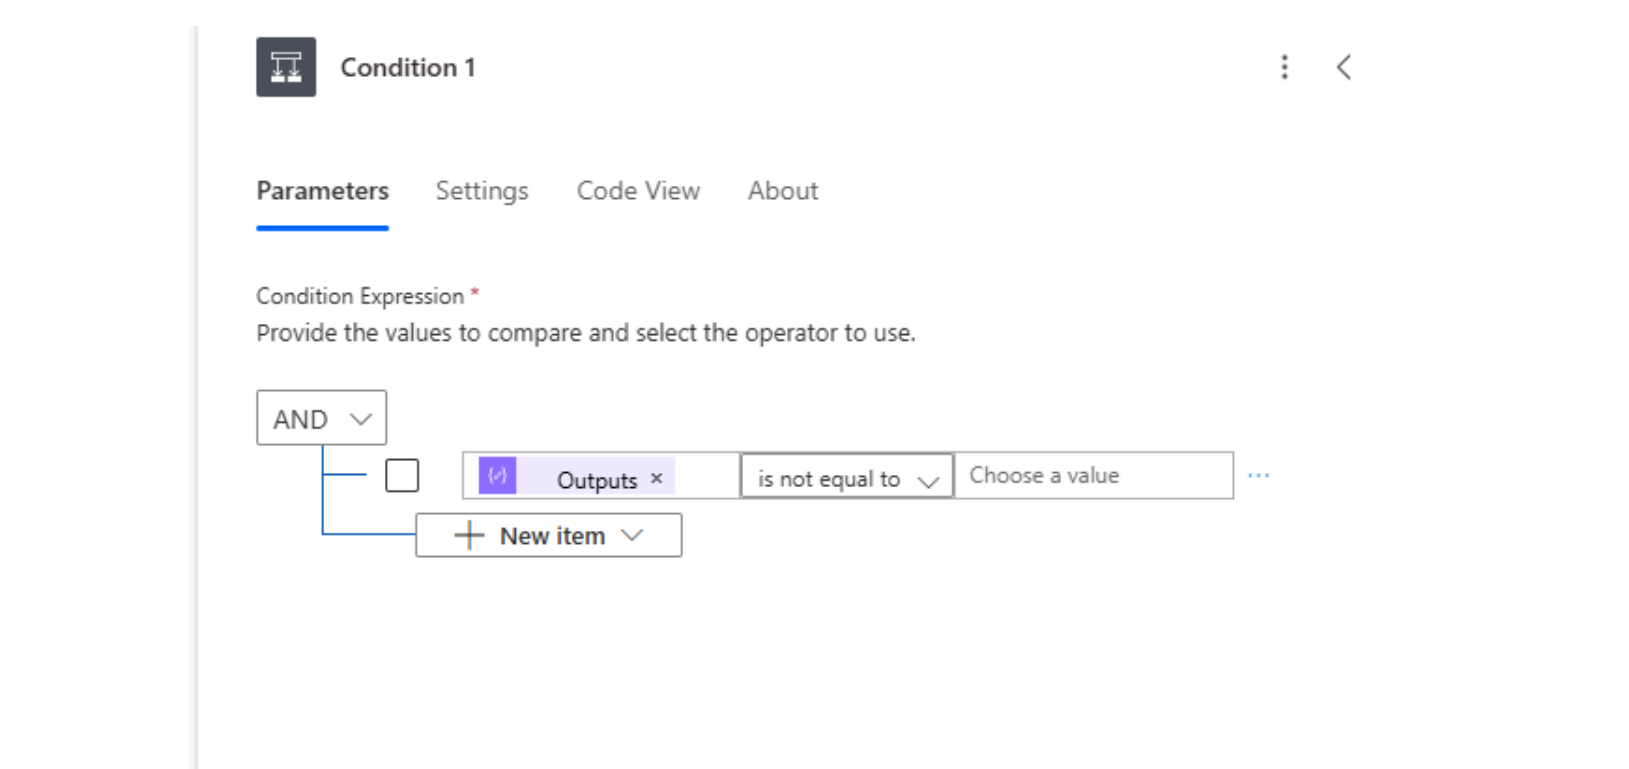
In the next part of the flow, there is a condition that uses the compose called Check Attachments to verify if the form submitted by the user contains attachments. This condition checks if the compose contains attachments. If the compose does not contain any files, the condition will be false.

In the following image, we can see how the condition should be constructed.
Step 3: Loop to Insert All Attachments from the Form into an Array
This loop reviews the attachments submitted in the form one by one. If we add any action within the loop, the result of that action cannot be used outside of it. That’s why, from the beginning of the flow, we create a variable that allows us to access the attachment information at any point in the process, in a simple and efficient way.
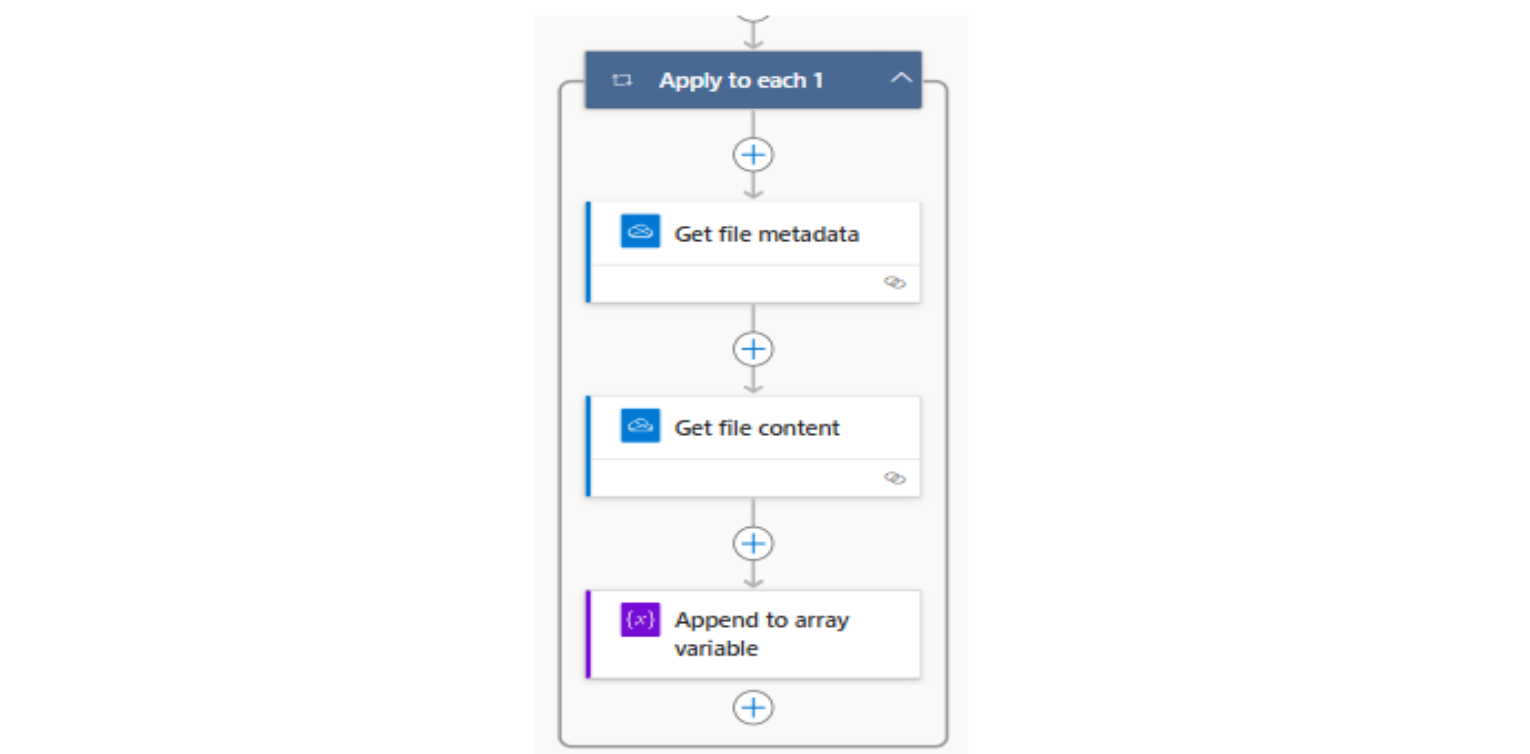
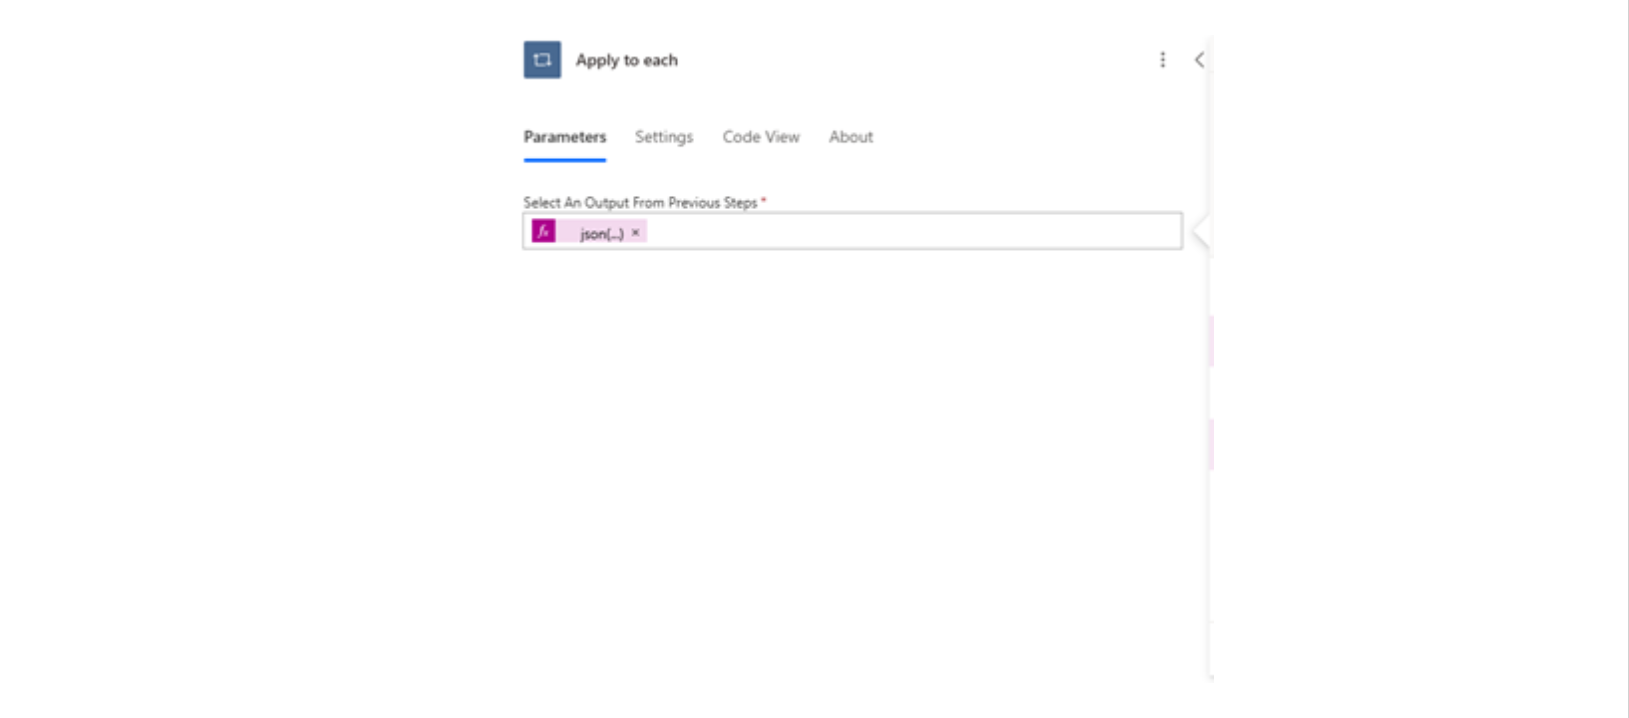
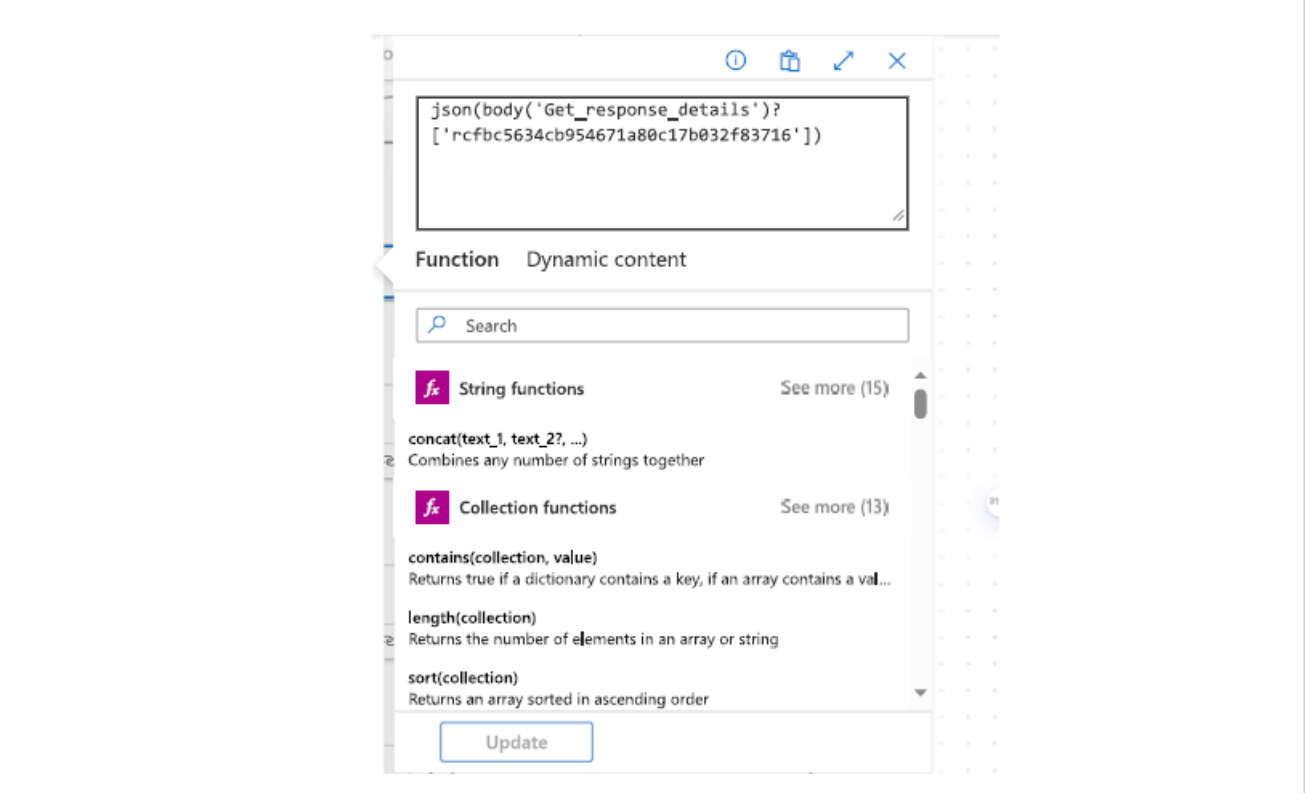
The Apply to each loop is being used to go through the list of attachments and manipulate each of their properties individually. In this Apply to each, an expression is used to convert the list of attachments from the form into a JSON object.
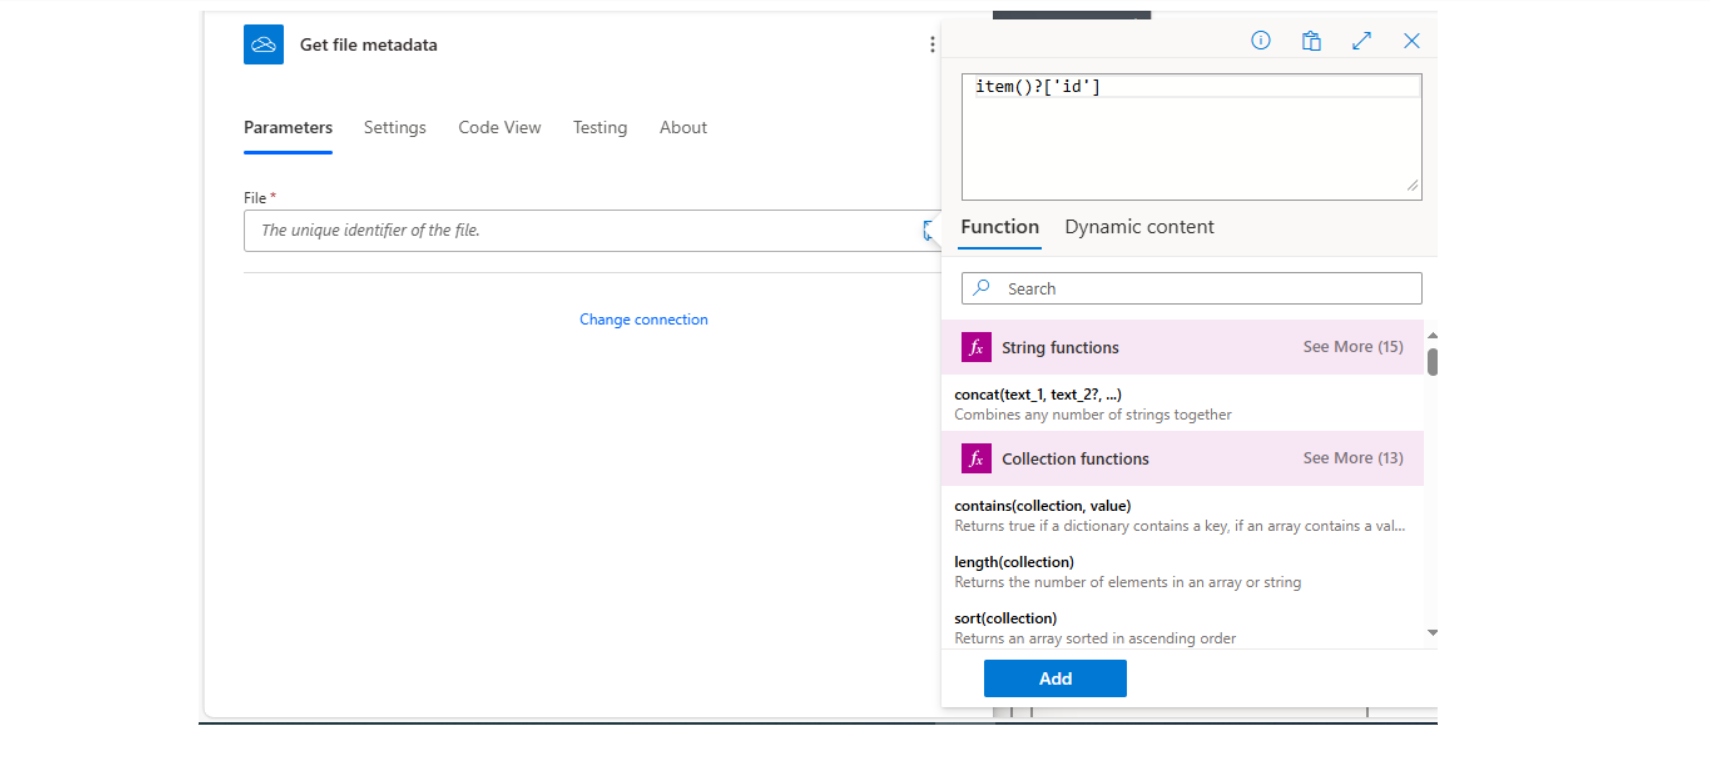
The next action used is Get File Metadata, which retrieves the metadata of the attachments so that they can later be manipulated within the flow. In this case, this action obtains the file properties, such as the name, modification date, author of the file, etc.
In this flow, this action is used solely to obtain the ID of the file.
For this action to retrieve the file metadata, it is necessary to input the ID of the current file being processed by the Apply to each loop. In this case, you need to use the expression shown in the following image to input the ID into the action’s input field.
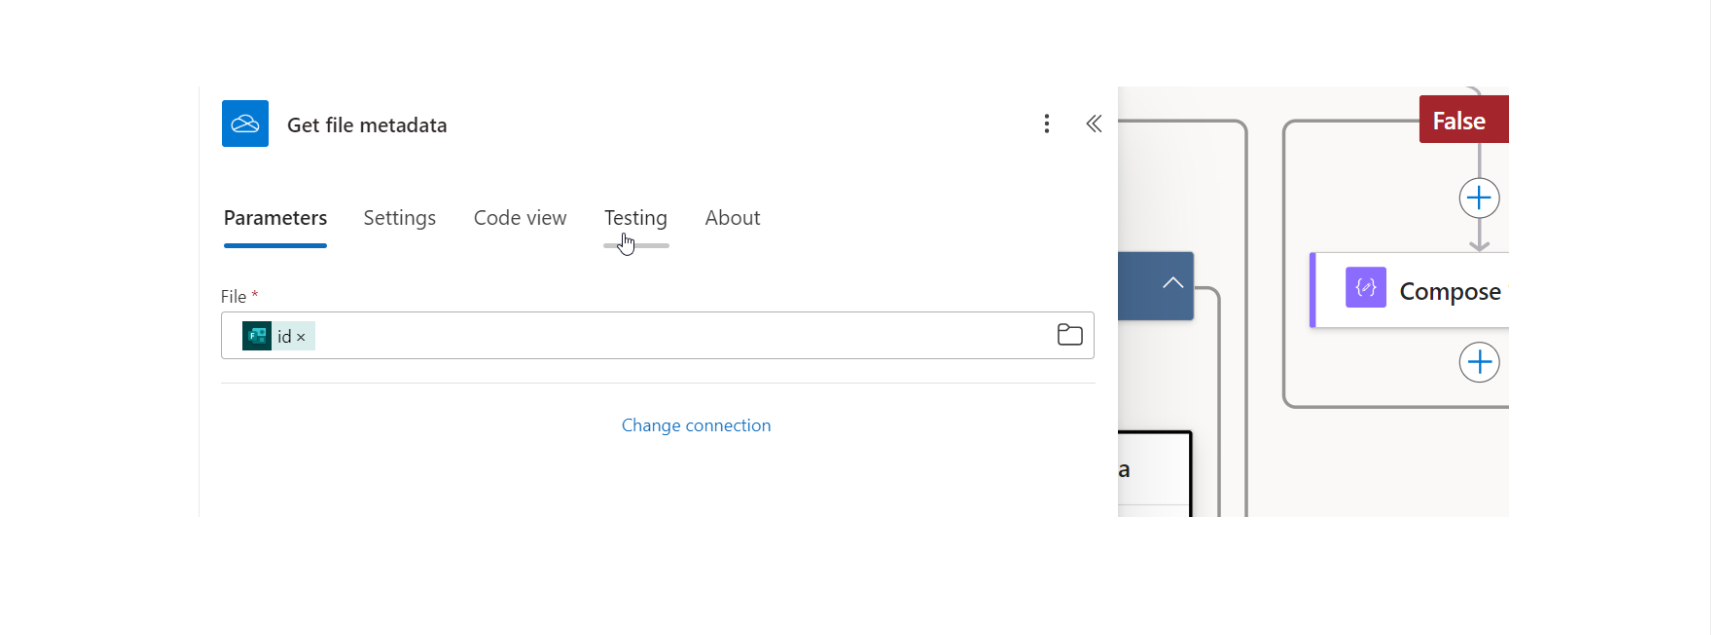
Obtaining the following result as shown in the image:
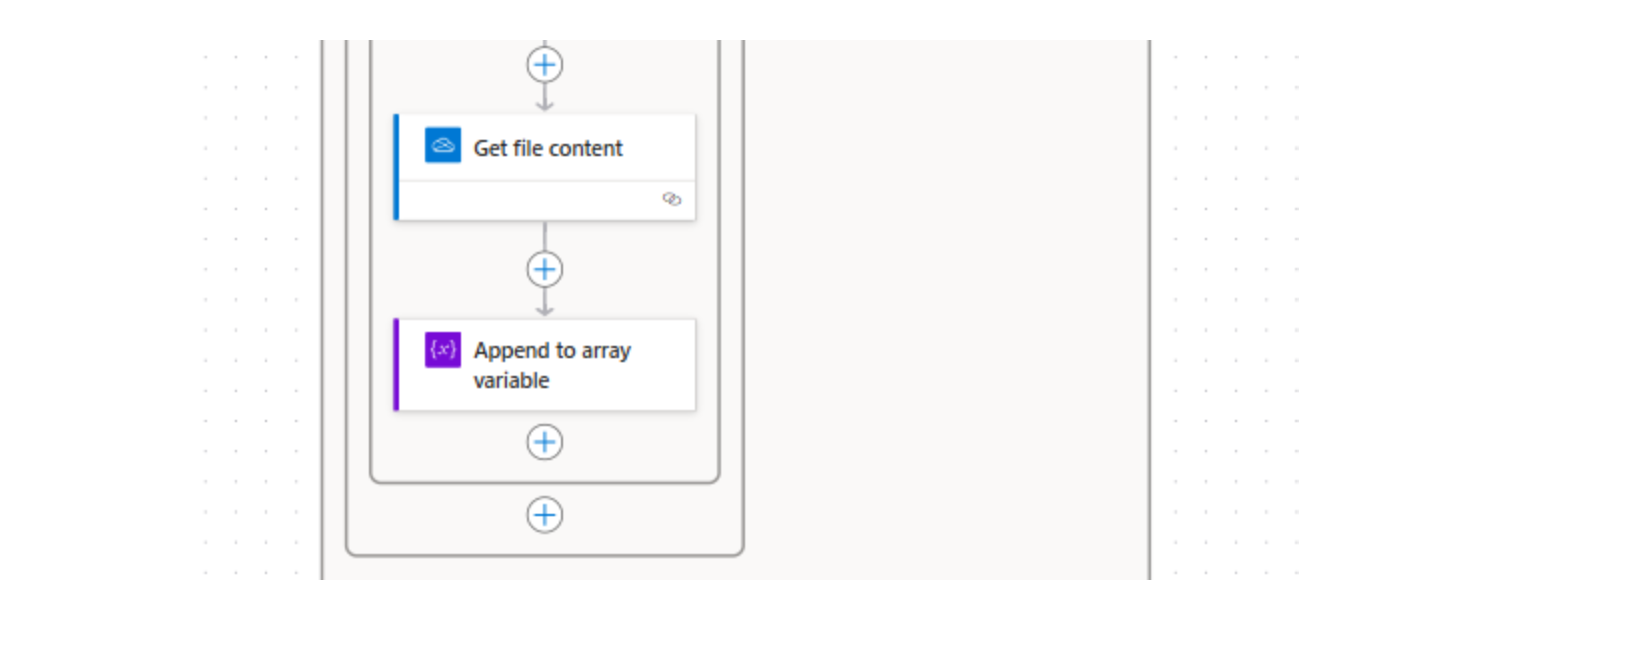
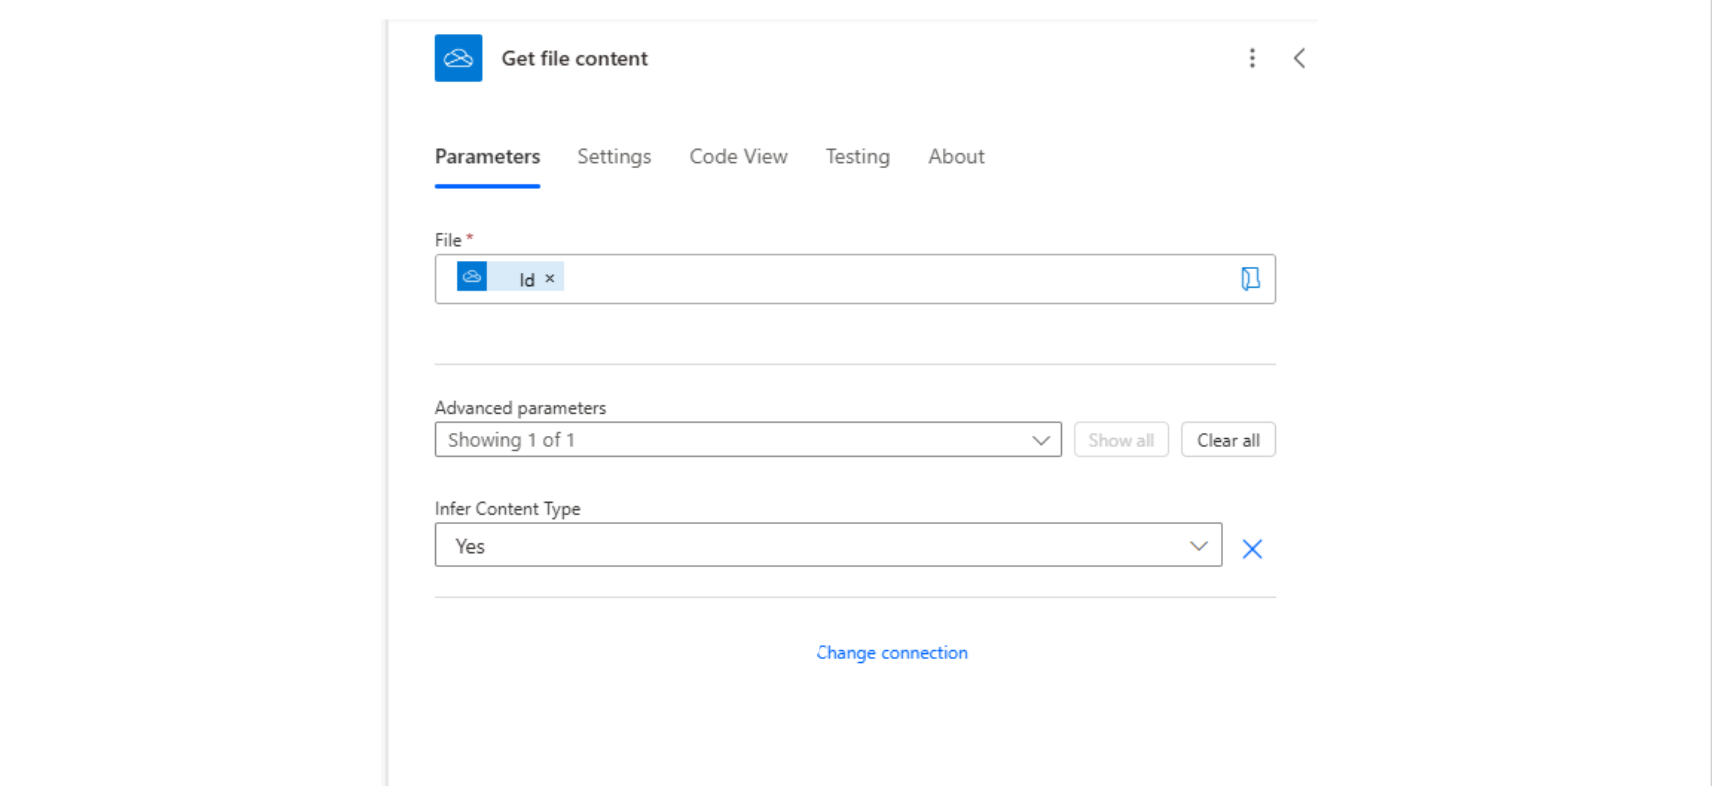
The next action is Get file content, which is used to retrieve the content of the file. This action requires the file ID, so in the input field of this action, you need to insert the ID obtained from the Get Metadata file action.
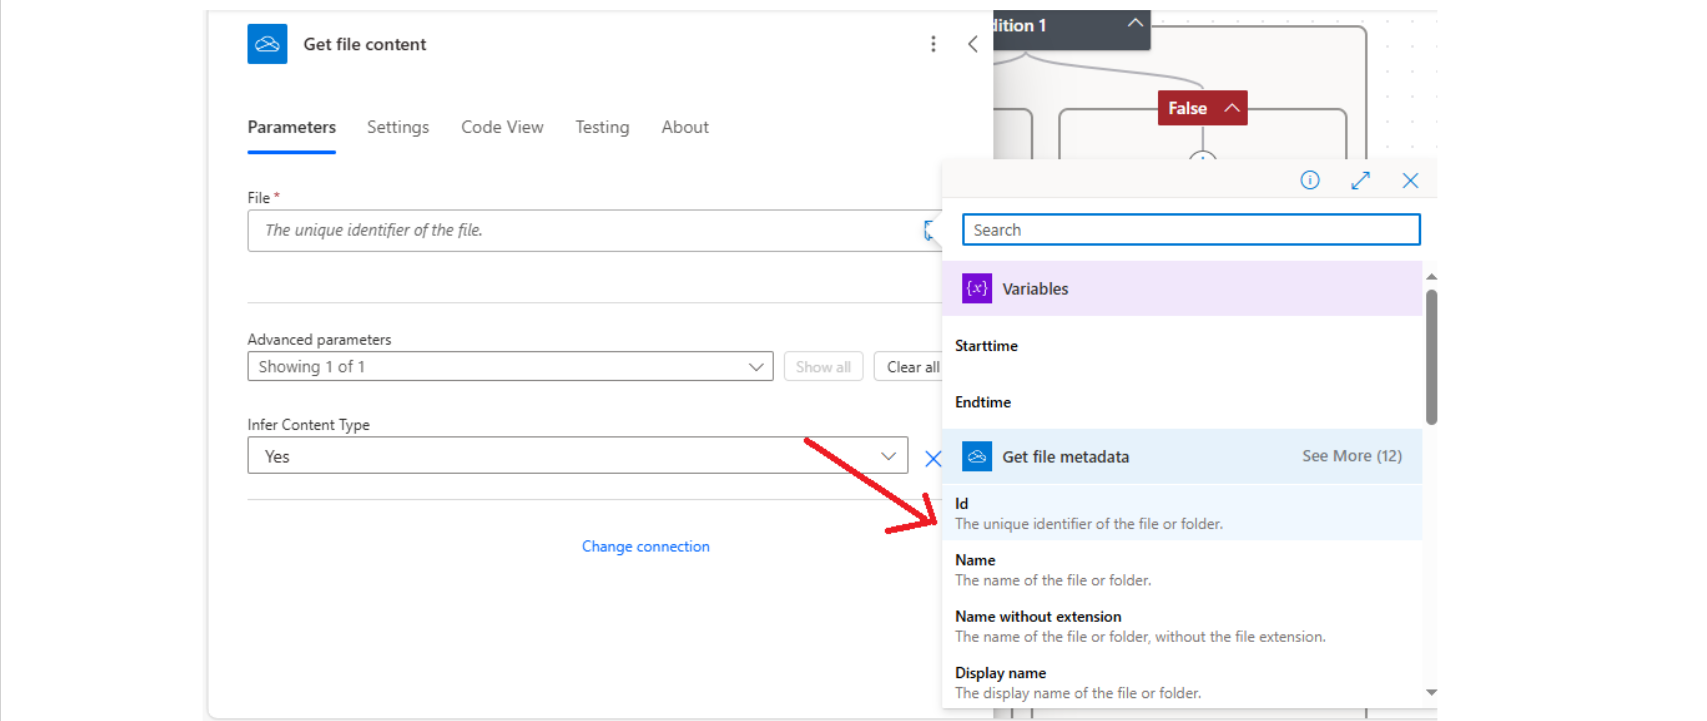
The result should be the following:
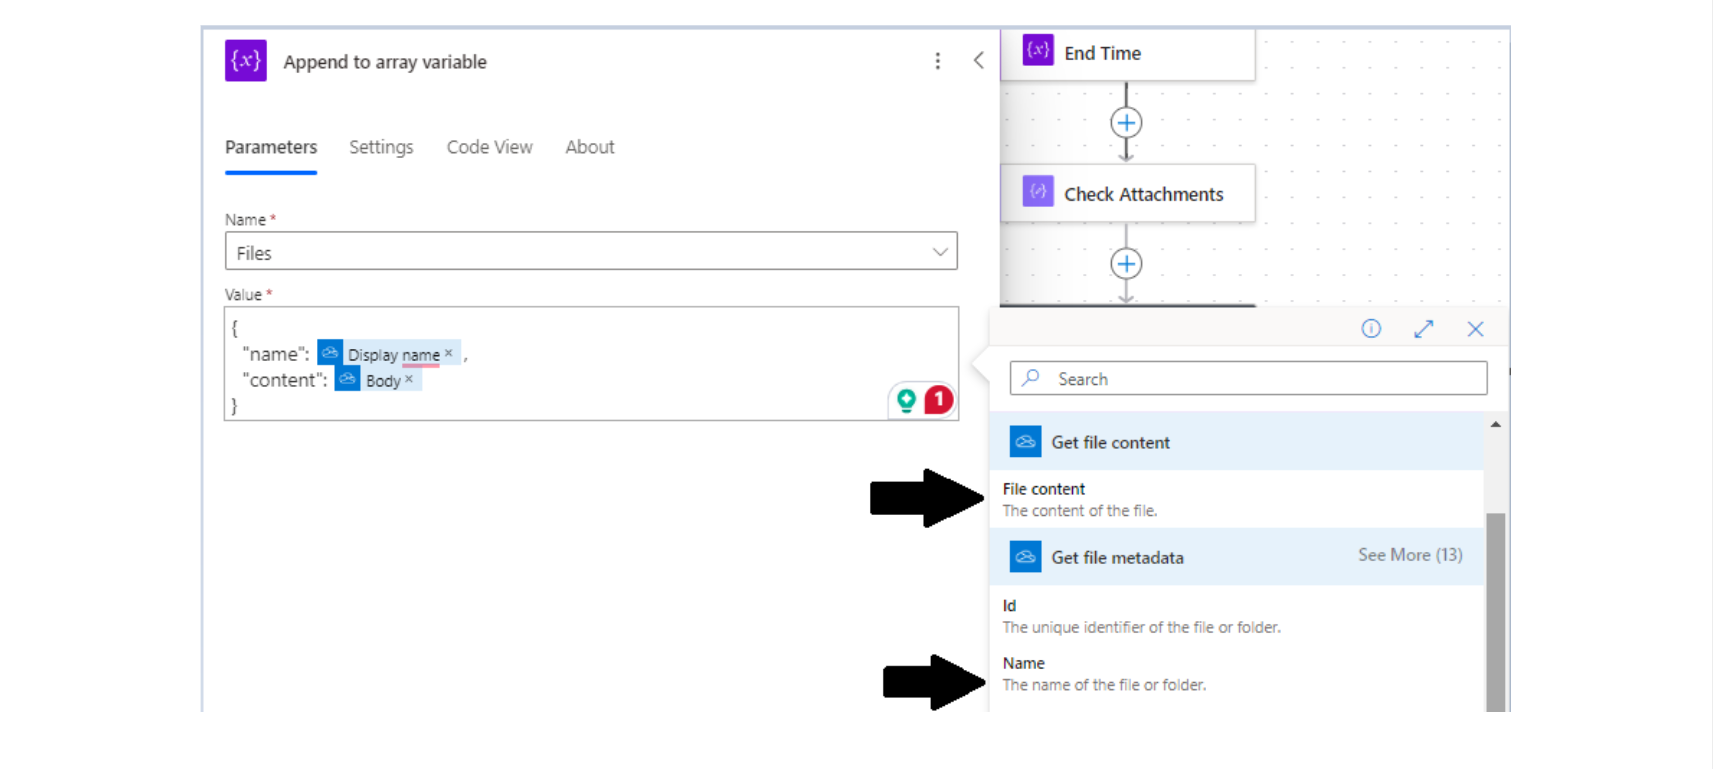
The next action is Append to array variable, which is used to add content to an empty array variable that was previously initialized in the flow.
In this case, this action is used to add the list of files to the File variable that was initialized at the beginning of the flow (Step 1).
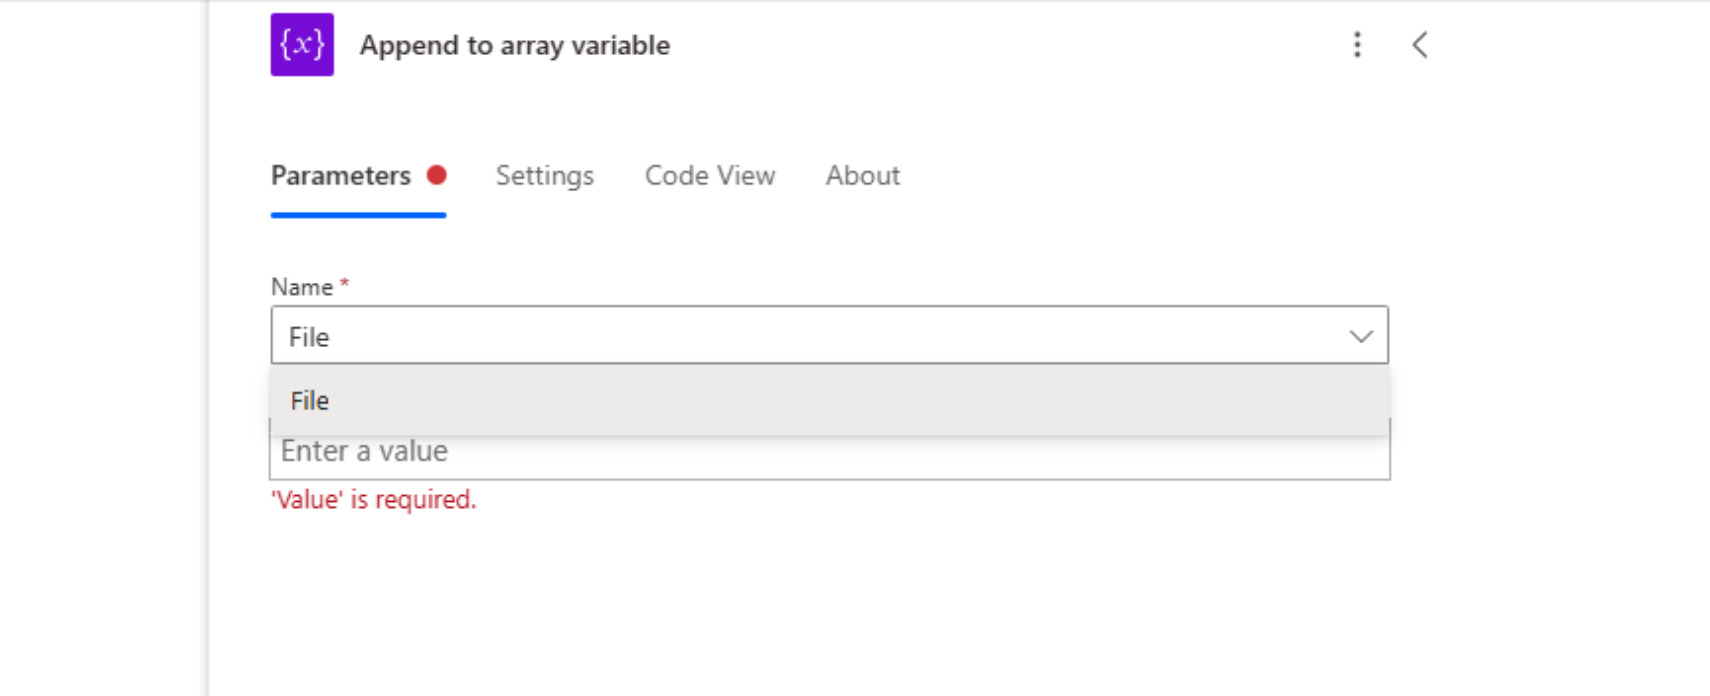
In the value field of Append to Array variable, you need to add the outputs from the Get Metadata File and Get File Content actions.
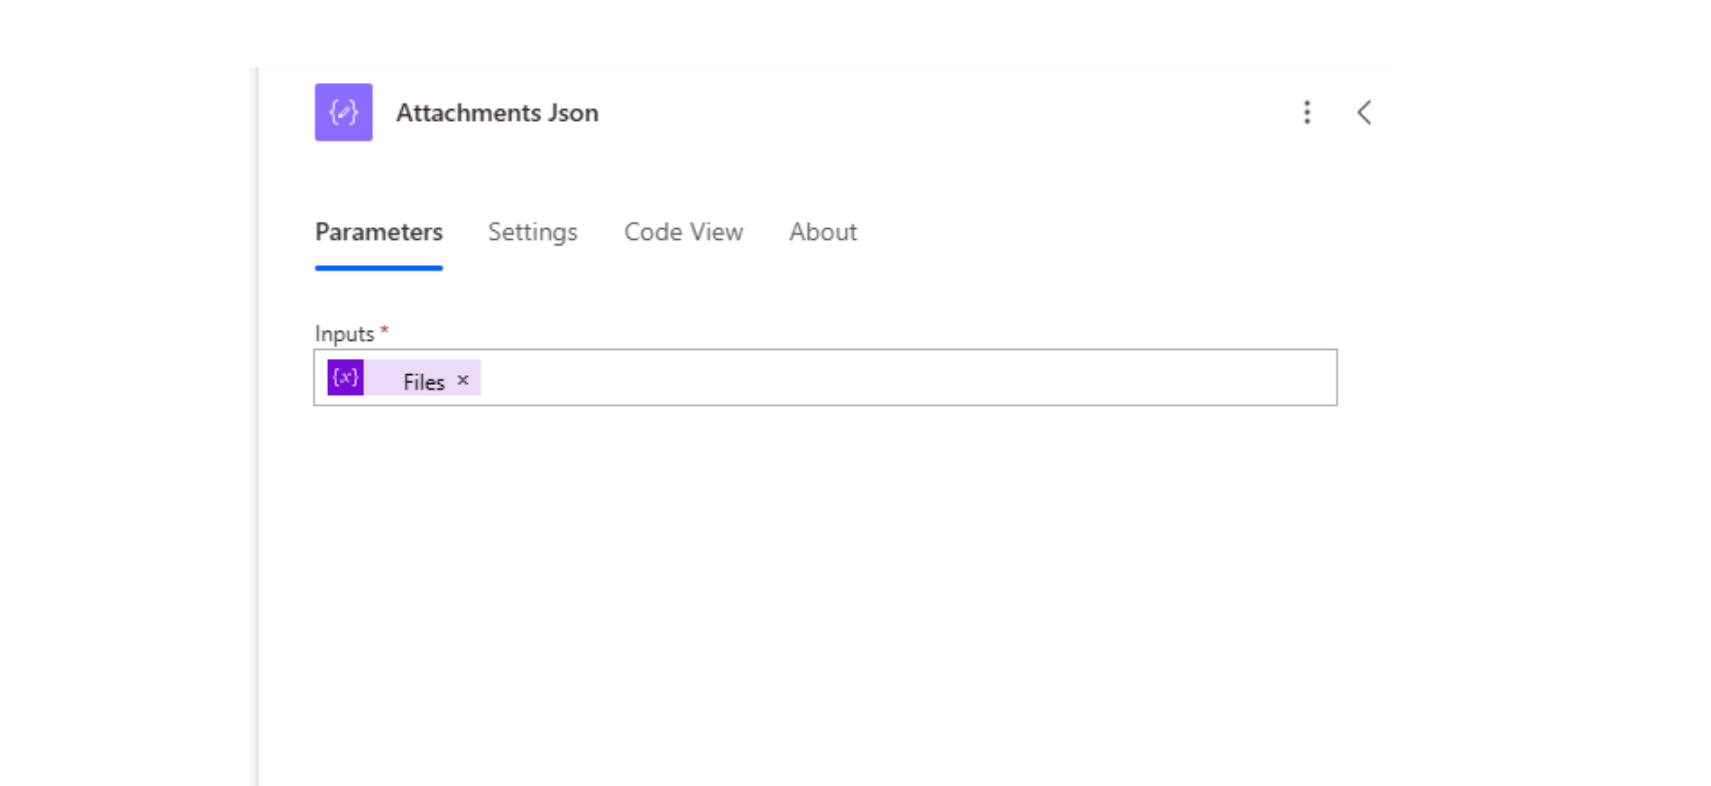
Step #4: Add Compose to Store and Manipulate Files from the Array
In the next part of the flow, you need to add a Compose named Attachments Json, which will be used to manipulate the File variable that was declared at the beginning of the flow. In this case, this variable must be stored in a Compose.
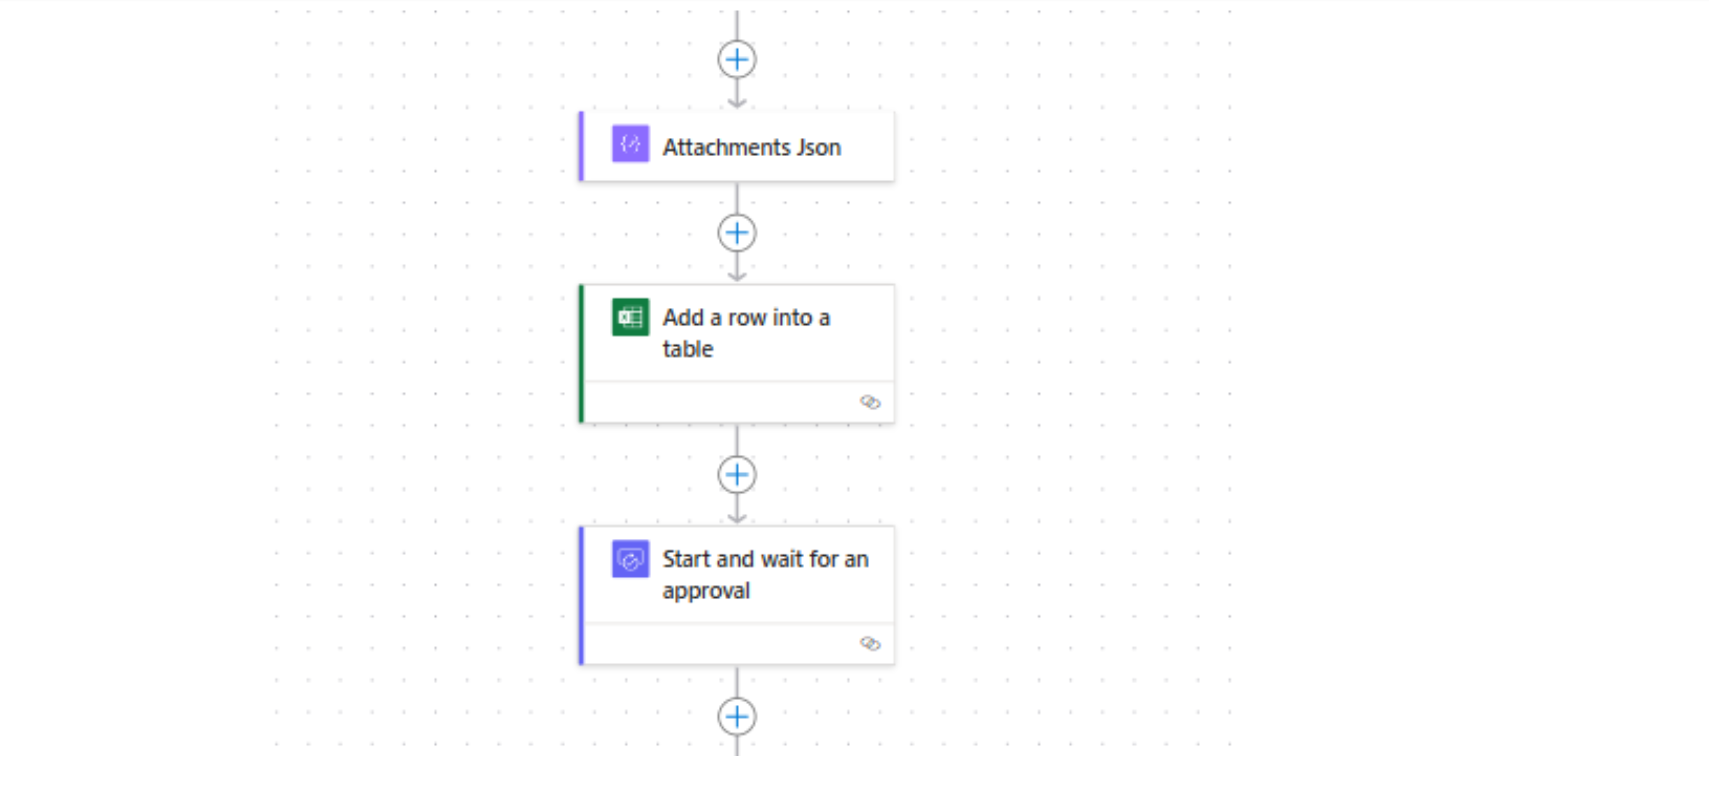

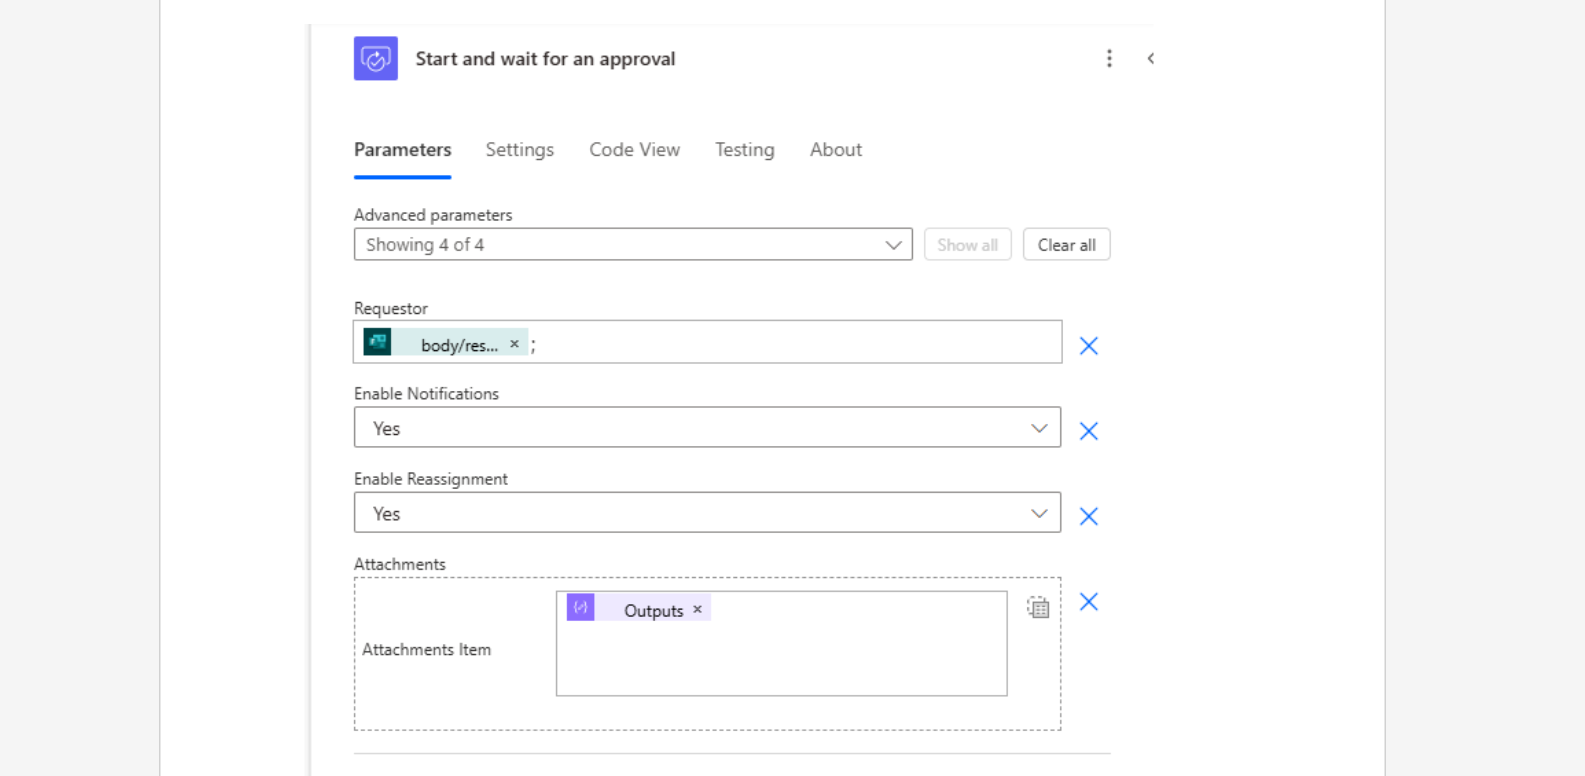
Step #5: Start and Wait for Approval
The final action is Start and Wait for an Approval. For the attachments to be visible in the approval request, we need to add the output from the Attachments Json action. This will allow the person reviewing the request to see the files the user submitted through the form.
In the field labeled attachments, simply click the button that says Switch to input entire array, as the files are handled as a set (array), and this will ensure that all attachments are properly included.


When running the flow, as an indicator that it is working and correctly implemented, if the form contains attachments, the output of the compose will be an array of files, as shown in the following image. (Step #2)
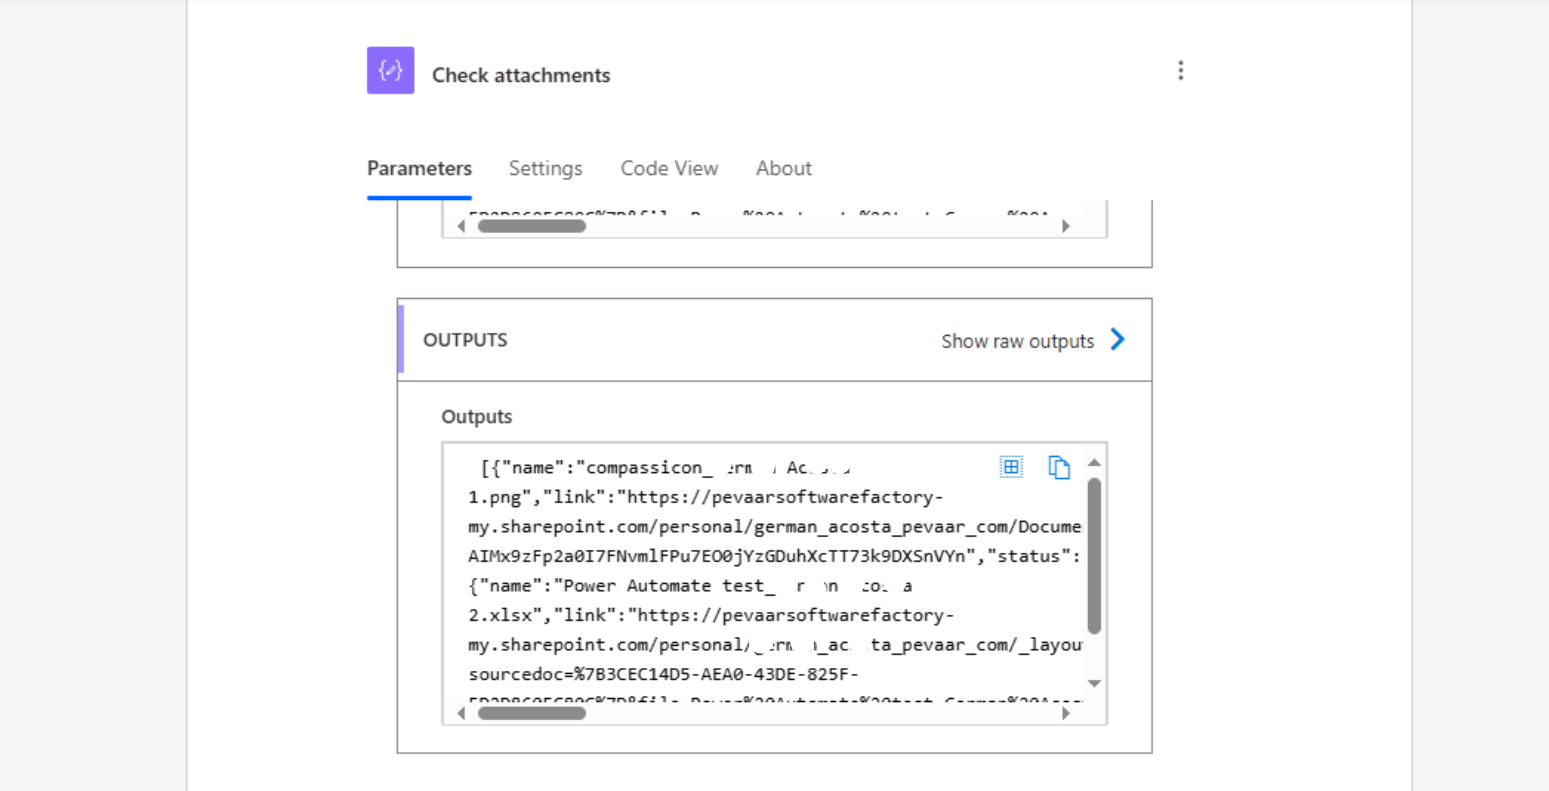
Otherwise, the output will be empty:
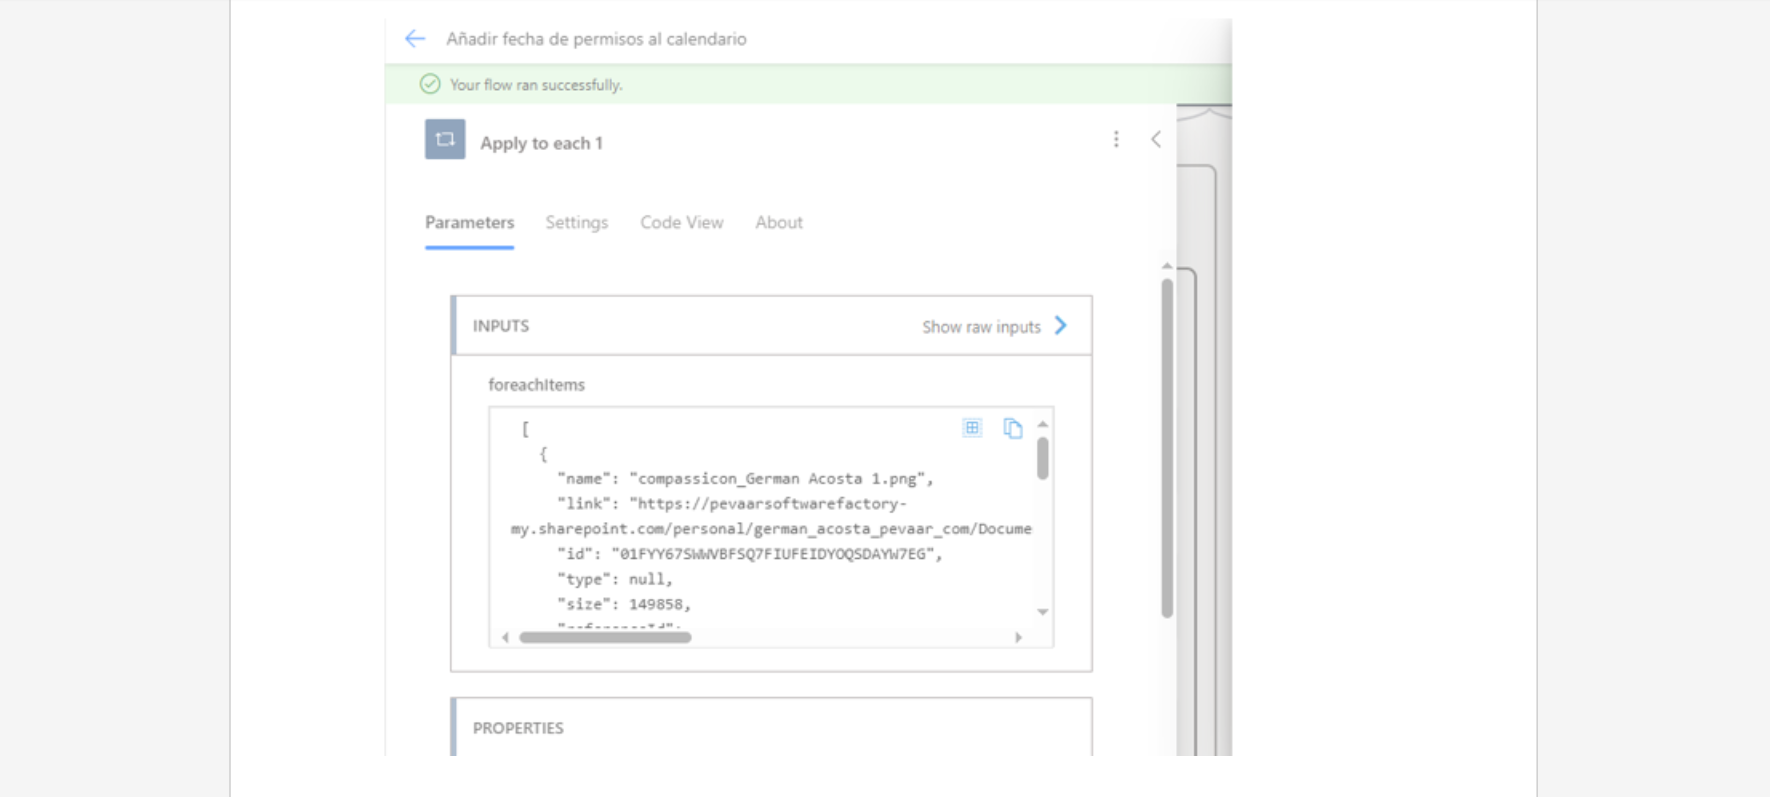
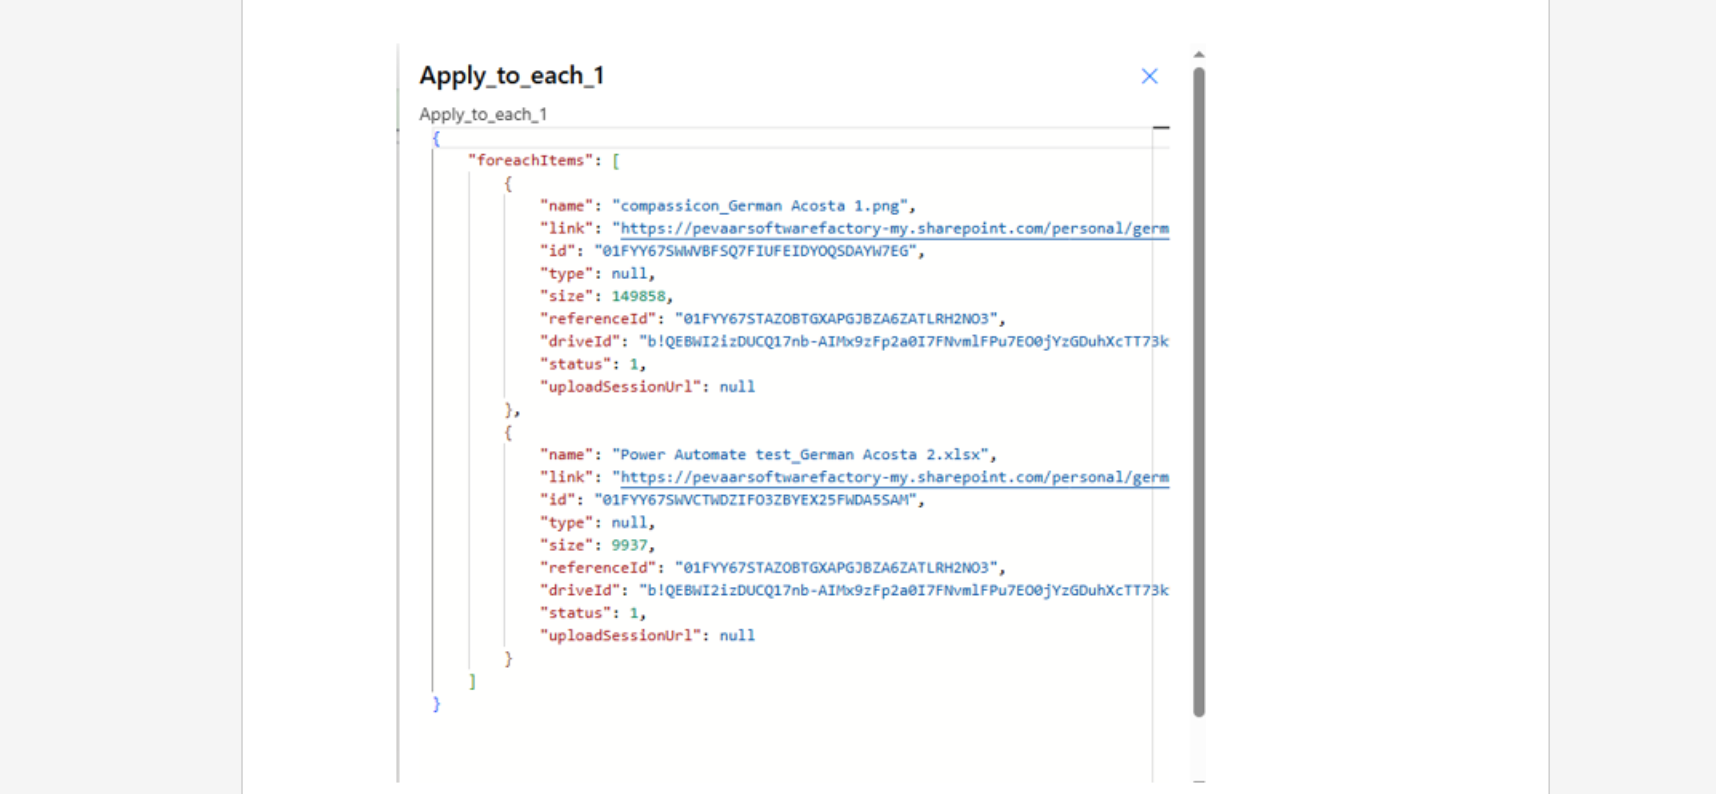
When the flow is run, the input of the foreach should display a JSON object, as shown in the following image. (Step 3)
Can you imagine the time you could save and how much easier your daily work would become? It’s time to leave repetitive tasks behind! Start automating with Power Automate now and free up time to focus on what truly matters: people.


Leave a Reply