Execute and Elevate: 7 Steps Seamlessly Connect Teams to SharePoint
Execute your tasks more efficiently and forget about manual processes that waste time and energy. With a simple automation, you can set up a flow that detects a specific keyword in a group chat or Microsoft Teams channel and automatically uploads files to SharePoint, organizing them into the correct folder. It’s that simple.
When you execute solutions like this, everything changes for the better. Documents are saved automatically, always organized, and readily available when you need them. This flow not only helps keep your projects in order but also improves team collaboration. If you’re working with large or remote teams, this is an ideal solution: everyone can quickly and easily access the files from a centralized location.
Table of content
- 1. Automatic Keyword Detection using the trigger “When a keyword is mentioned in Teams”.
- 2. Reviewing Messages in the Chat Using the “For Each” Action
- 3. Extracting Message Details Using the “Get Message Details” Action
- 4. Identifying the Attached File Name Using the “Compose” Action
- 5. Accessing File Content Using the “Get File Content Using Path” Action
- 6. Retrieving File Metadata Using the “Get File Metadata Using Path” Action
- 7. Uploading the File to SharePoint Using the “Create File in SharePoint” Action
Can you imagine everything you could achieve when you stop worrying about repetitive tasks? By executing this automation, you eliminate manual processes and free yourself to focus on strategic and creative activities that truly matter. Additionally, you’ll work faster, with fewer errors, and with productivity that you’ll notice right away.
The best part? You don’t need to be an expert to execute this solution in your workplace. With simple tools like Power Automate, you can implement this automation easily and efficiently. So, what are you waiting for to execute it and simplify your work life? Take the step and experience how technology can transform your daily routine. Execute the automation and reach a new level of productivity!
Flow for Uploading Files Sent in a Teams Chat to SharePoint:
1. Automatic Keyword Detection Using the Trigger “When a Keyword Is Mentioned in Teams.
The flow starts when a specific keyword is mentioned in a group chat or Microsoft Teams channel. This is the activation point that ensures the process begins only when necessary. Using a trigger configured in Power Automate, all conversations in Teams are monitored for predefined keywords like “Upload Report” or “Relevant File.” This step allows the automation to start the flow by identifying relevant messages without manual intervention, ensuring the process is efficient from the beginning.

2. Reviewing Messages in the Chat Using the “For Each” Action
Once the keyword is detected, the flow enters a loop that analyzes each message in the chat or channel. This step is crucial for reviewing all messages to identify those containing attachments associated with the mentioned keyword. Thanks to this iteration, the flow ensures that no relevant file is missed, even in chats with multiple contributions. This approach guarantees that every relevant file is included in the automated processing.

3. Extracting Message Details Using the “Get Message Details” Action
Next, the flow extracts detailed information from the message where the keyword was detected. By using the “Get Message Details” action, data such as the message ID, sender’s name, date of sending, and whether the message originates from a group chat or channel is collected. This allows for precise identification of the original message and its association with the file to be uploaded to SharePoint. This step ensures complete traceability and prepares the flow for processing the attached files efficiently.

4. Identifying the Attached File Name Using the “Compose” Action
Next, the flow uses the “Compose” action to determine the name of the attached file in the detected message. This is achieved through an automated expression that directly extracts the file name from the message details. This step is essential as it clearly identifies the file to be processed in the subsequent steps. For instance, if the attached file is “Reporte_Ventas.pdf,” the flow will extract this name to prepare the file’s path and storage in SharePoint. This automation eliminates errors associated with manual file selection.
Function:
body(‘Get_message_details’)?[‘attachments’][0][‘name’]

5. Accessing File Content Using the “Get File Content Using Path” Action
With the file name identified, the flow uses the file path to access its content. By utilizing the “Get File Content Using Path” action, the content of the attached file is automatically retrieved from Teams. This ensures that the file is ready to be uploaded to SharePoint without requiring manual intervention. If the specified path is invalid or the file does not exist, the flow can generate a notification to prompt users to take corrective actions as needed.

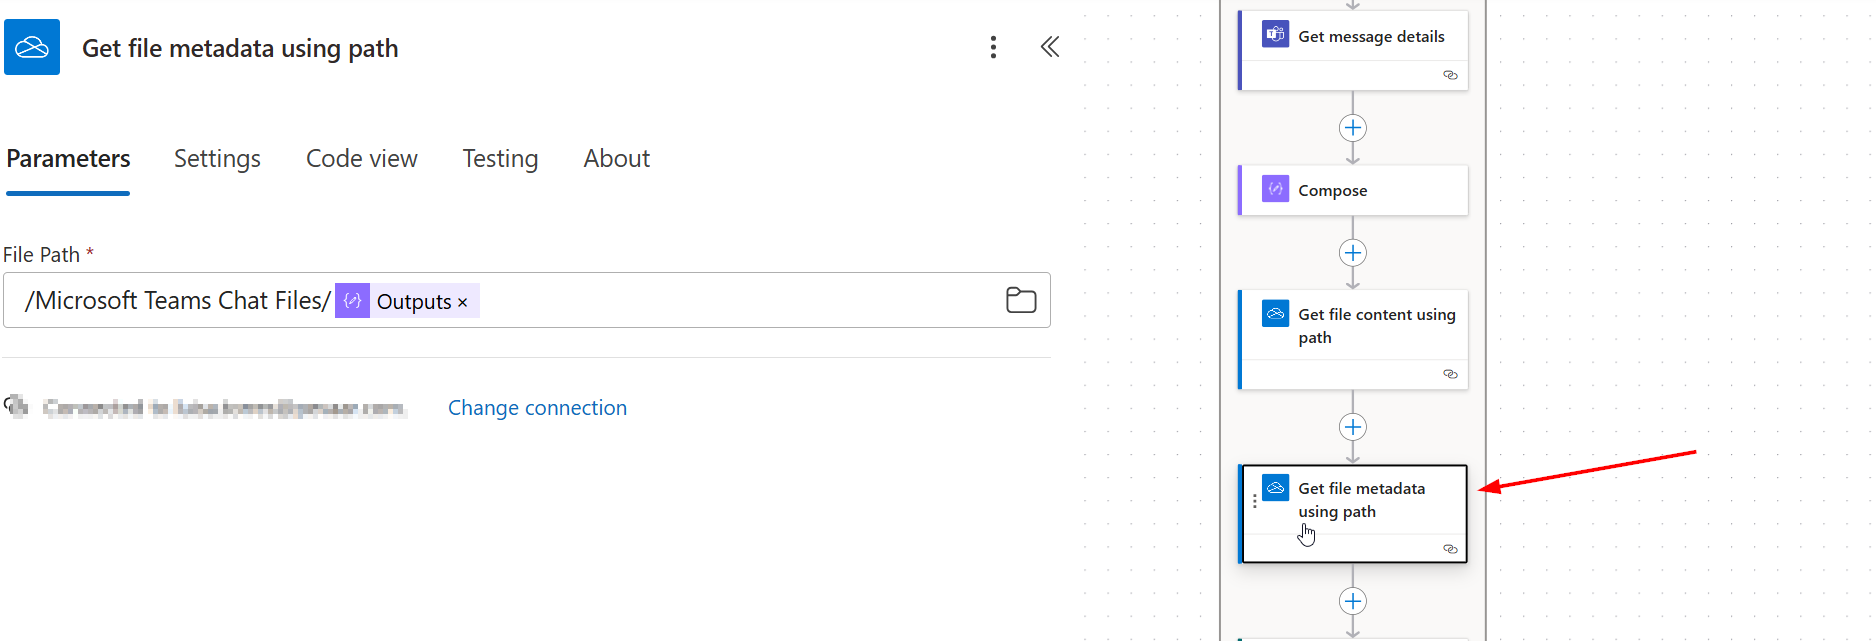
6. Retrieving File Metadata Using the “Get File Metadata Using Path” Action
Subsequently, the flow collects the file’s metadata using the same path employed to retrieve its content. The metadata includes crucial information such as file size, document type, creation date, and other relevant details. This step not only helps organize the file more efficiently but also enables automatic categorization when uploading it to SharePoint. For instance, larger files or specific document types can be assigned to designated folders based on their characteristics.
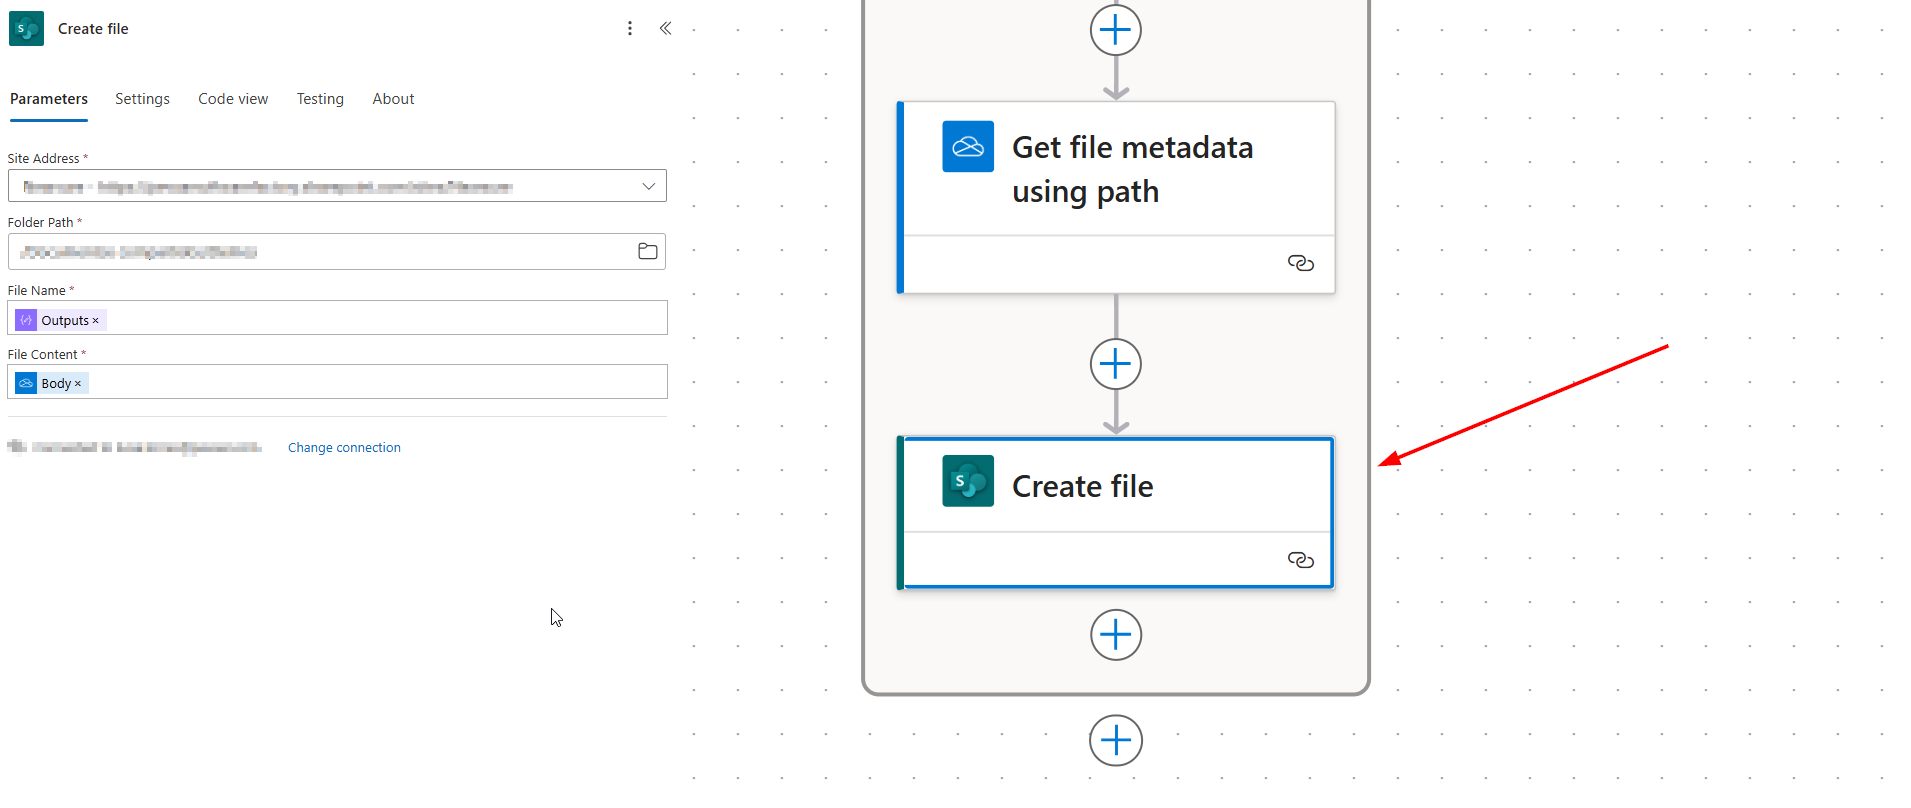
 7. Uploading the File to SharePoint Using the “Create File in SharePoint” Action
Finally, the flow achieves its goal by uploading the file to a specific folder in SharePoint. Using the “Create File” action, the file is transferred to a predefined repository that can be configured based on the detected keyword, the sender of the message, or the file type. For instance, a file related to “Monthly Report” can be automatically stored in a folder such as “/Documents/Reports/2024.” This step ensures that files are well-organized, easily accessible, and aligned with the team’s collaboration needs.

This automated flow ensures that your documents remain organized, accessible, and well-managed, giving you more time to focus on strategic activities that truly matter.
If you have questions about how to execute this flow or need to customize it for your team’s specific needs, don’t hesitate to contact us. At Pevaar, we don’t just help you configure and execute automated flows like this; we also design tailored solutions to optimize any process you want to automate.
Do you want to take your team’s productivity to the next level? Reach out to us, and together we’ll design the perfect solution for your needs. At Pevaar, we are committed to transforming how you work. Contact us and let us help you execute the next step towards digitalization and efficiency!


Leave a Reply