
Business Process Automation Solutions: Step-by-Step to Create Reminders in Outlook from Excel with Power Automate
Business process automation solutions are revolutionizing the way businesses manage their workflows, streamlining repetitive tasks and improving operational efficiency. Implementing automation solutions reduces human error, increases productivity and and ensures better time management.
One of the best examples of business process automation solutions is the integration of Power Automate with Excel and Outlook to automatically create events. In this article, we’ll walk you through setting up a flow that generates reminders in your Outlook calendar every time a new row is added to an Excel table. With this automation, events will be scheduled without manual intervention, ensuring attendees are notified in real-time.
If you’re looking to optimize your business processes, we recommend exploring more about how business process automation can transform your organization. You can find more information on this topic in Microsoft Power Automate.
This detailed guide will show you how to implement business process automation solutions to improve your calendar management and simplify event planning in your company. Read on and get your automation up and running!
Create reminders individually in the calendar from an Excel spreadsheet.
Objective
The goal of this flow is to automate the creation of events in the Outlook calendar every time a new row is added in an Excel file. This allows for more efficient event management, ensuring that relevant information is automatically synchronized and attendees are notified in a timely manner.
Scope
This document applies to the user who manages the event schedule and to anyone who needs to use the flow to ensure that events are created efficiently in Outlook.
Responsibilities
- Flow user: In charge of correctly entering the information in the Excel file.
- Power Automate Administrator: Responsible for monitoring the operation of the flow and in case of finding errors, fixing them.
Related Documents
- Microsoft Excel file.
- User guide for the flow in Power Automate.
Content
Power Automate is a platform that allows the automation of repetitive tasks through the creation of flows, which is a sequence of steps where different applications and services can be connected to each other, in order to perform certain specific automated actions.
The Create Reminders Individually in the Calendar from an Excel flow was designed in order to automate and simplify the process of scheduling events, it connects to Excel and Outlook, allowing each row added to the file to generate (through the activation of a button) an event in the calendar, including the necessary details and the corresponding attendees.
It is essential to create the Excel table beforehand, since the flow starts from the values added in this table, also for several key reasons related to the connectivity, structure and configuration of the flow; for this particular flow the Excel table was created with the following columns:
- ID
- Event
- Customer
- City
- NIT
- Description
- Date
- Start time
- End Time
- Assistant1
- Assistant2
- Assistant3
- Assistant4
- Assistant5
It is crucial that the Excel created is in table format as shown below (img1) as this allows the flow to be more flexible and dynamic.
 img.1
img.1
Initially we must access Power Automate, click on the “Create” option and then on “Instant cloud flow” since this type of flow is activated manually by means of a button. (Img.2)
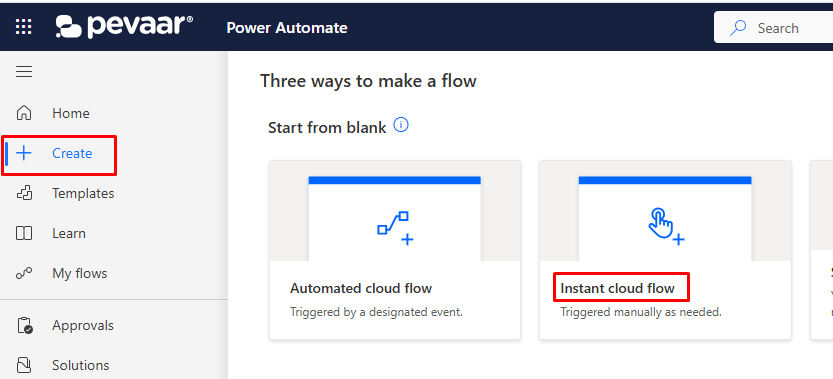
img.2
Then we must assign a name to the flow (this name must be concise to identify the flow easily) select trigger “Manually trigger a flow”. (Img.3)
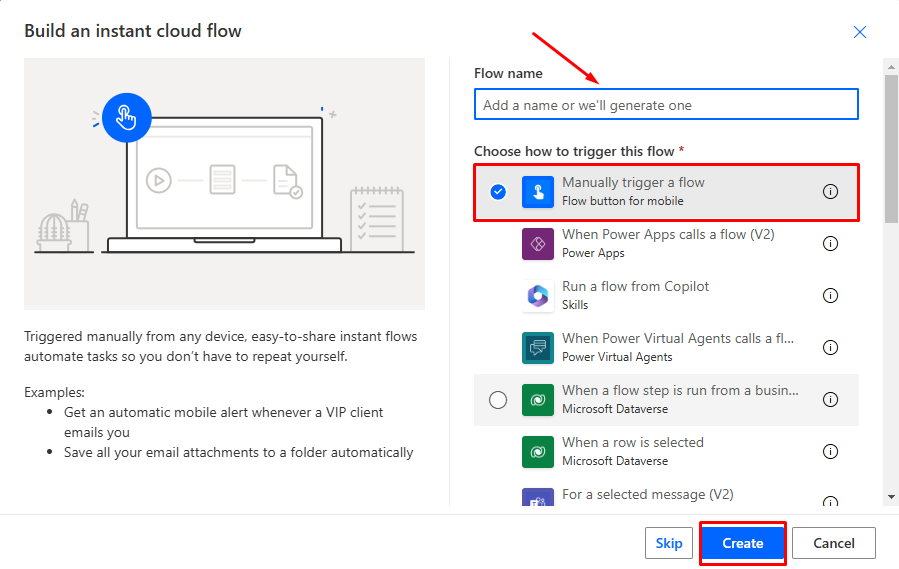
img.3
The flow and its connections will be detailed below:
Once we are in the interface to create the flow, we continue to add a new action from the “+” icon. As the data starts from an Excel file, then that will be what we will put in the search engine and after that, we will click on the “See more” option to display all the actions that we have available in this Microsoft Excel connection. (img.4)
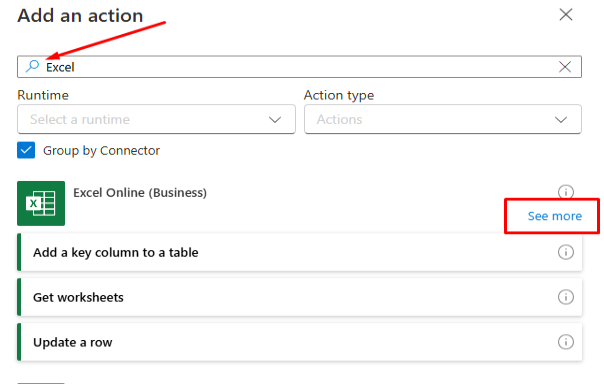
Img.4
We will select the action “List rows present in a table”, this action is used to retrieve rows from a table in an Excel site, which will allow us to obtain specific data to use in other actions of the flow. (img.5)
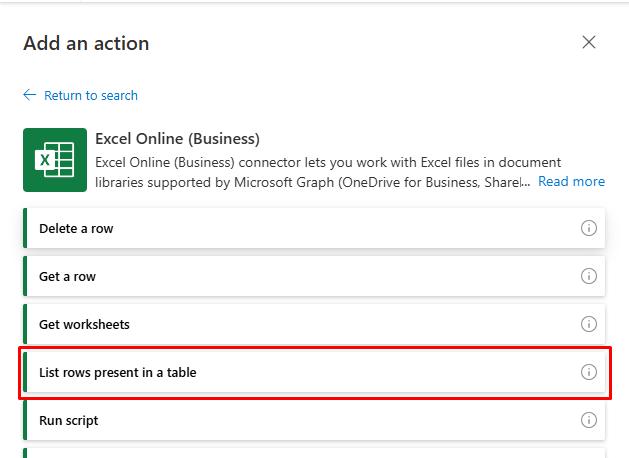
img.5
Once we select the action we can add the corresponding data such as the location of the file, document type, file, and table. We will also click on the “Show all” option to add some parameters. (img.6)
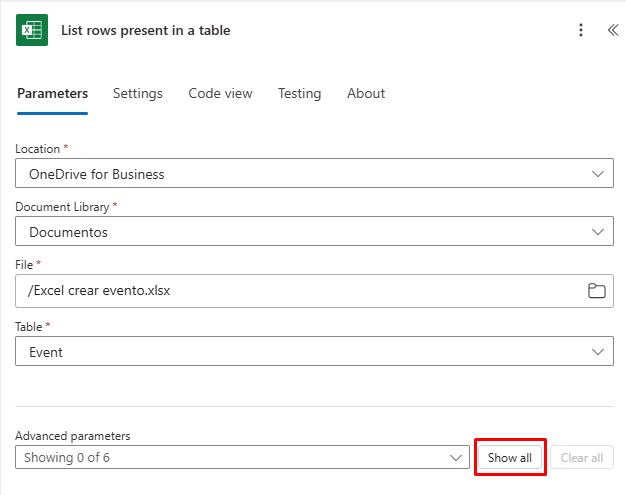
img.6
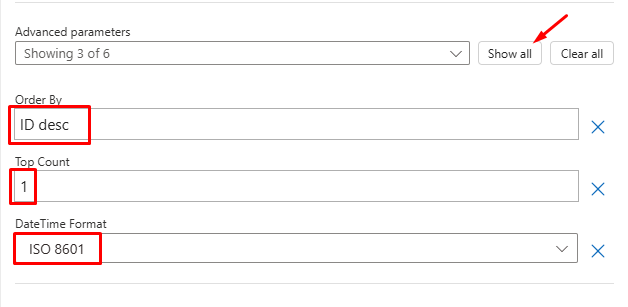
From the list of additional parameters displayed, we will use only the following: “DateTime Format”, “Order By” and “Top Count” adding the values shown in the image (img.7)

img.7
The “Order By” action allows us to specify the order in which the table rows will be returned, while “Top Count” is responsible for limiting the number of rows we want to recover, which in this case is 1 row.
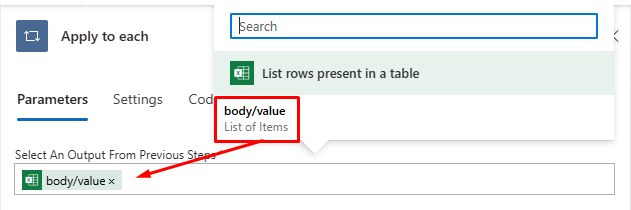
We continue to add a new action to our flow. Click the ‘+’ icon and in the search bar we write the action “Apply to each” that allows us to iterate on each row of our Excel list, in the parameters we will add with dynamic content “body/value” as shown below. (img.7)
img.7
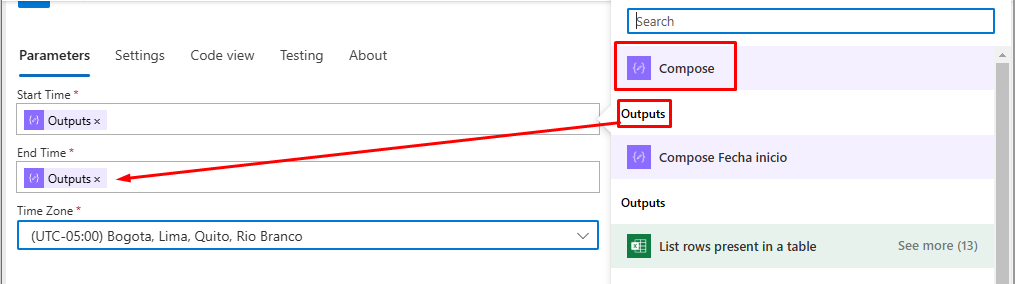
The next action that is added to the flow within the “Apply to each” is a Compose, which we will rename it “Compose Start Date” in order to identify its function within the flow.
Here we will add this expression which will concatenate the date with the start time of our Excel table (img.8):
concat(formatDateTime(items(‘Apply_to_each’)?[‘ Fecha’], ‘yyyy-MM-dd’), ‘T’, formatDateTime(items(‘Apply_to_each’)?[‘ Hora Inicio’], ‘HH:mm:ss’), ‘-05:00’)
img.13
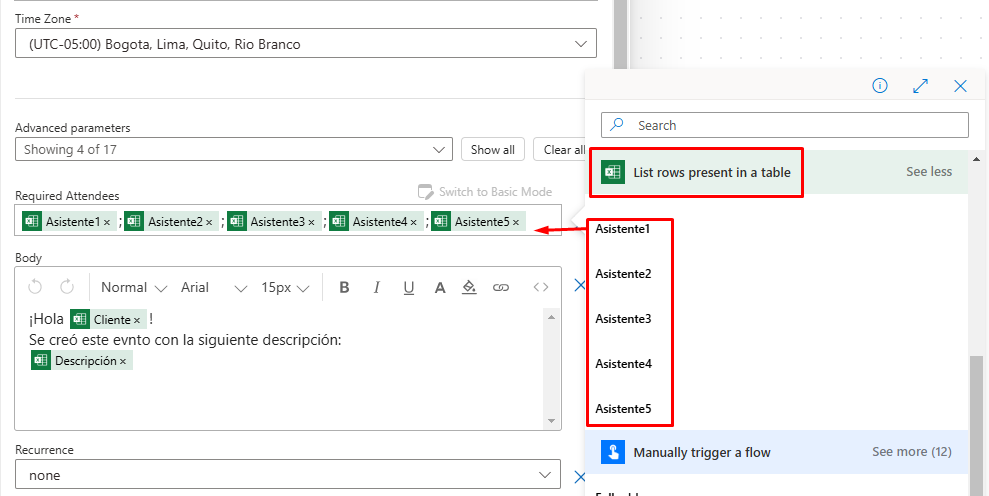
We add the required attendees to the event in the “Required Attendees” parameter, these are the attendees that we have in our Excel table therefore we will add them with the dynamic content of “List rows present in a table”.
We need to make sure that each dynamic content added in this parameter is separated by semicolons (;) since this is the correct way to concatenate the dynamic content, and that there are no problems in the flow. (img.14)
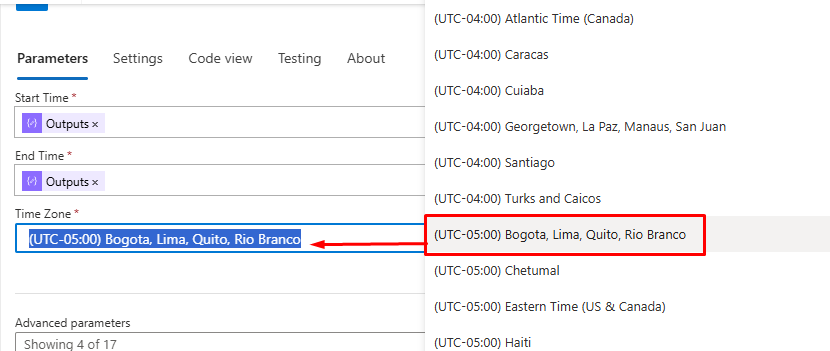
img.14
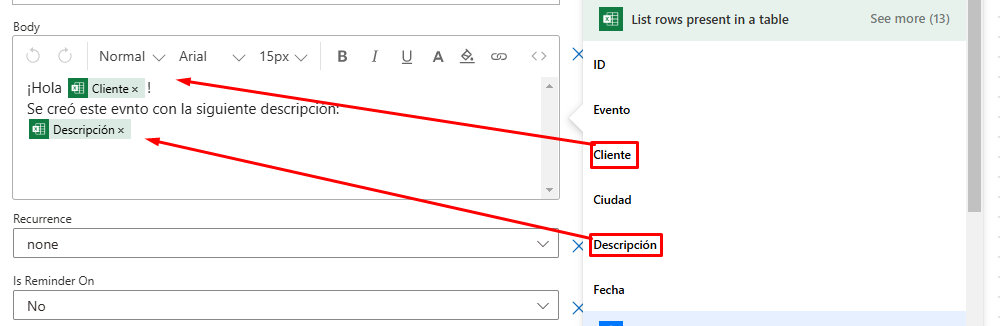
Finally, we will structure the body with text and dynamic content as we saw above. Again, the dynamic content will be taken from “List rows present in a table” (img.15)
img.15
With the steps executed you will have the flow structured as follows: (img.16)
 img.16
Save the flow, run a test by adding values to the Excel table, executes the flow and ensures that the events are created correctly in the calendar to ensure correct operation.
Optimize Your Business with Business Process Automation Solutions with Pevaar
At Pevaar, we are specialists in custom software and development, as well as staffing services for companies looking to improve their operational efficiency through technology. Business process automation solutions are essential for streamlining repetitive tasks, reducing human error, and improving team productivity.
Automating your Outlook calendar from Excel with Power Automate is just one example of how automation solutions can transform event and reminder management in any organization. By reducing manual intervention and ensuring real-time information synchronization, your business can focus on strategic activities that drive growth.
At Pevaar, we offer innovative tools and technology development services for your company to implement the best business process automation solutions tailored to your needs. If you are looking to optimize your workflow, improve time management and boost your team’s productivity, contact us today and find out how we can help you transform your business with custom technology. Automate with Pevaar and elevate your company to the next level!


Comments (2)
This is a great use case for Power Automate, but I’m curious about its scalability for larger teams or organizations with more complex workflows. Has anyone implemented it in a more dynamic setting?
Thanks for your question! Power Automate is very scalable, and many large teams are using it to automate complex processes. If you’re interested, we can share specific use cases or resources to implement in more dynamic scenarios. Would you like to explore this further?