
Automate Reminder Emails and Streamline Request Management
Why Automate Reminder Emails?
In daily HR operations, approval flows can easily stall due to lack of follow-up or forgotten requests.
That’s where automation comes in.
With the flow “Send reminder emails to the immediate supervisor when no response has been given to a request”, you ensure every request gets the attention it deserves, improving efficiency and internal communication.
Connecting the Tools: Forms, Approvals, and Outlook
This flow was built in Power Automate, which connects apps and services to execute automated tasks.
In this case, it integrates:
- Forms – to receive leave requests.
- Approvals – to manage the approval workflow.
- Outlook – to send automated reminder emails.
Step-by-Step Flow Setup
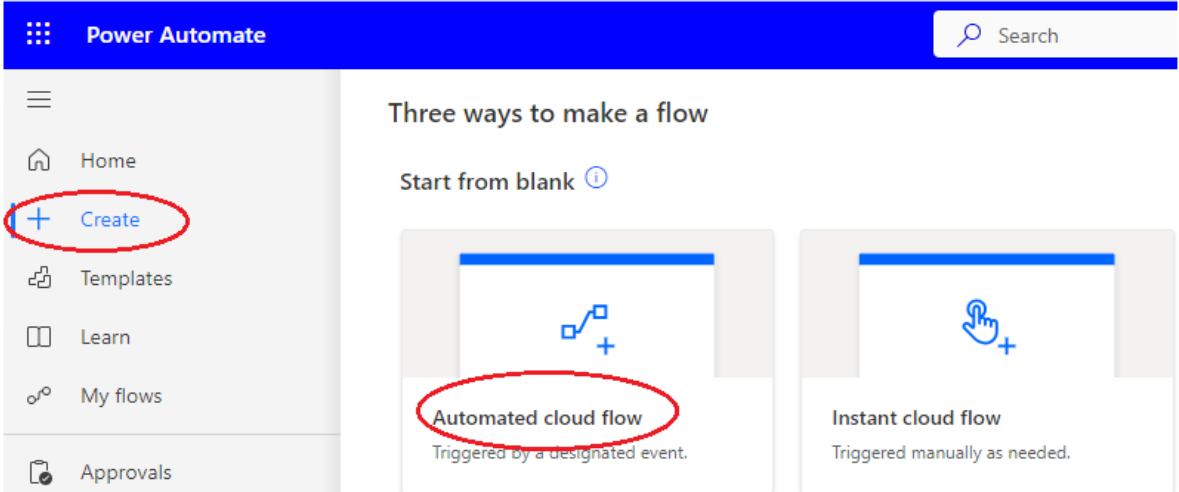
1) Access And Create The Flow
- Open Power Automate.
- Click Create → Automated cloud flow.
- Image 1 should show the Create button and the Automated cloud flow option selected.
Img.1
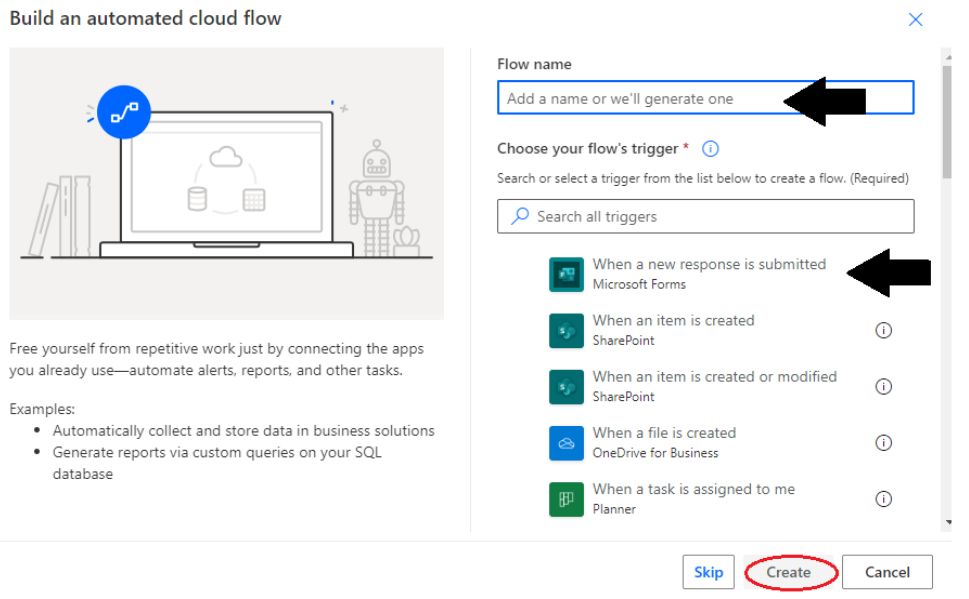
2) Name The Flow And Select Trigger
- Give a descriptive name.
- Choose the trigger When a new response is submitted (Forms).
- (Image 2) shows the naming and trigger selection screen.
Img.2
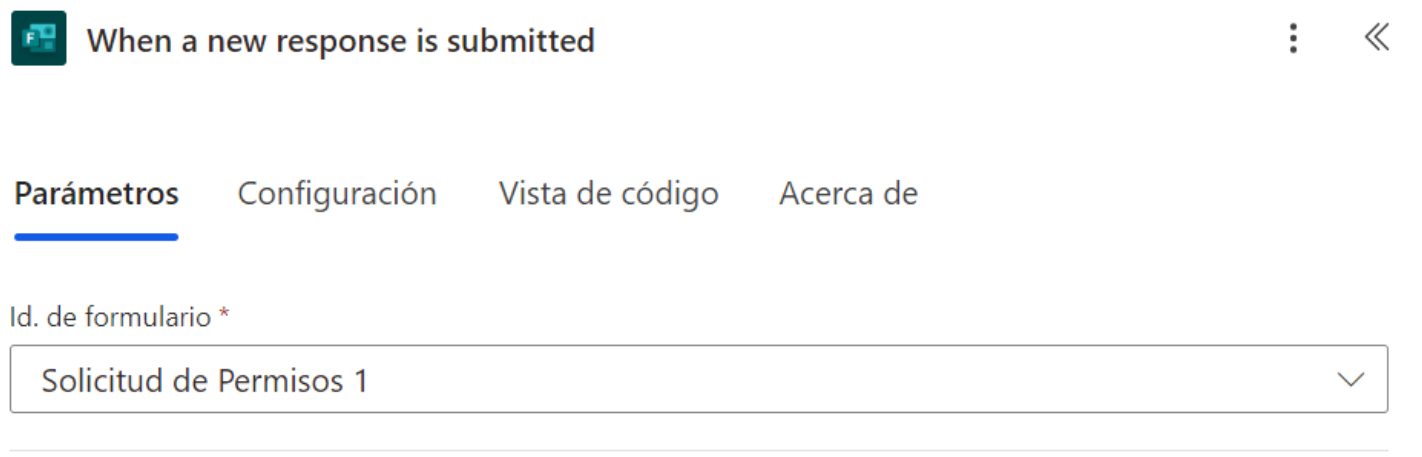
3) Select Form Id
- In the trigger, open Form Id and choose Leave Request 1 (or your form).
- (Image 3) displays the list of forms and the selected Form Id.
Img.3
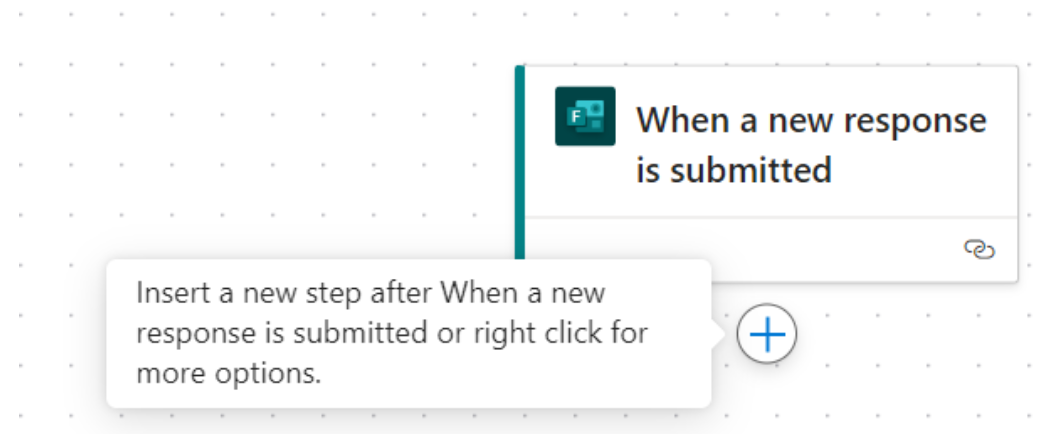
4) Add New Action (+)
- Each time you add an action, click + (Add an action).
- (Image 4) should capture the moment right after clicking +.
Img.4
5) Search For The Action
- In the search box type Forms and pick the appropriate action.
- (Image 5) shows the search bar and Forms options.
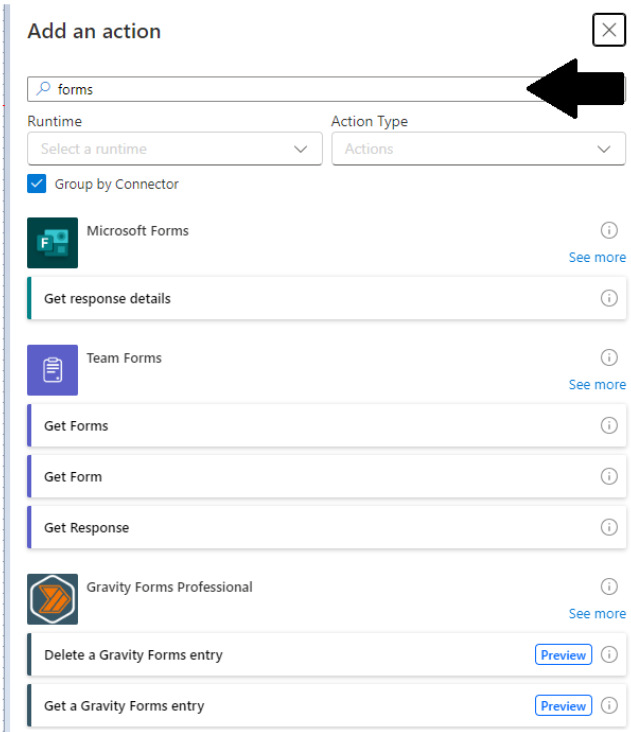
Img.5
6) Get Response Details — Get Response Details
- Add Get response details.
- Set Form Id to the leave request form and use Response Id (dynamic content).
- (Image 6) shows the action configured.
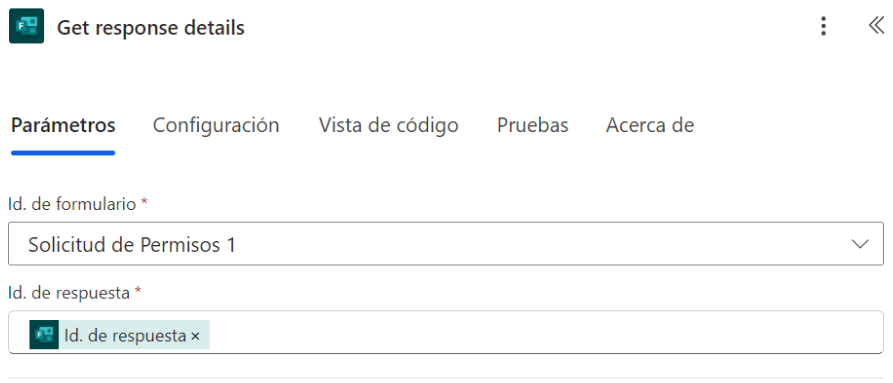
Img.6
7) Initialize Boolean Status Variable
- Add Initialize variable:
- Name: responseStatus (or similar).
- Type: Boolean.
- Initial value: false.
- (Image 7) displays the variable configuration.
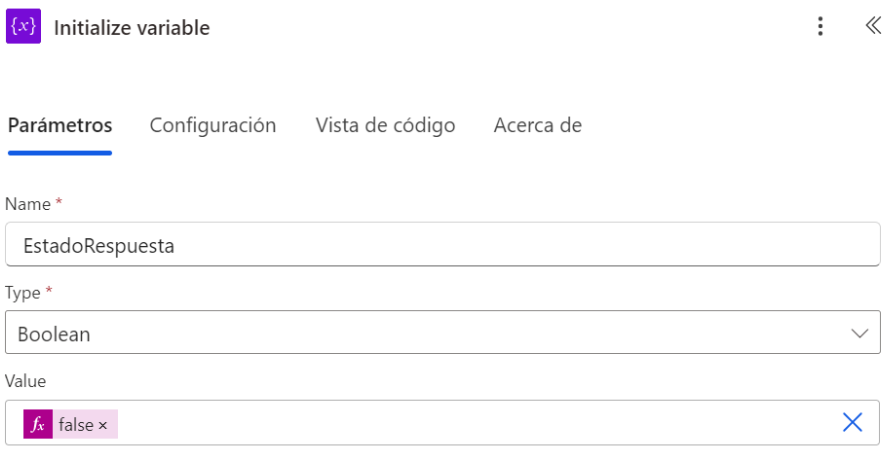
Img.7
8) Store Start Date (Compose)
- Add Compose for the start date using expression:
formatDateTime(outputs('Get_response_details')?['body/rb5d86af2b03b4a4187d072f87a4f4d3b'], 'dd/MM/yyyy')
(field id may differ in your environment)
- (Image 8) shows the Compose with the expression.
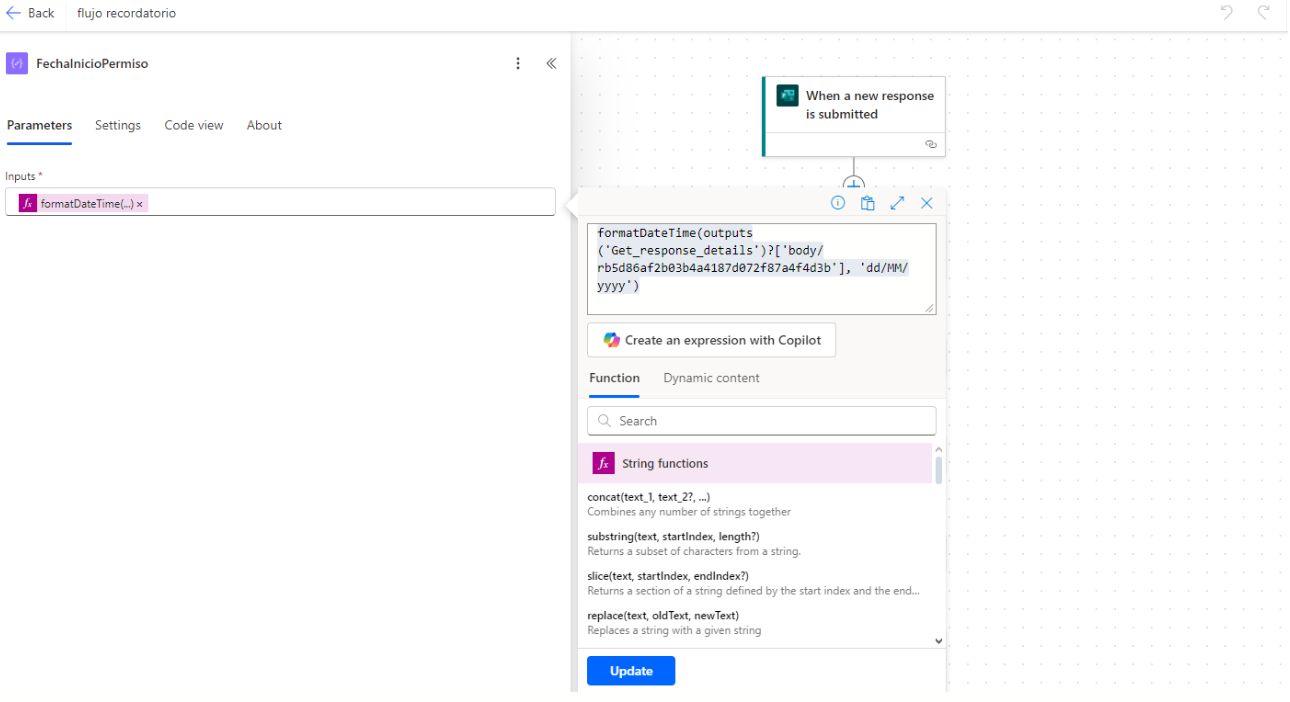
Img.8
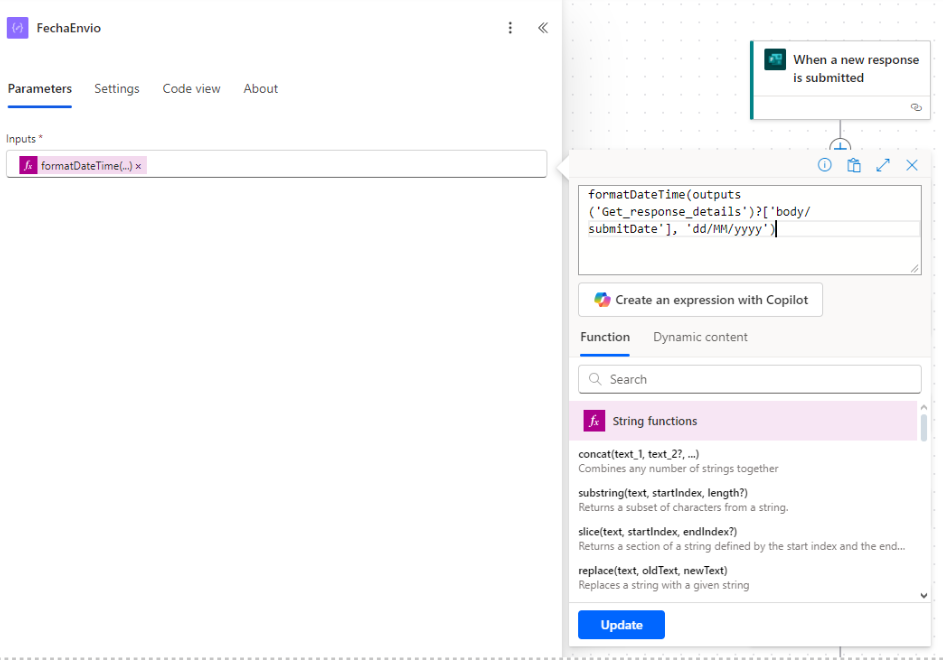
9) Store Submission Date (Compose)
- Add Compose with:
formatDateTime(outputs('Get_response_details')?['body/submitDate'], 'dd/MM/yyyy')
- (Image 9) displays this Compose action.
Img.9
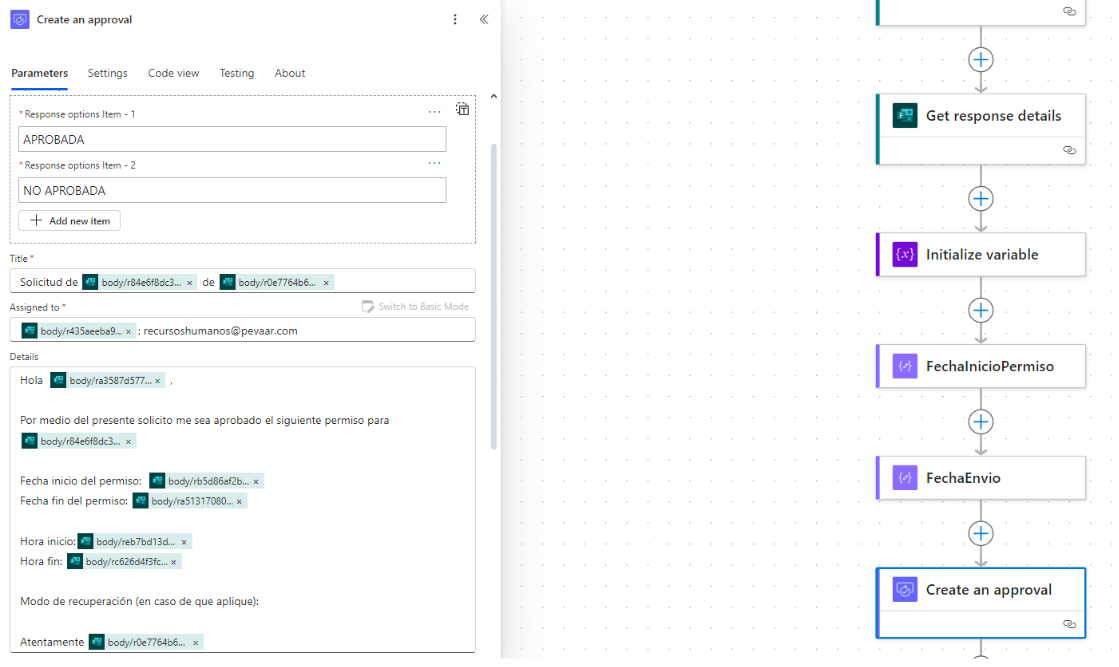
10) Create An Approval — Create An Approval
- Add Create an approval:
- Type: Custom Responses – wait for all responses.
- Custom options: APPROVED, NOT APPROVED.
- Title, Assigned to (HR email), Details (dynamic content).
- (Image 10) shows the approval action configured.
Img.10
11) Parallel Branching: Wait For An Approval + Set Variable + Condition
- Create parallel branches to handle approval waiting and reminder sequences. (Image 11) visualizes the parallel branches.
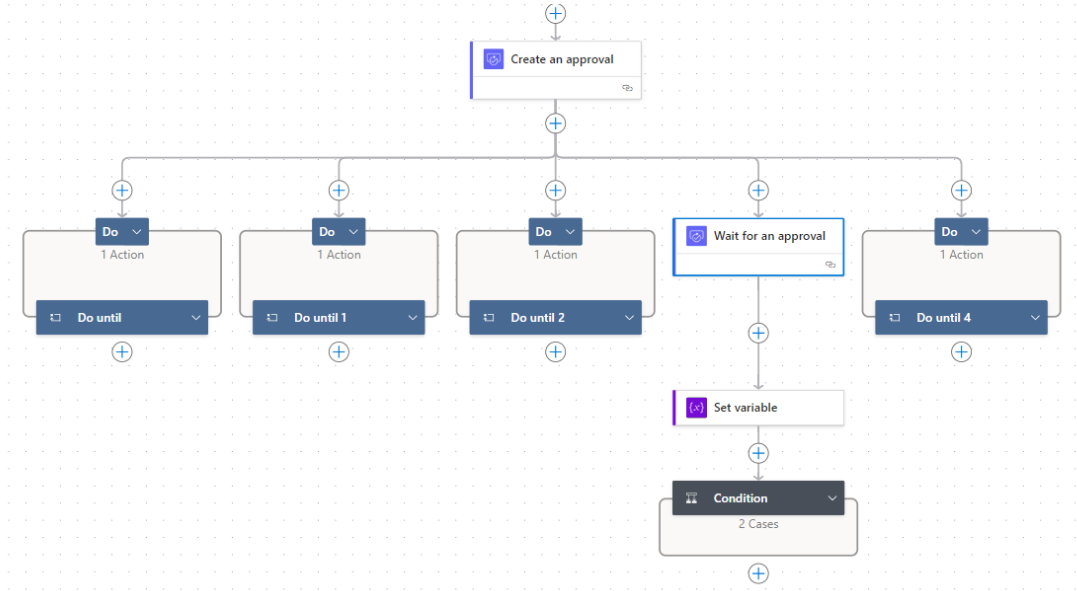
Img.11
11.1) Wait For An Approval Linked To Approval Id
- Add Wait for an approval and use Approval Id from Create an approval.
- (Image 12) shows the action with the linked id.
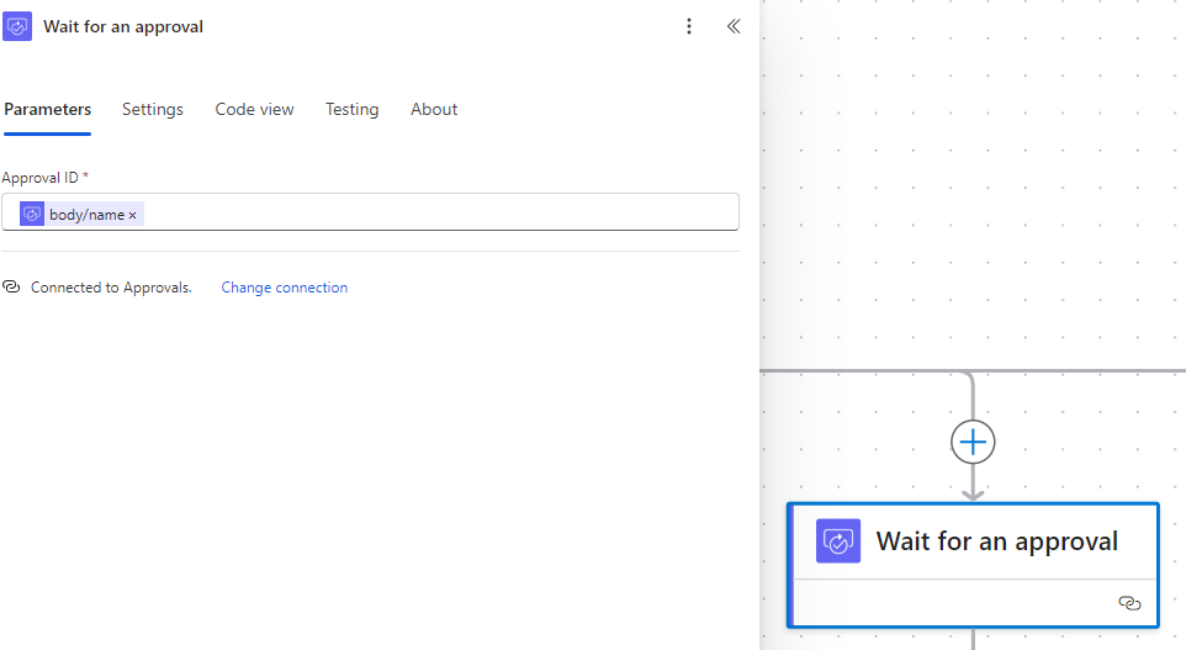
Img.12
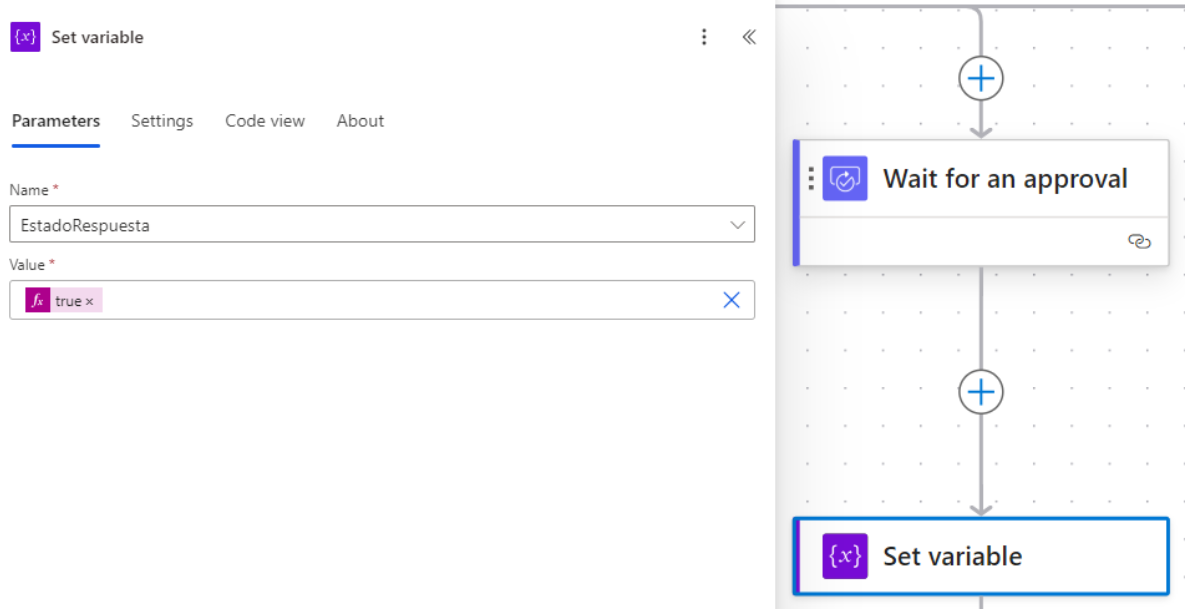
11.1.1) Set Variable To True When There’s A Response
- In the Wait branch add Set variable to change responseStatus to true upon receiving a response.
- (Image 13) depicts the Set variable action.
Img.13
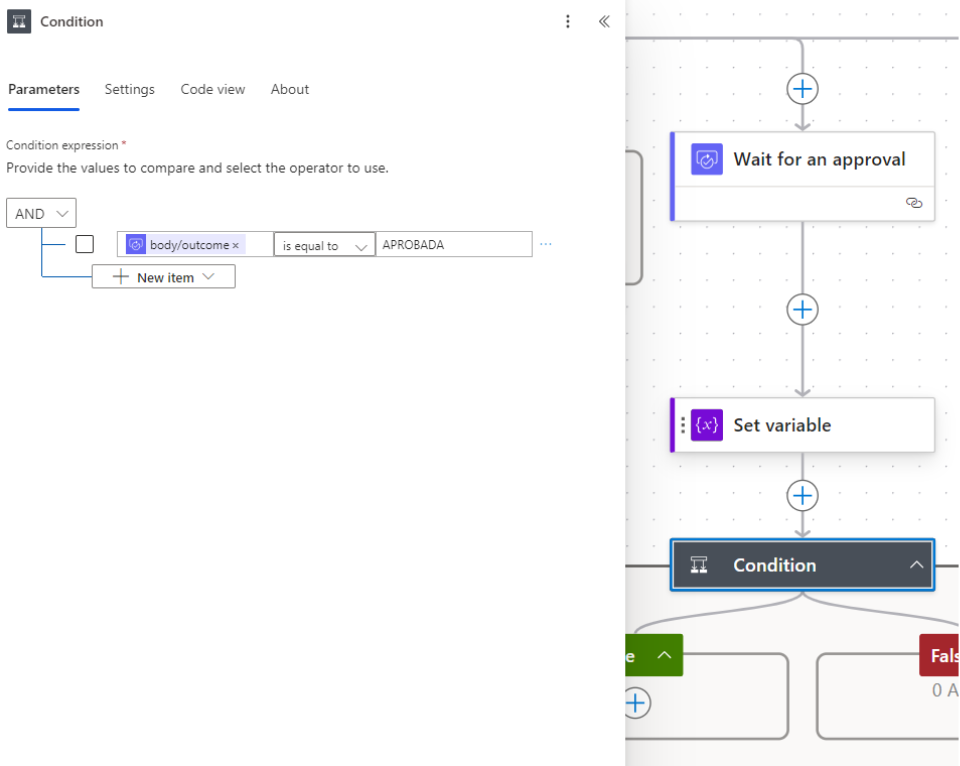
11.1.2) Condition To Check If Result Is APPROVED
- Add a Condition that checks if approval result equals APPROVED.
- If true → continue approval process (update records, notify requester).
- If false → handle denial accordingly.
- (Image 14) shows the condition with the true path.
Img.14
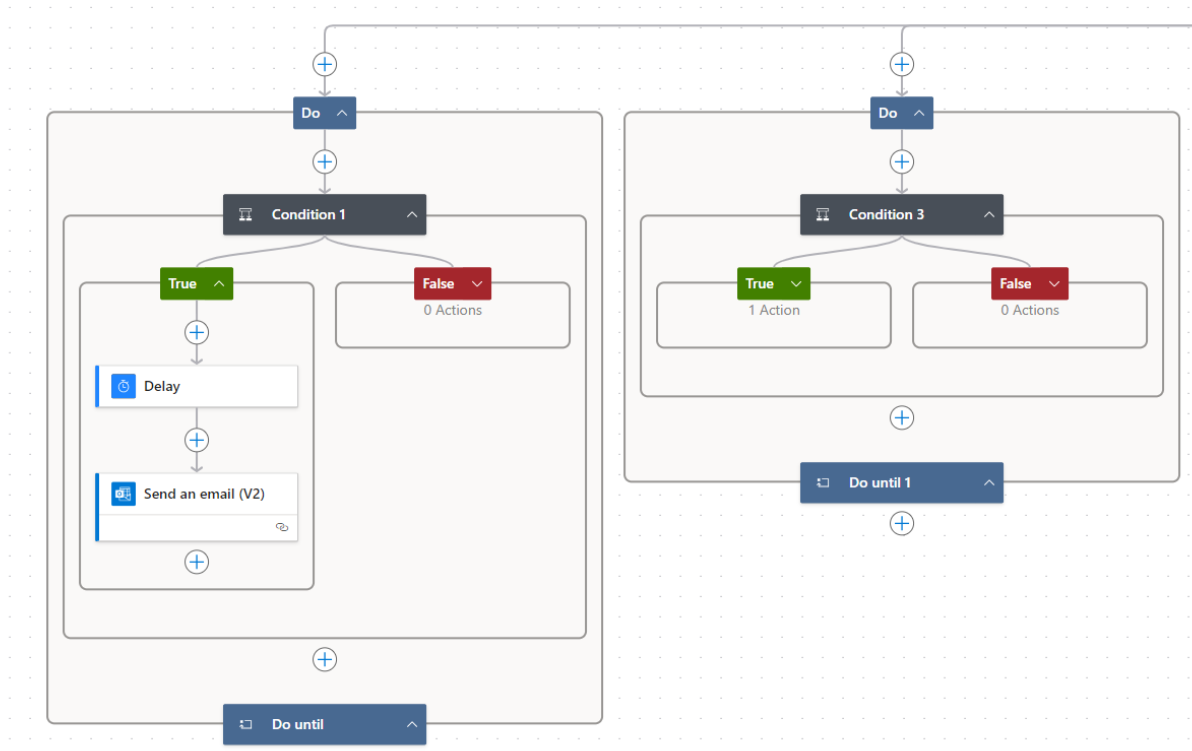
12) Configure The 3 Do Until Reminder Types
- In parallel to the Wait add three Do until branches for the different Reminder Emails. (Image11 shows the 3 parallel branches).
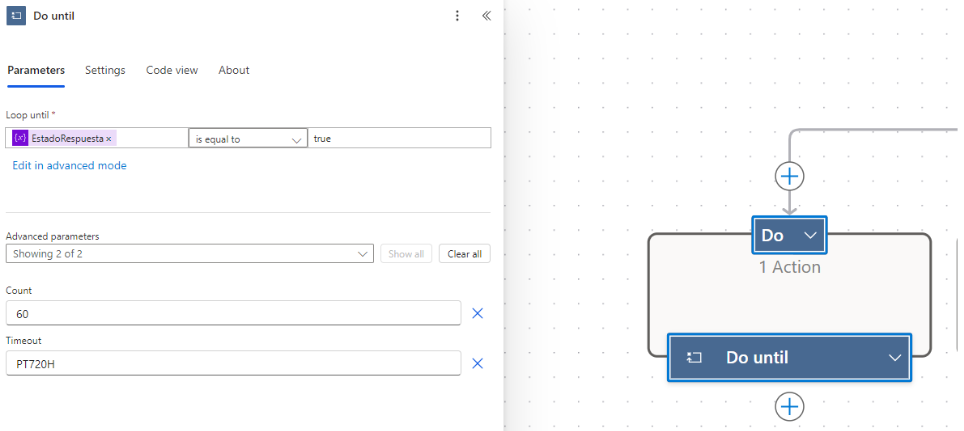
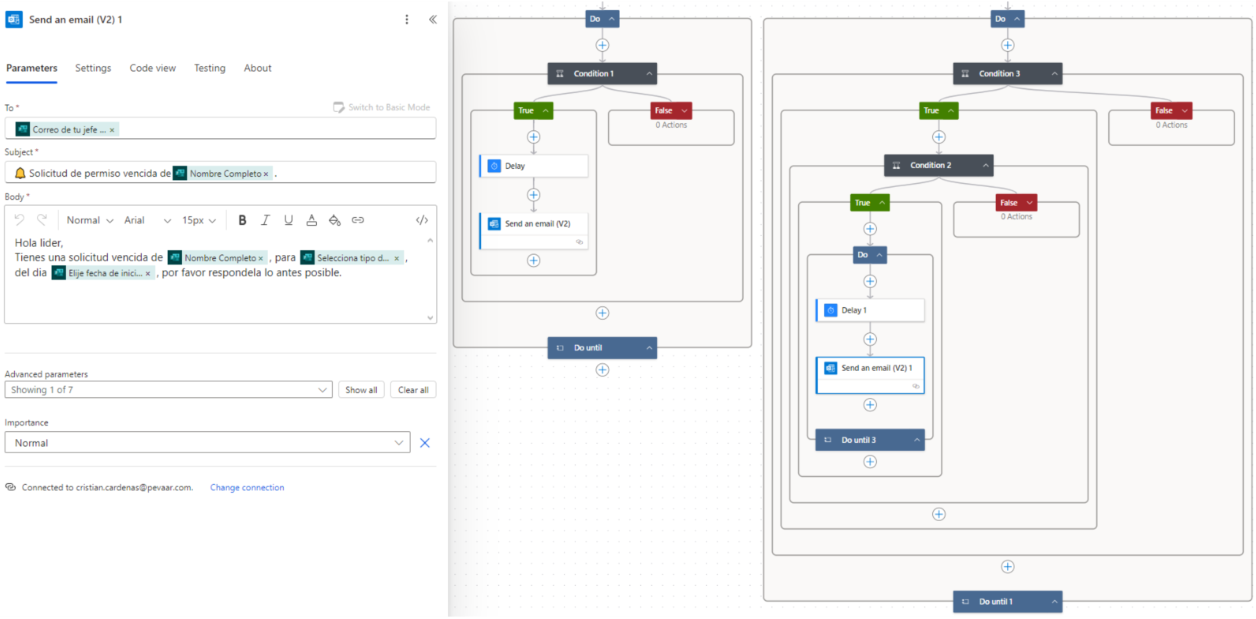
12.1) Every-3-Days Reminder
- Do until condition: responseStatus is equal to true.
- Set Timeout to PT720H (30 days). (Image 15 shows the Timeout adjustment.).
Img.15
- Inside Do until add a Condition to ensure responseStatus is still false.
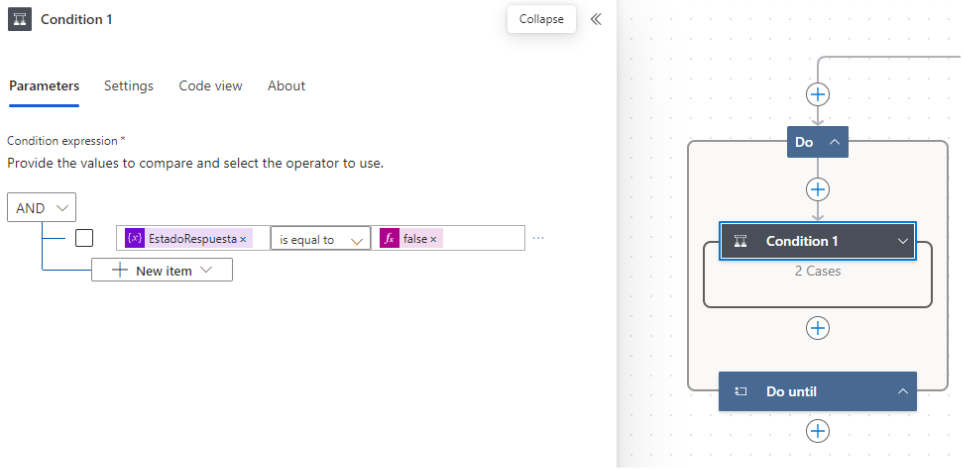
Img.16
- If false: add a Delay of 3 days.
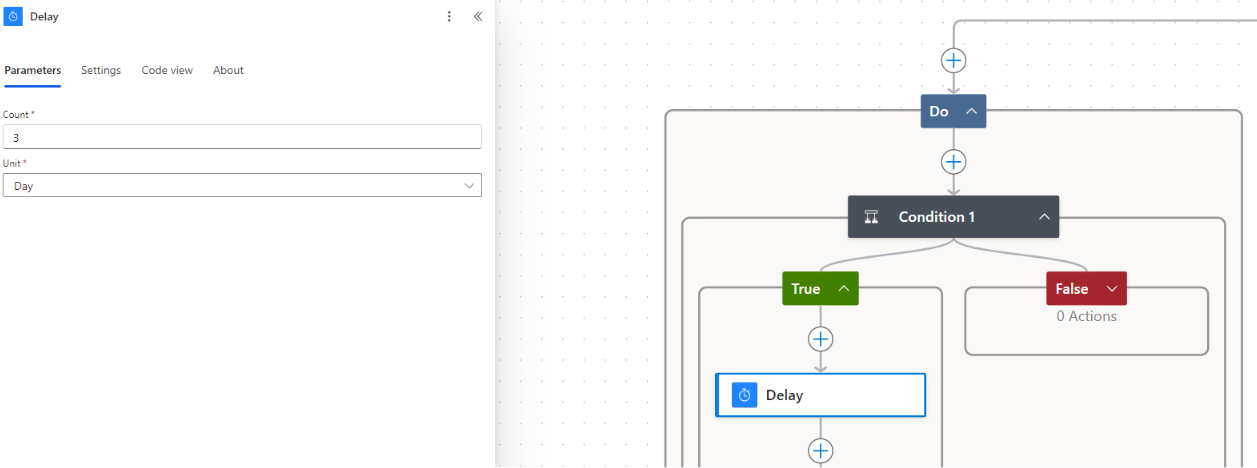
Img.17
- After delay, Send an email (V2) to the immediate supervisor using dynamic email content. The body must be clear and include a link to the application. (Image 18 will show the configured email).
- Loop until responseStatus = true or Timeout reached.
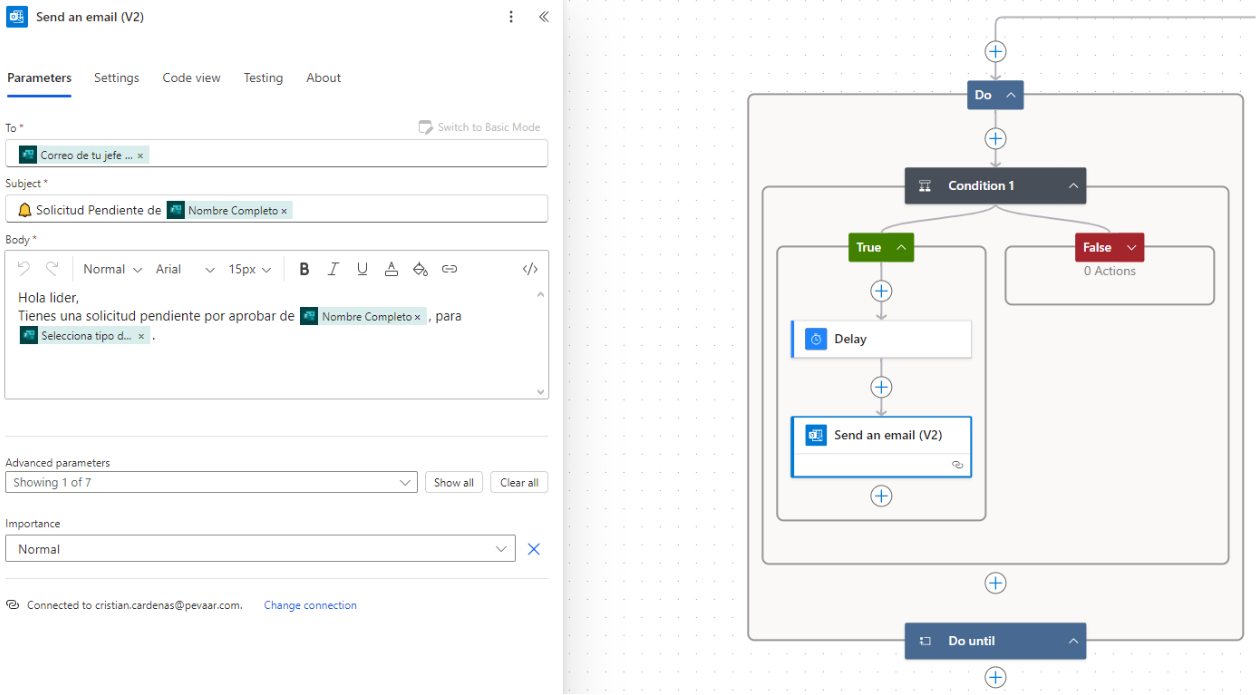
Img.18
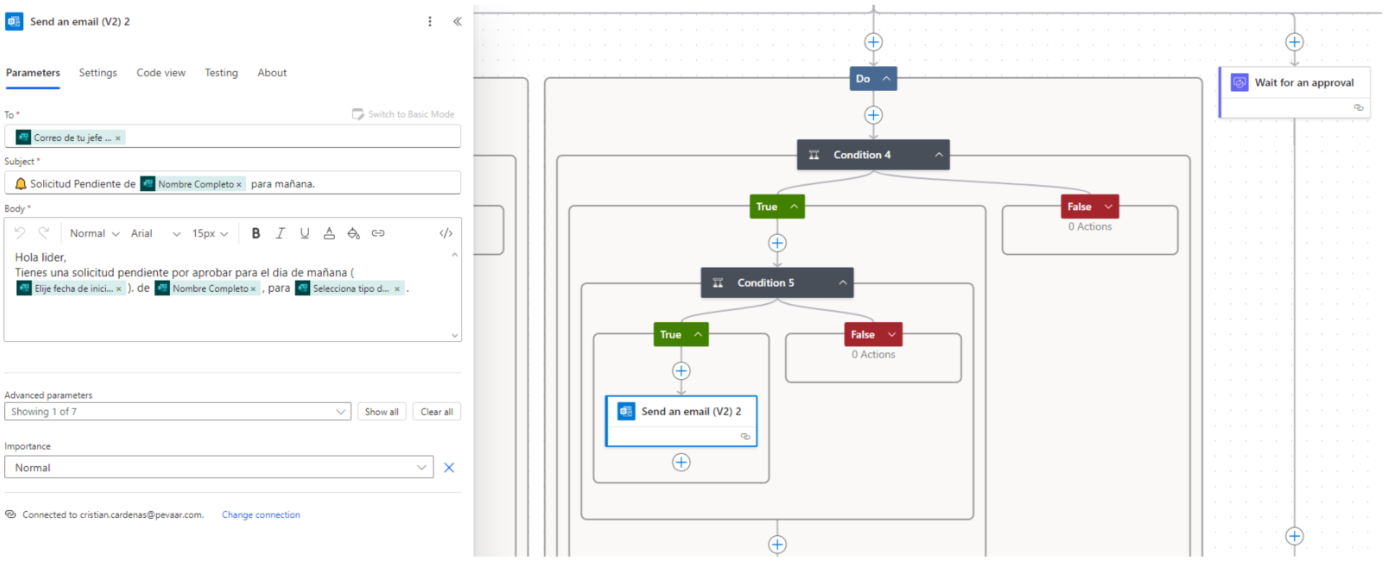
12.2) One-Day-Before-Start Reminder
- Create another Do Until with the same logic (condition on responseState, Timeout PT720H).
Img.19
- Add Condition comparing the start-date compose to today:
formatDateTime(utcNow(),'dd/MM/yyyy')
(Image 20 It will show the condition using that comparison).
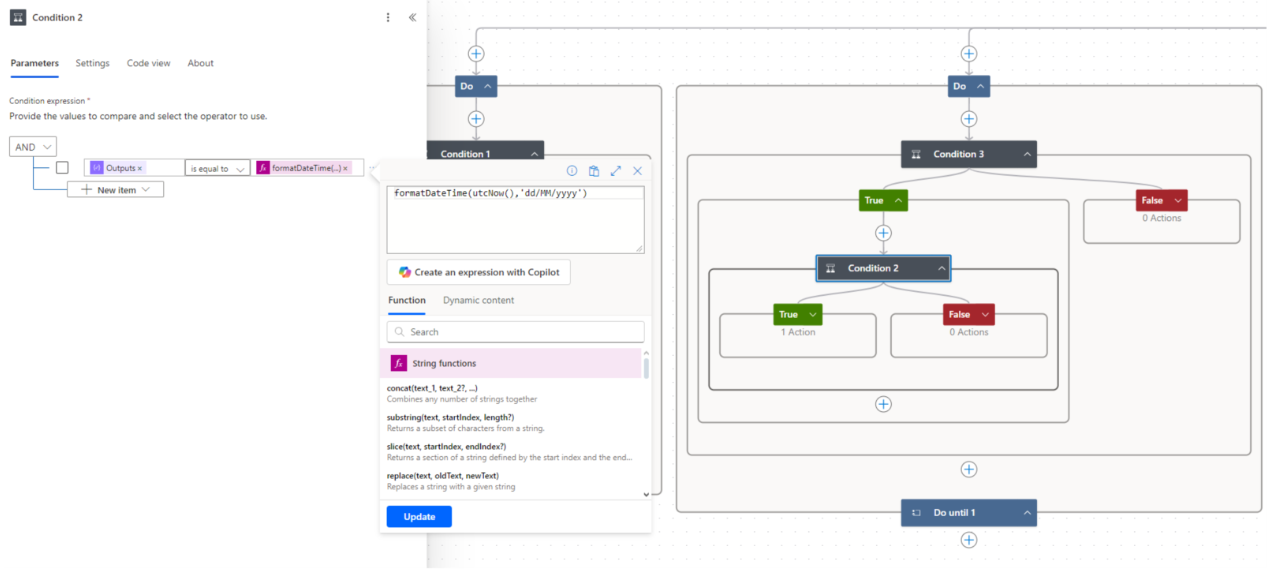
Img.20
- If the condition indicates that today is the target date, perform a 1-day Delay (Image 21) and then a Send an email (V2) similar to the previous one, indicating the reminder ‘1 day until the start of the leave’.
Img.21
12.3) Daily-After-Start Reminder
- Third Do until with the same termination condition by response state.

Img.22
- Add a Condition that compares the start date compose with formatDateTime(addDays(utcNow(), 1), ‘dd/MM/yyyy’) to detect if today is the day after the start.
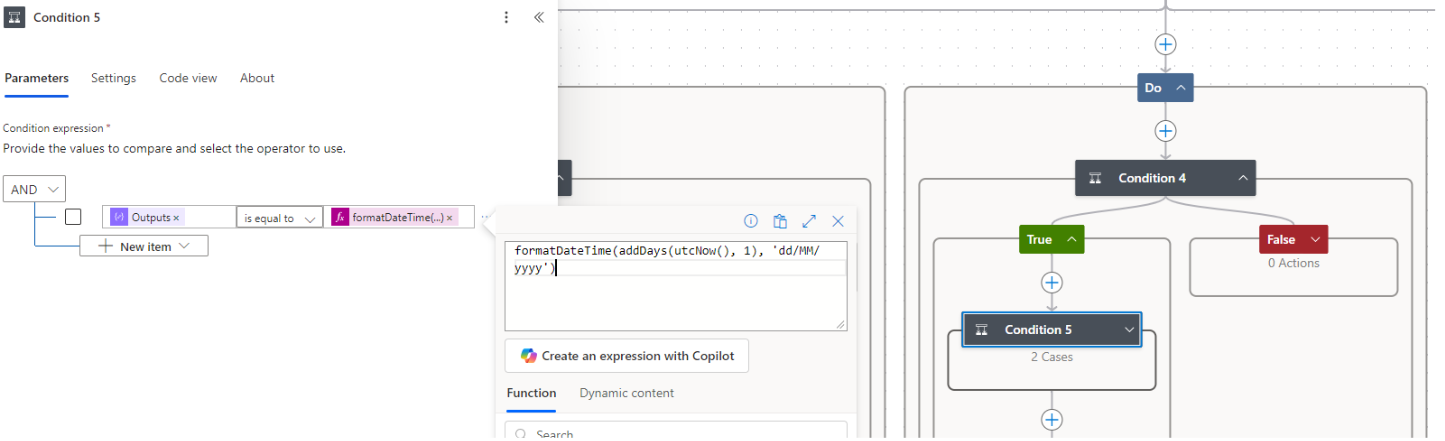
Img.23
- If true, Send an email (V2) to the supervisor (Image 24).
Img.24
- Add an outer Delay of 2 days to space notifications
- This pattern will achieve subsequent daily emails as needed.
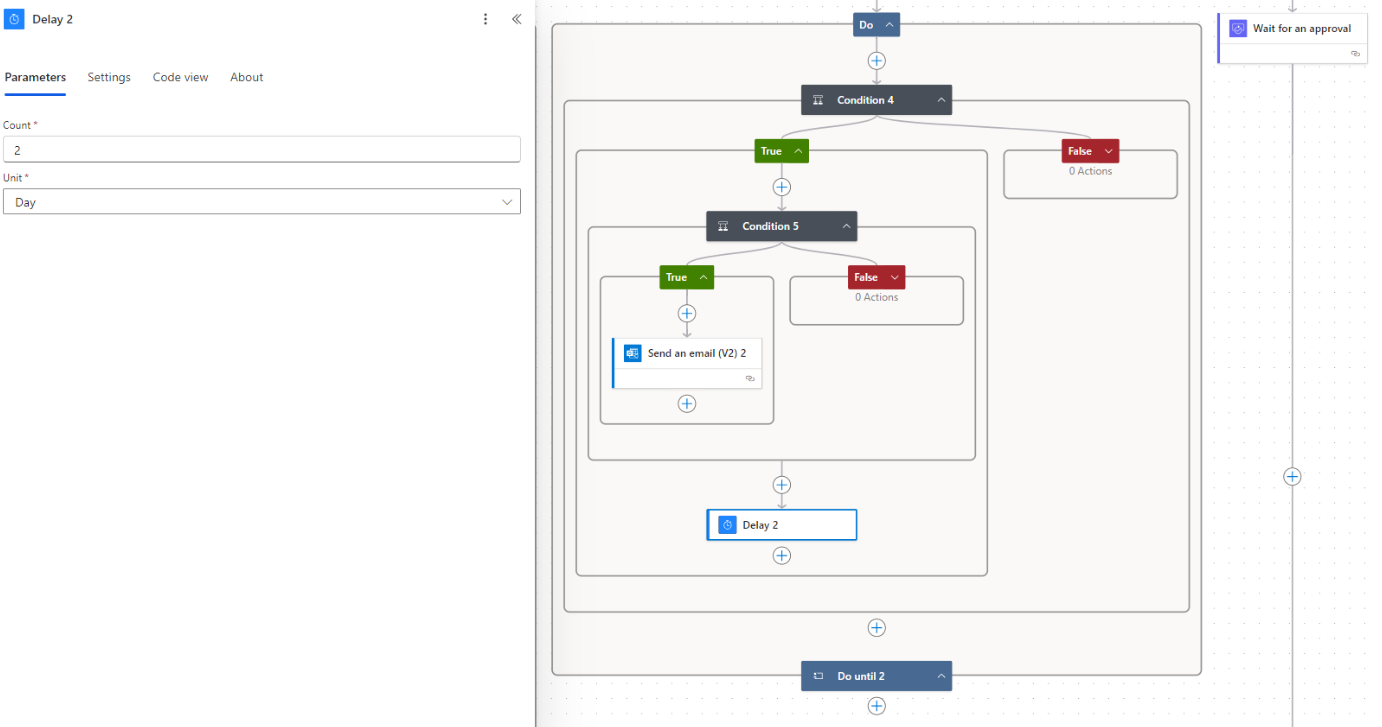
Img.25
13) Notify Requester After 30 Days Of No Response
- Add another Do until branch for notifying the requester.
Img.26
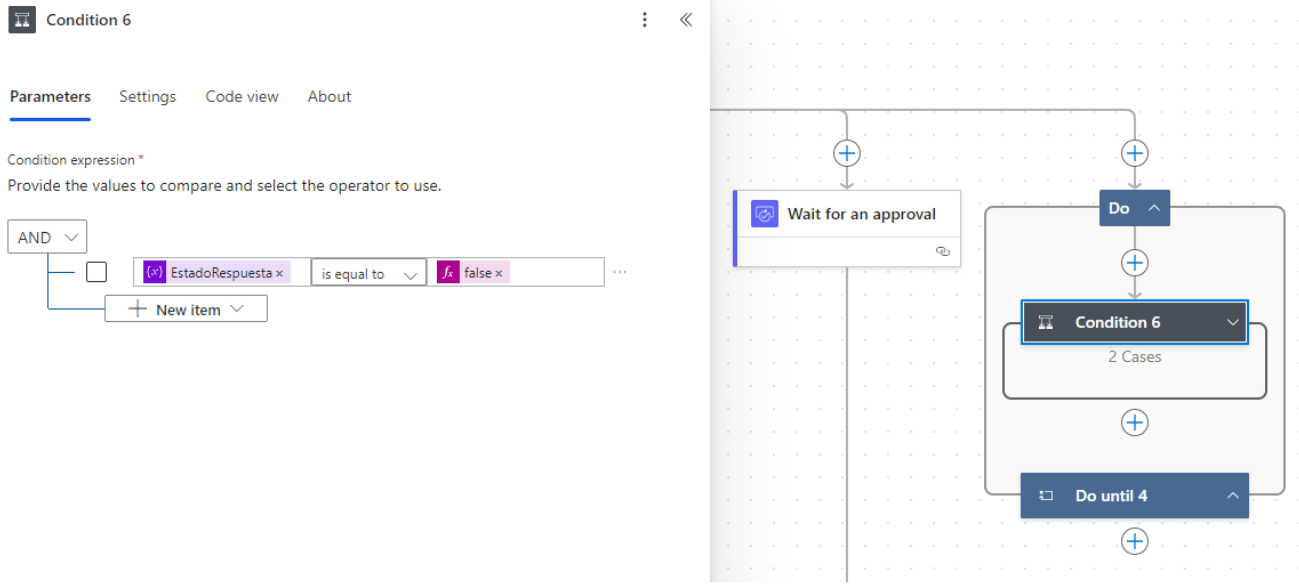
- Use condition:
formatDateTime(addDays(outputs('Get_response_details')?['body/submitDate'], 29), 'dd/MM/yyyy')
If this is true (that is, 29 days have passed since the submission), the route is activated
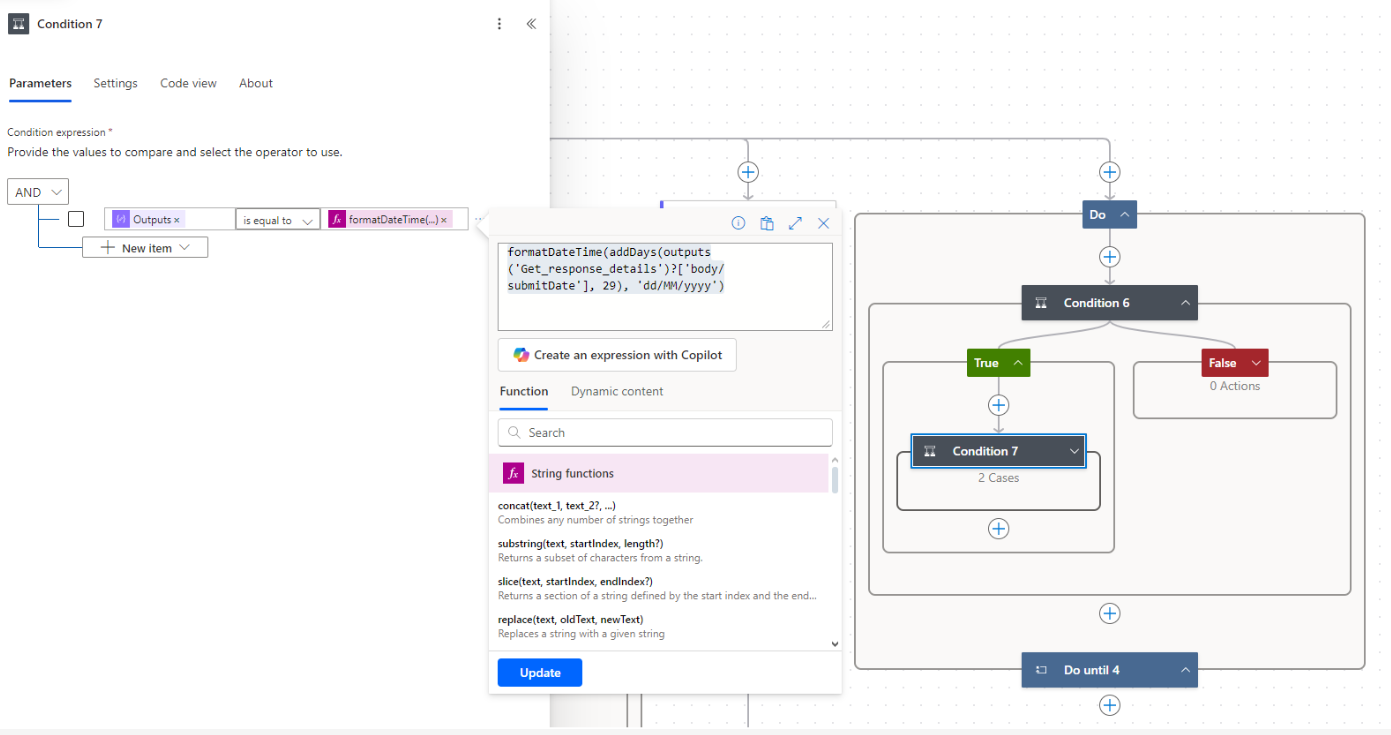
Img.27
- Add Delay of 20 hours – as expected before the final shipment.
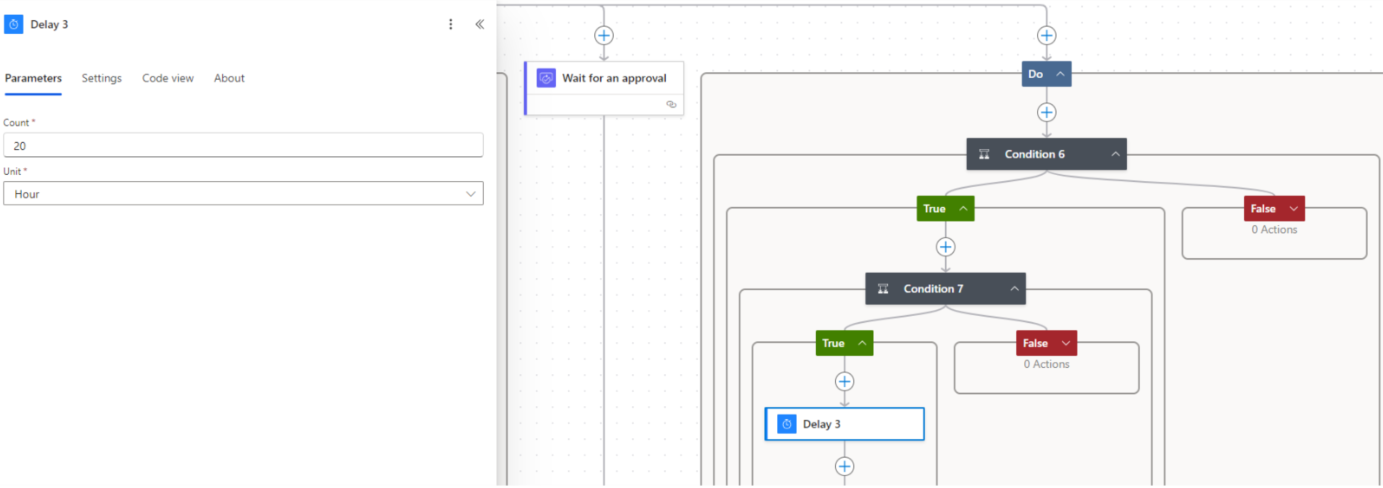
Img.28
- Then, a Send an email (V2) to the applicant’s email informing them that there was no response and suggesting to resend the request if it is still needed. (Image 29 will show the final email).
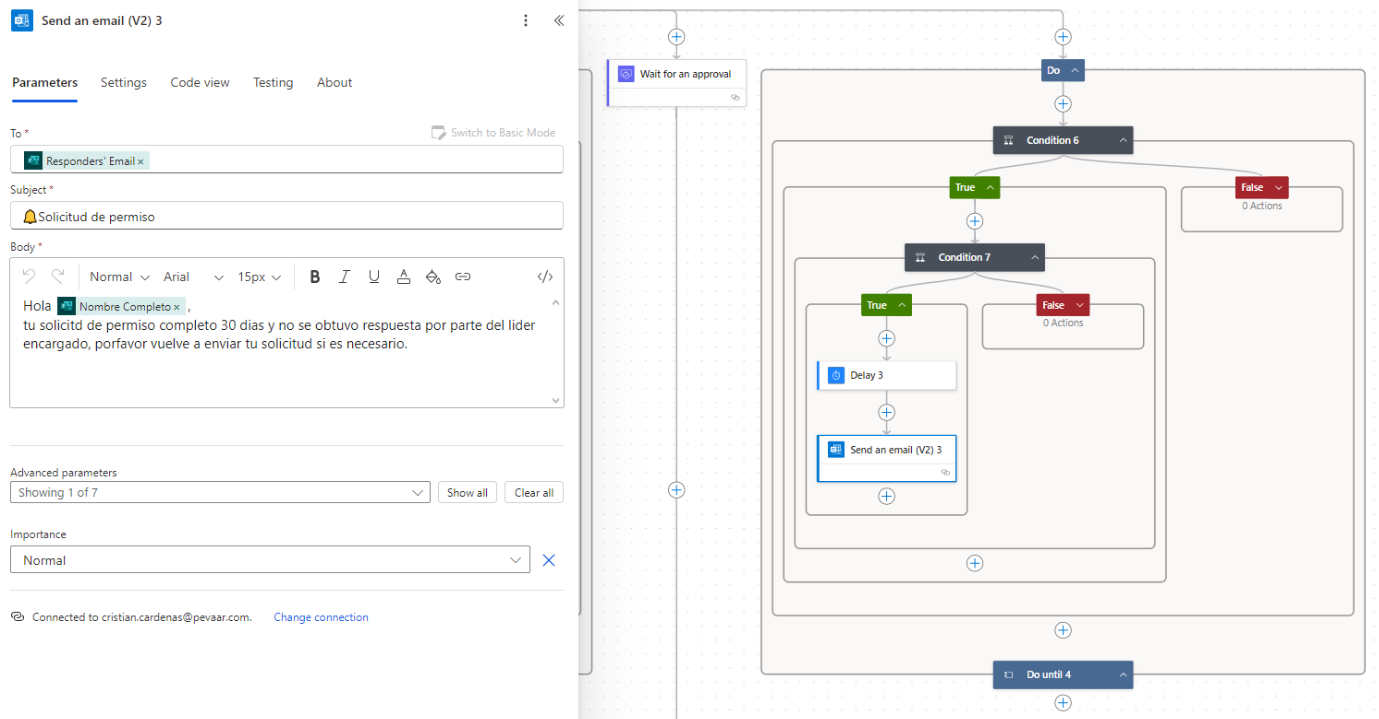
Img.29
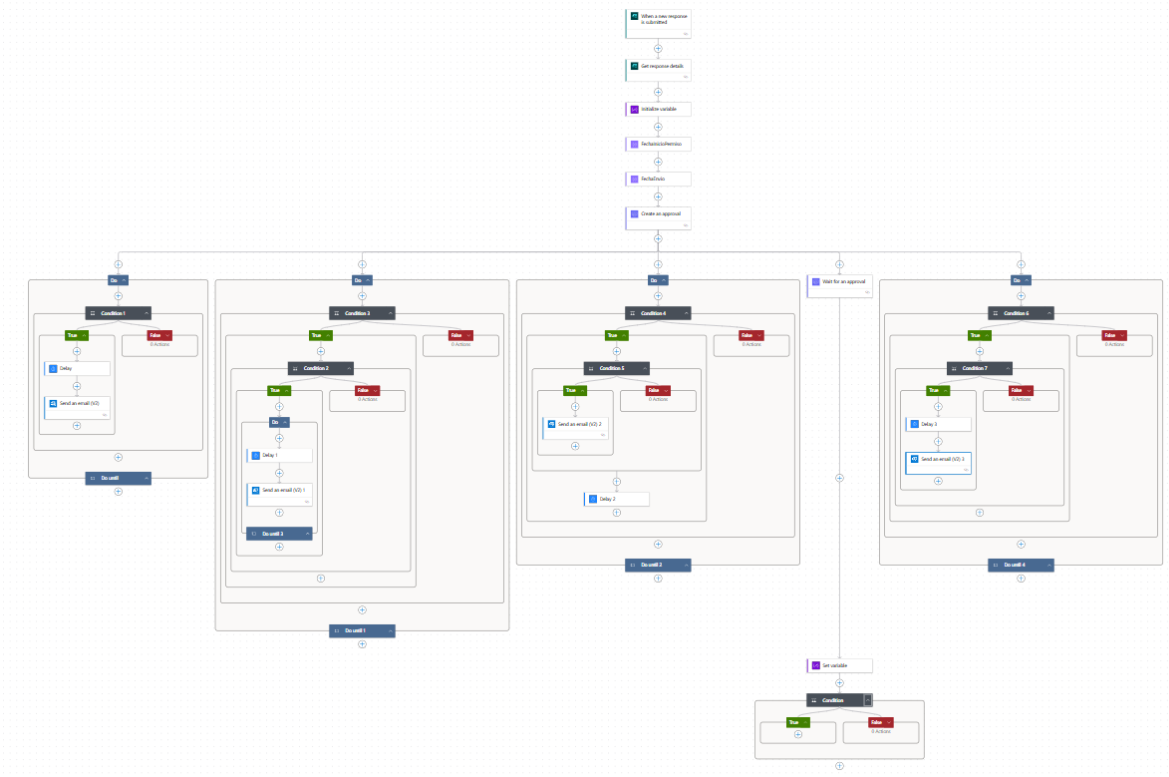
14) Final Flow Diagram
- In the blog include (Image 30), the full diagram: trigger → Get response details → variable → create approval → wait → set variable → condition → three Do until branches → requester notification.
- This visual helps the reader see where reminder emails are triggered and how branches flow.
Img.30
Best Practices & Notes
- Test thoroughly with dummy submissions.
- Confirm field identifiers used in expressions — they can differ per form.
- Personalize emails with dynamic fields for clarity and actionability.
- Keep an audit log where needed.
Flow Benefits
- Eliminates approval delays.
- Keeps everyone informed.
- Boosts HR efficiency.
- Ensures better tracking and accountability.
Finally, This automation transforms reminder emails into a simple, intelligent tool that drives efficiency and clear communication.
At Pevaar, we design automation solutions that adapt to your organization’s needs and save your team valuable time. Would you like to learn more about automation workflows? Visit our website where you will find more articles to help you manage multiple tasks in your company. Check them out here.


Leave a Reply