
From Chaos to Control: How Project Administrative Management Transforms Your Work
Imagine a futuristic command center where each button controls a part of your company. That is the Administration module. The heart of project administrative management, a place where everything essential is stored and organized. Here in this module, clients, projects, suppliers, workers, and contractors coexist without chaos or duplicates. It’s like going from having papers flying all over the office to having everything on a single screen, ready to be used.
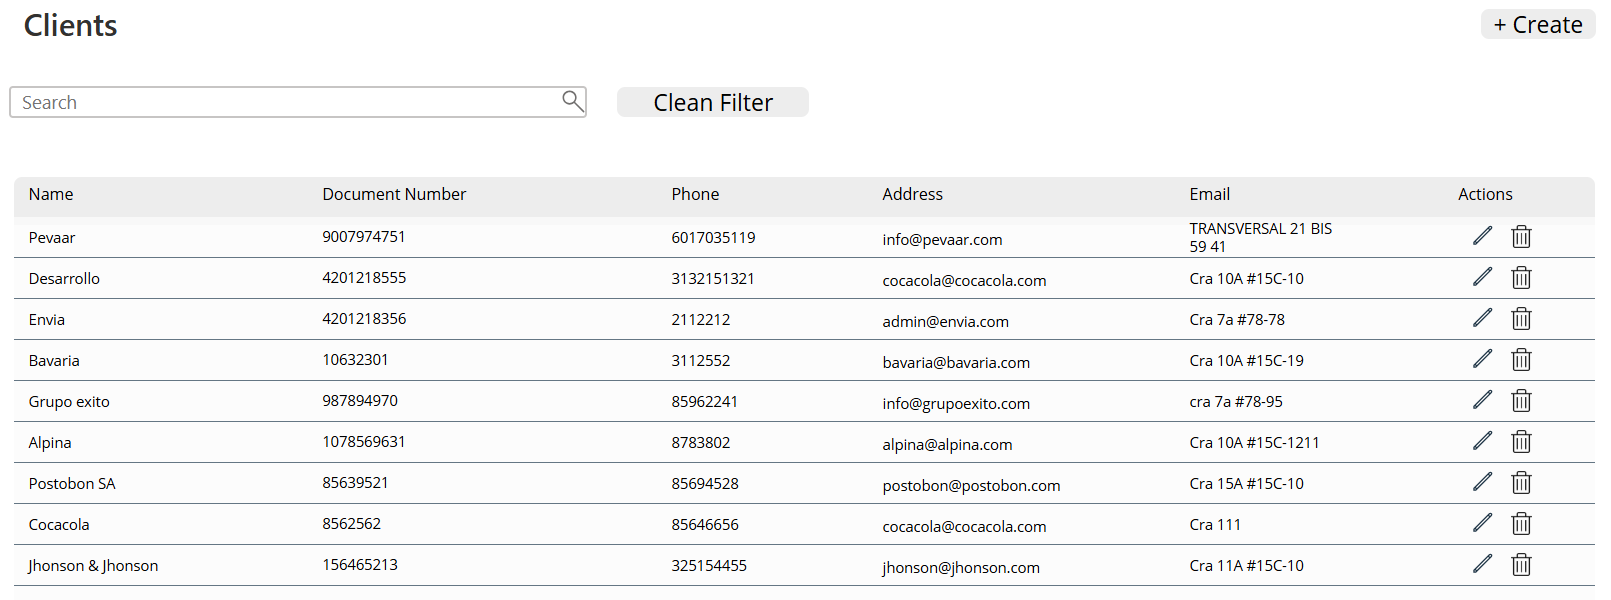
1. Clients
In project administrative management, the Clients submodule works like your smart agenda, designed so nothing gets lost and everything is easy to find. Let’s build it step by step—with style:
- The official title First, insert a label with the title “Clients” in its Text property. It shows up at the top so you always know where you are—no confusion.
- The magic magnifying glass Next comes a text box with a search icon. Think of it as your personal assistant: type a name or detail and voilà! It instantly appears across all table columns.
- Reset Button Made a mistake or want to start fresh? A button to clear the text box resets the filter with one click—like shaking an Etch A Sketch.
- The organized gallery This is where everything comes to life: information neatly arranges itself, showing exactly what you need every time. Finally, insert a blank vertical gallery with the Items property:
 Sort(
     Search(ClientApp;
        TextInput_ Search _Client_4.Text;
        ClientName; DocumentNumber;Phone; Email; Address
    );
    'Created On';
    SortOrder.Descending
Here, client data stops being a headache and turns into the key for a faster, more efficient project administrative management.
Data Source
In project administrative management, everything starts with a solid database. That’s where ClienteApp comes in—the source that holds the list of all registered clients.
This table stores key fields like ClientName, DocumentNumber, Phone, Email, and Address.
Think of it as your ultimate contact book—digital, organized, and always ready to deliver.
Search Functions
Looking for a specific client? Here’s where the magic happens:
- The formula Search(ClientApp; TextInput_Search_Client_4.Text; …) lets you search across multiple fields at once.
- The text box TextInput_Search_Client_4.Text is where users type the term they’re looking for (name, document, phone, email, or address).
- Instantly, the data filters itself to show only the matching records.
It’s like having a radar that scans your entire client base in seconds, making project administrative management smooth and effortless.
Sort Function
Finding information is great—but sorting it makes it even better:
- With Sort( … ; ‘Created On’; SortOrder.Descending), results are organized by the date they were created.
- Thanks to SortOrder.Descending, the most recent clients always appear at the top.
Inside the Gallery
In project administrative management, the gallery is like the display window where your clients are showcased clearly. Here’s how it all comes together:
Information labels ️
Inside the gallery, labels are inserted for the table’s columns: Name, Document Number, Phone, Address, and Email.
Each label uses the Text property to pull real data: ThisItem.ClientName, ThisItem.DocumentNumber, etc.—all directly connected to Dataverse.
Icons with superpowers
A Delete icon ️ with the OnSelect property:
Set(varClientDeletionRecord; ThisItem);;
UpdateContext({ popDelete: true })
An Edit icon ️ with the OnSelect property:
Set(ClientItemRecord; ThisItem);;
Navigate(EditClients)
This lets you jump right into the record and update it instantly.
Create button
On the same screen, a button named “Create” is inserted, with the property:
Navigate(CreateClients; ScreenTransition.None)
This takes you straight to the Create Clients screen, where you can add a new client without hassle.
In short, this section turns the gallery into an interactive dashboard: you view data, edit, delete, or create new records—all with a single click. Just the kind of feature that makes project administrative management faster and smarter.
Img.7
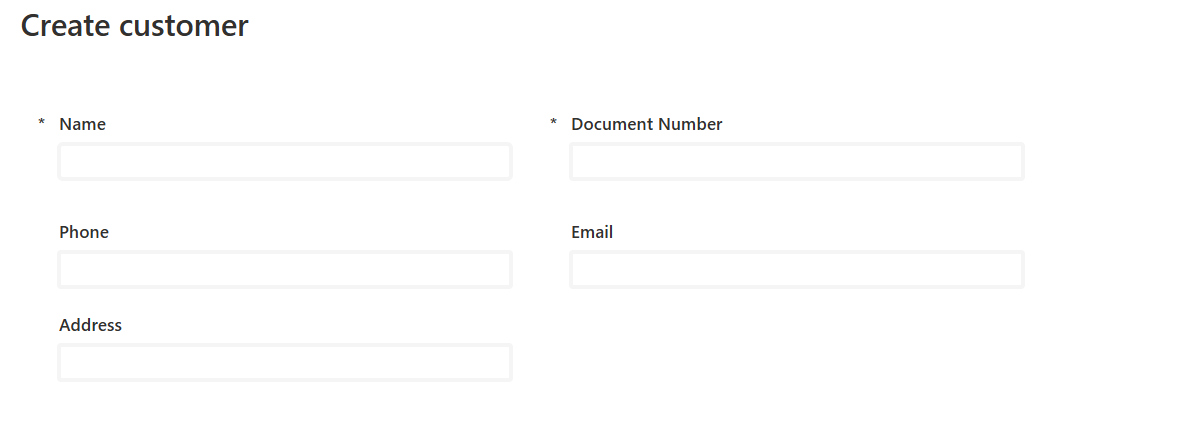
“Create Client” Screen
- Back Button
A button with the property:
OnSelect = Back()
Because it’s always good to have a quick way to return without hassle.
- Save Button
The classic “Save” button with:
OnSelect = SubmitForm(Form_CreateClient_1)
This submits the client’s data from the form directly into the database.
- Title label
A label with:
Text = "Create Client"
So you always know exactly where you are in the app.
- The magic form
The form is tied to:
Item = ClienteApp
(the Dataverse table where client data is stored). Plus, its OnSuccess property contains this effective configuration combo:
Notify("Client created successfully"; NotificationType.Success);;
NewForm(Form_CreateClient_1);;
Navigate(Clients; ScreenTransition.Fade)
What happens here? Once a client is saved, a success notification pops up, the form resets for a new entry, and the screen smoothly navigates back to Clients with a fade transition.
Img.8
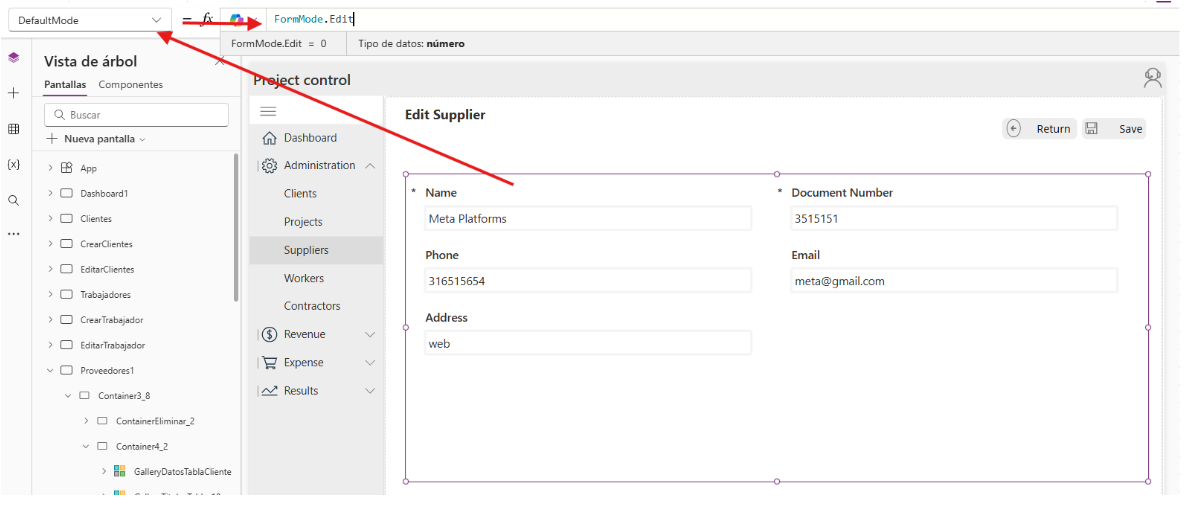
Edit Client
It is the same screen for creating Clients, but the form changes in its property DefaultMode = FormMode.Edit
Img.9
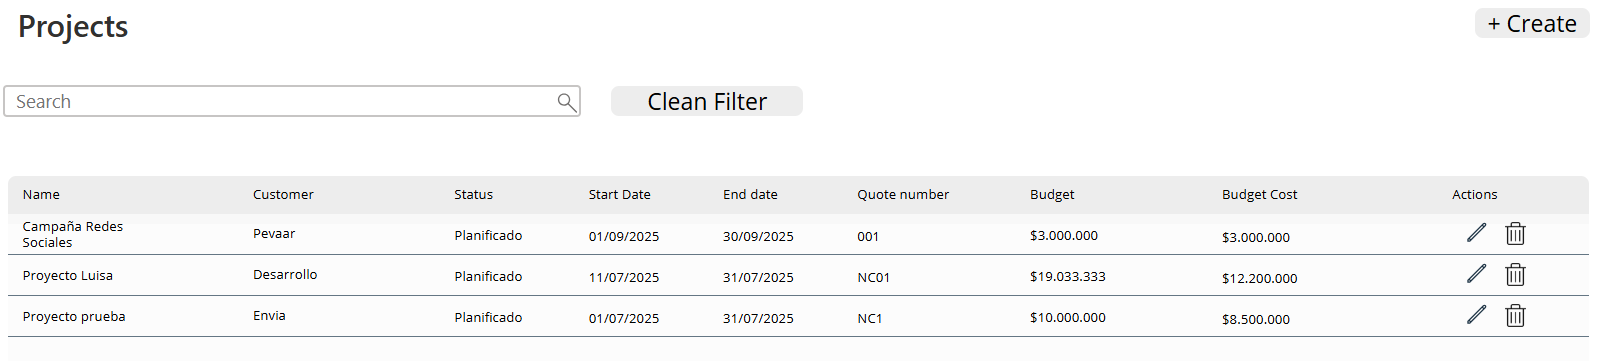
2. Projects
For the Projects screen, the same steps used in the Clients screen (point 1) are followed:
- A gallery displays the list of projects.
- Search, sort, create, edit, and delete functions work in a similar way.
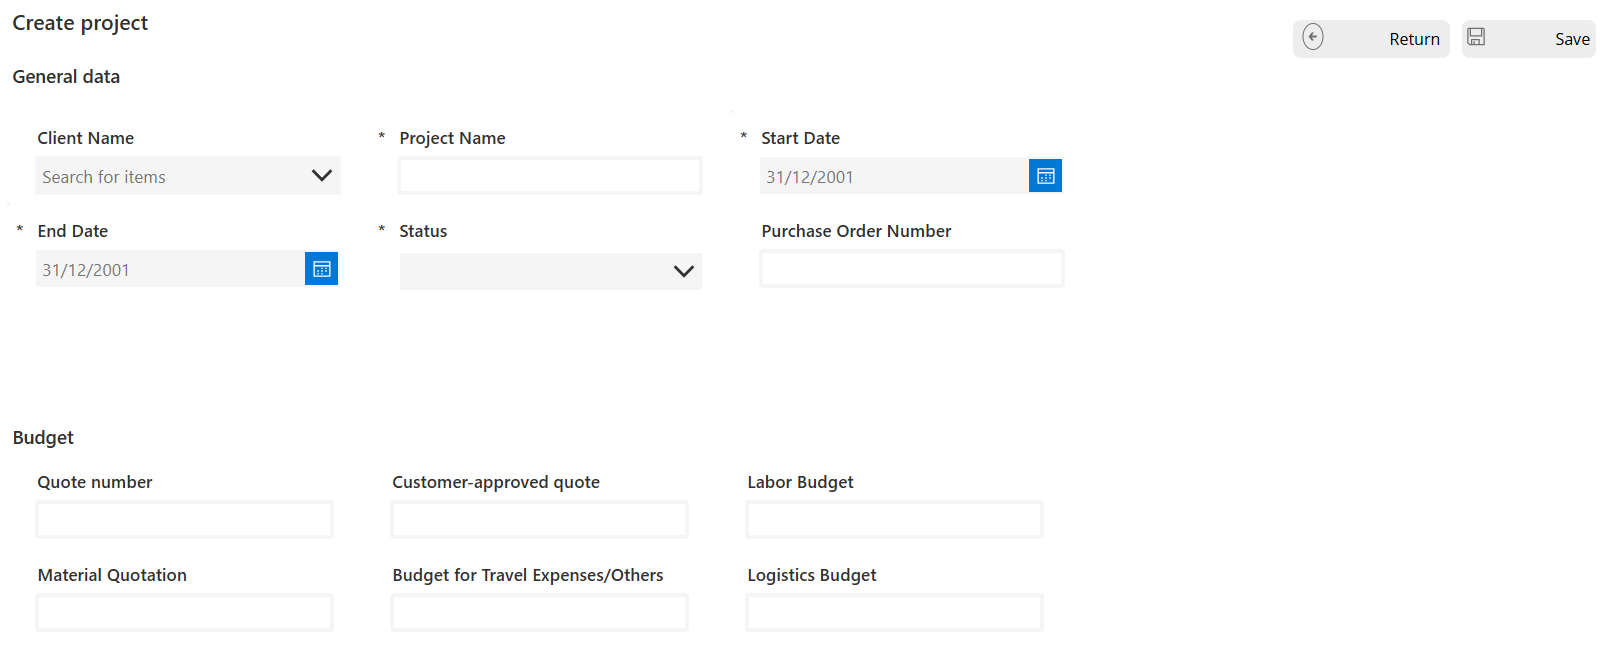
- The Create Project screen uses a form connected to the Projects table in Dataverse, with a Save Button to submit the record and a Back Button to return.
The key difference comes in the Edit Project screen:
- The form is set to DefaultMode = FormMode.Edit.
- The Item property points to the selected project record (e.g., ProjectItemRecord).
- On success, a notification confirms the update and navigates back to the Projects screen.
Img.10
Img.11
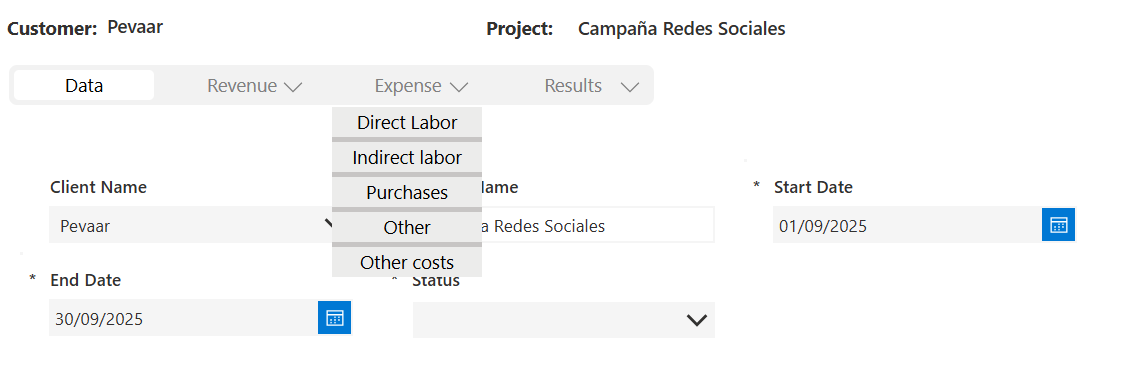
When entering the Edit Project screen, the magic happens with a horizontal menu. This menu mirrors the structure of the left sidebar but with a twist: it’s filtered to show only data for the selected project.
Img.12
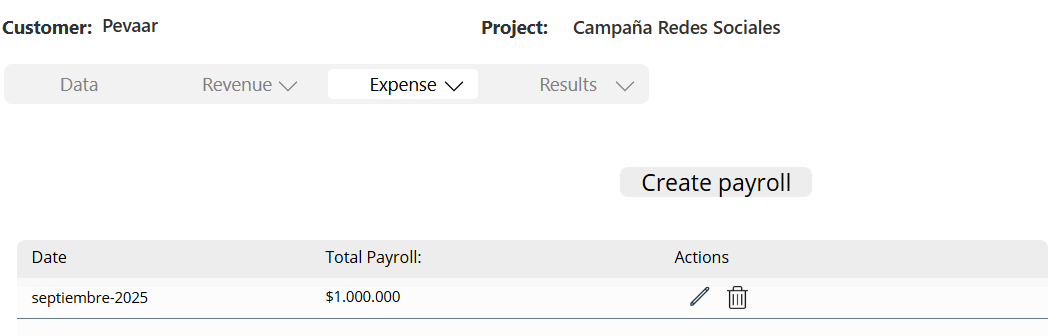
Each option you press redirects you to a screen where you see exactly the project-specific data you need. For example, clicking Direct Labor (Payroll) takes you straight to the payroll table, already filtered for that project.
Img.13
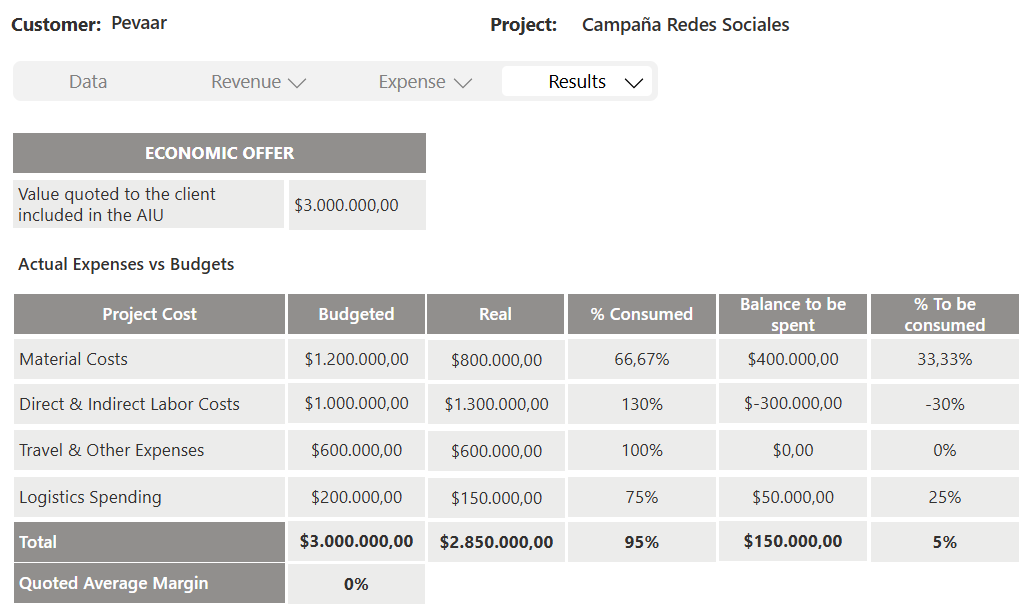
In the results, we found 2 screens; the first displays the project indicators, a screen with labels that show information extracted directly from the tables in Dataverse and filtered by the selected project.
Img.14
The second screen focuses on the utilities of the project, giving you a clear view of the resources and management tools.
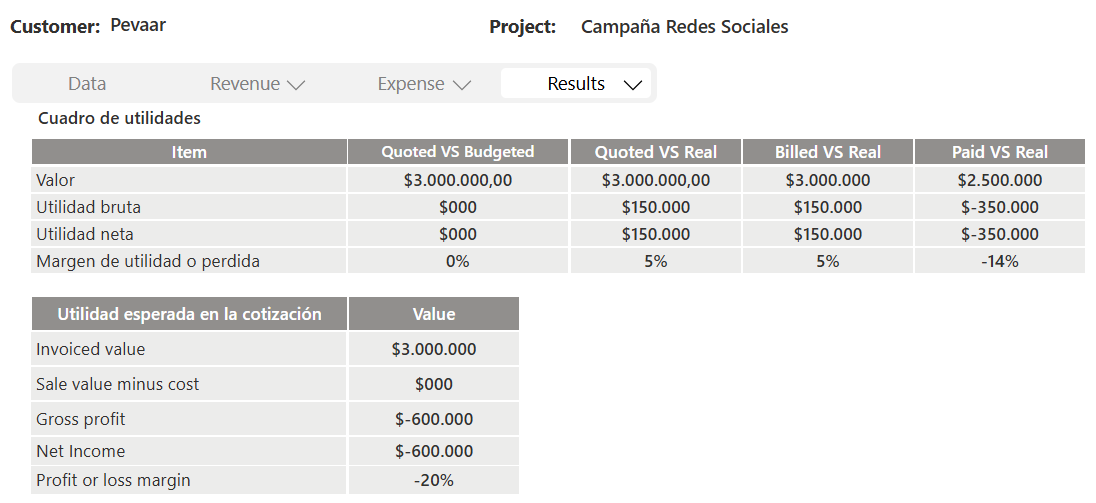
Img.15
3. Suppliers
Managing suppliers is just as smooth as managing clients. The Suppliers submodule comes with its own trio of screens:
Suppliers List
A clean, searchable gallery where all suppliers are displayed. You can filter by name, contact info, or other fields—so finding the right supplier is just a few keystrokes away.

Img.16
Create Supplier
This screen works like a friendly form. With a Back Button to escape, a Save Button to confirm, and the magic of Dataverse behind the scenes, adding a new supplier feels effortless.
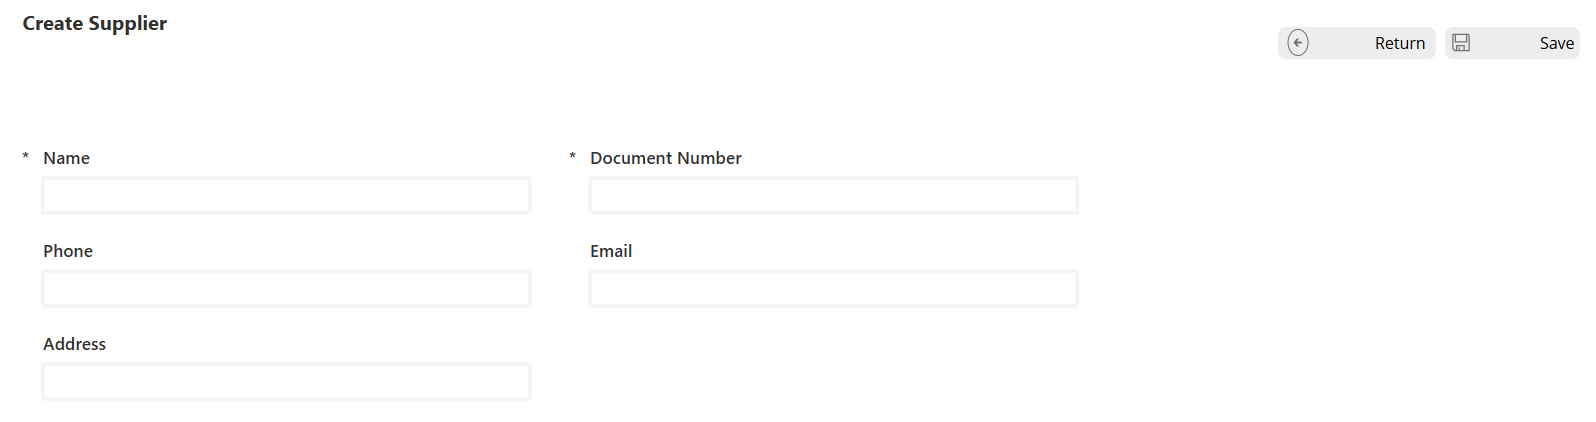
Img.17
Edit Supplier
Almost identical to the Create Supplier screen, but smarter. Instead of starting blank, the form opens with the supplier’s details already filled in, so you just tweak what’s necessary and save.
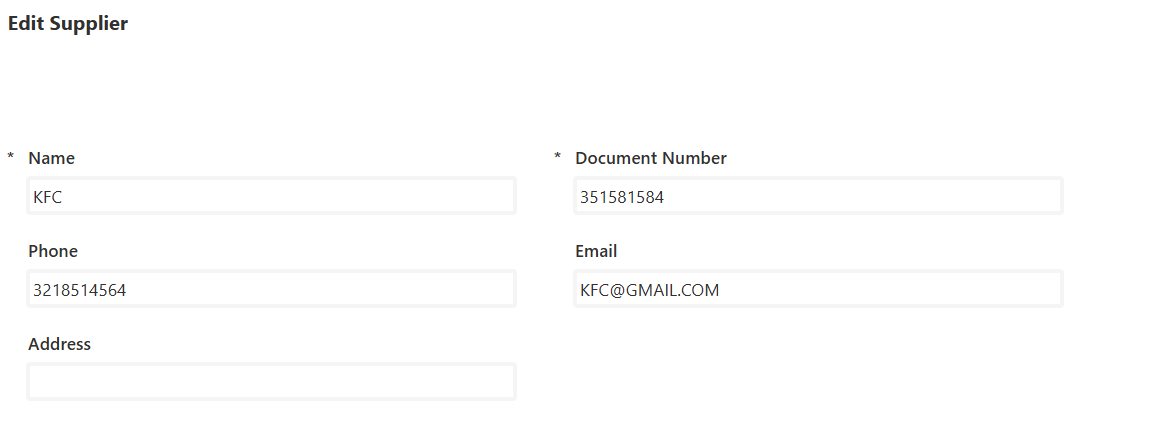
Img.18
4. Workers
The Workers screen follows the same friendly structure you’ve already seen with Clients and Suppliers. It’s all about making workforce management simple, organized, and efficient.
Workers List
A searchable gallery that shows all registered workers. You can filter by name, role, or any field in the database—perfect for quickly finding the right person in your team.
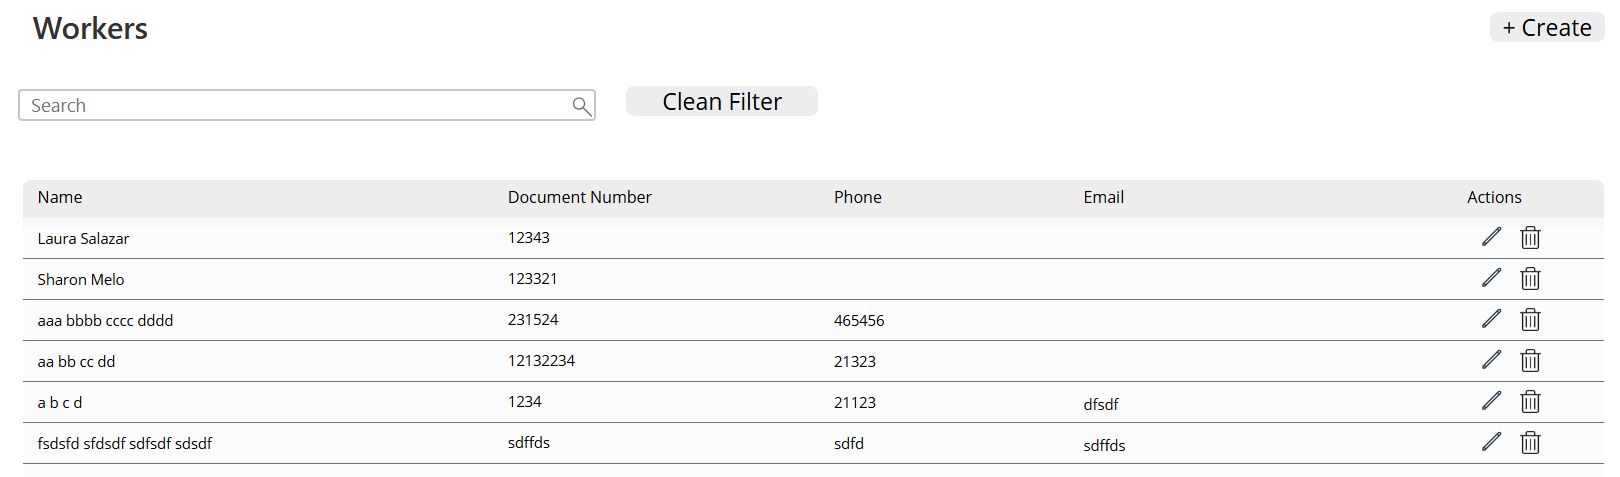
Img.19
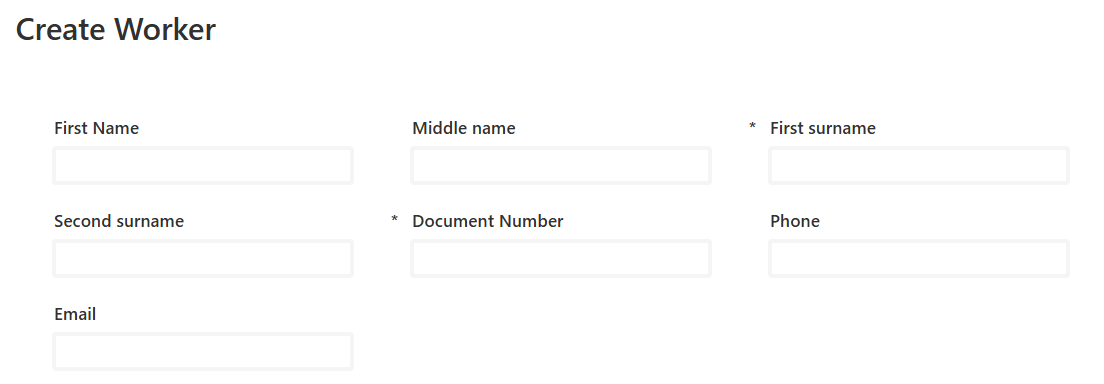
Create Worker
Just like creating a client or supplier, this screen is a form with the basics:
- A Back Button to exit,
- A Save Button to confirm,
- And Dataverse working behind the curtain to store everything.
Adding new workers is smooth and intuitive.
Img.20
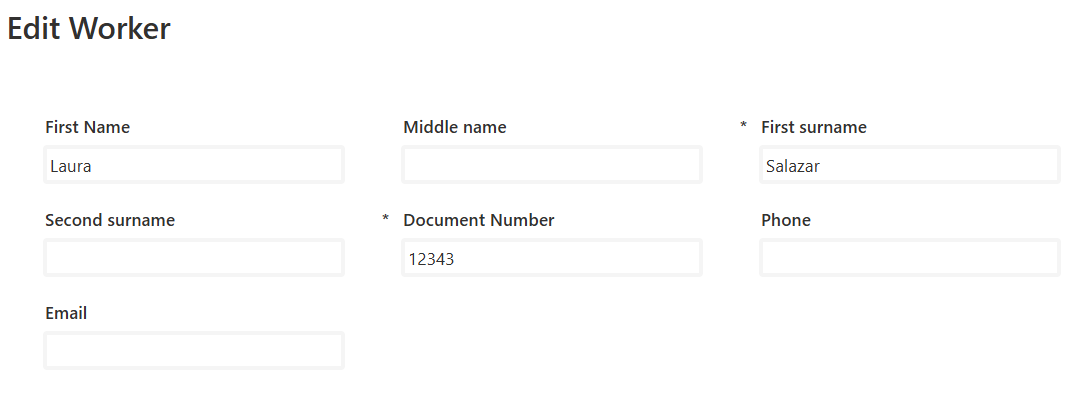
Edit Worker
This screen reuses the same design as Create Worker, but instead of starting blank, the form comes preloaded with the selected worker’s details. Update what you need, hit save, and the system takes care of the rest.
Img.21
5. Contractors
The Contractors screen is built just like Clients, Suppliers, and Workers—with its own set of screens:
Contractors List
A searchable gallery where you can see all registered contractors, filter them, and manage them with ease.

Img.22
Create Contractor
Works the same way as other “create” screens: a Back Button, a Save Button, and a Dataverse-powered form that makes adding a new contractor fast and intuitive.

Img.23
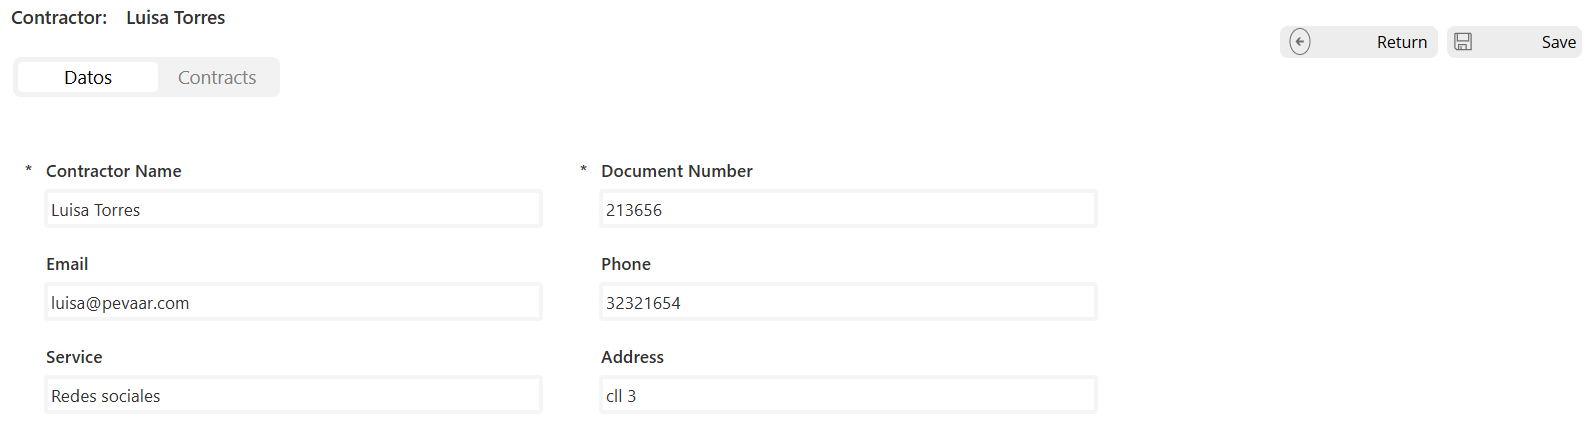
Edit Contractor
This screen is almost the same as Create Contractor, but with an important difference:
- It includes a Contracts table.
- This table shows the contracts of the projects associated with the selected contractor.
- That way, you not only update contractor details but also get a clear picture of their active and past agreements.
Img.24

Img.25
Administrative project management doesn’t have to be complicated or boring. With structured modules for clients, projects, suppliers, workers, and contractors, everything becomes a clear, streamlined, and centralized process.
Every screen, form, and detail is designed to make administration flow without chaos and with all information just one click away.
Want to keep learning more tips, ideas, and tools to boost your administrative project management?
Visit our website if you want us to help you create your next project management app, contact us here and check out more blogs like this by clicking here.


Leave a Reply